|
Please feel free to give this tutorial a try.
Only thing I ask is that you do not take it
and place it on another site or claim it as your own.
Thank You
Corner Mail Box
By: SwtKitty99 Writen with PSP 7
Images resized for faster loading
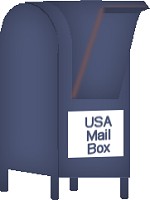
This is what I will try and tell ya how to make
 You will need my selection files for this tutorial

Ok got this idea when I took some things to the post
office and saw one of these sitting outside.
Figured someone might could use it...who knows. I needed
a tube of one of these one day and had to go and take a
picture of one and tube it...lol
I know this can be way improved, so play with it
and see what you come up with :)
Ok lets start
Open a new 400X400 transparent image.
Add a new raster layer
Go to selections/load from disk/MbBody01.sel
Flood fill this selection with a color of your choice.
I am using #4E5778 Now go to selection/float
Next effect/3D/cutout and apply these settings
You should have this
Selections/select none
Add a new raster layer, go to
selections/load from disk/MbBody02.sel
Flood fill this with the same color as before.
Next selection/float and now apply the same cutout.
Selections/select none
I now have this
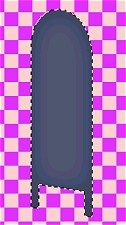
Ok add a new raster layer
Go to selections/load from disk/MbBody03.sel
and repeat steps...Flood fill with same color
Then Selections/Float
Apply the same cutout
Selections/select none
And we have this.
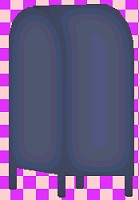
Hey we could stop there and call it the back view...lol
No? Ok then lets go on :)
Add a new raster layer
Go to selections/load from disk/MbBody04.sel
Again flood fill this selection with same color
Selection/float
Apply the same cutout
Selection/select none
And we have this
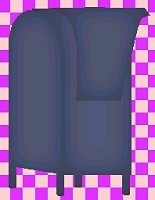
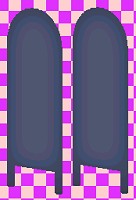
Add another new raster layer
Selections/load from disk/MbBody05.sel
Flood fill with same color
Selection/Float
And apply the same cutout
Selection/select none
and we have this
Ok now I hope I explain the next few steps so you
can understand them :)
Change your foreground color to a darker shade of the color
you are using. I am going to use #2C3760.
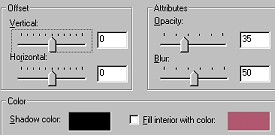
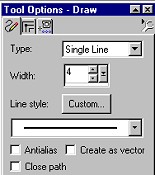
Get your Draw Tool
 ,Settings are ,Settings are
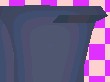
Add a new raster layer and we want to draw a line
(see image below)
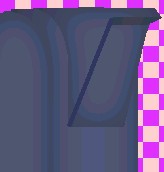
ok now go to effects/blur/gaussian blur...setting 2
Basically you are done except for adding any signs you might
want to, or some highlights if you want.
Here is how I am going to highlight mine.
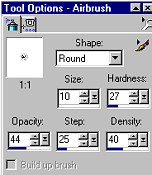
On your layer palette click on layer 5 and get your Airbrush tool  , with these settings , with these settings
Add a new layer. Add some highlights, like this
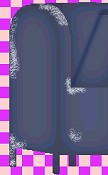
Then apply a gaussian blur of 2 or 3. Where you put,
or even if you do put highlights is up to you :)
When you have finished adding the extras merge your visible layers.
Just play with it and add what you want. Save as a tube for later
use, or decorate to your hearts desire.
Hope you liked this and can find a use for it.
If you have any ?'s Please email me at [email protected]
(((((Hugs Chelle)))))
To return to the tutorial index please click below.

To return to main page please click below.

Copyright � Jan.2002 Chelle
|

