You can click on the pictures to make them larger Explanation: Orochi is wearing Akatsuki clothes and Itachi is in ANBU gear and you probably think I'm either doing this just because it's hot or because I'm mildly insane. I assure you it is neither (well, okay.. it is hot, too. But.. that's not the main issue here). This is my idea of Itachi's 'initiation' into Akatsuki. Orochi being the pervy Uchiha-stalker he is, I always figured he'd be more than happy to show Itachi the ropes and make him feel 'welcome.' That is, prior to his leaving Akatsuki in a fit of jealous rage over the fact that Itachi left him for Kisame. |
|
| First step. Here we have the |
| --- |
 |
| Second step. This step is actually unnecessary for coloring purposes and highly skippable. I have added further details to the picture. Once again, this is .. skippable! |
| --- |
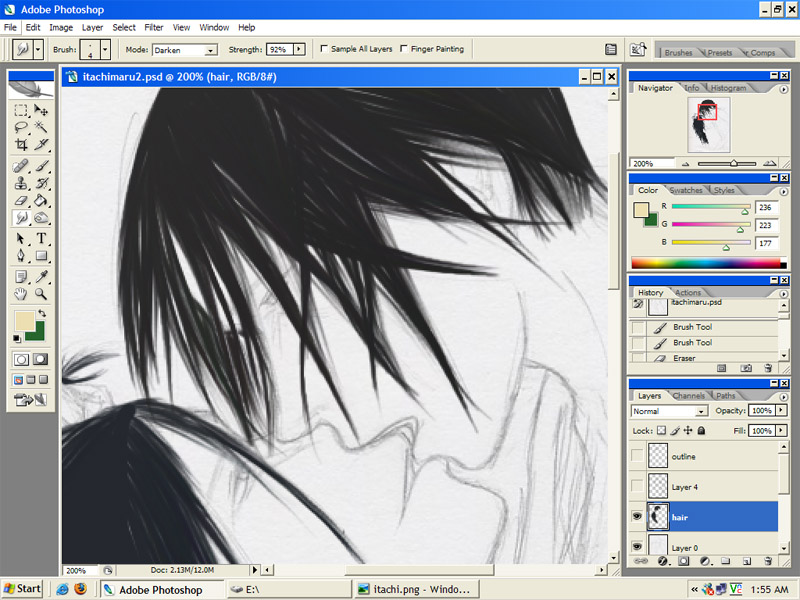 |
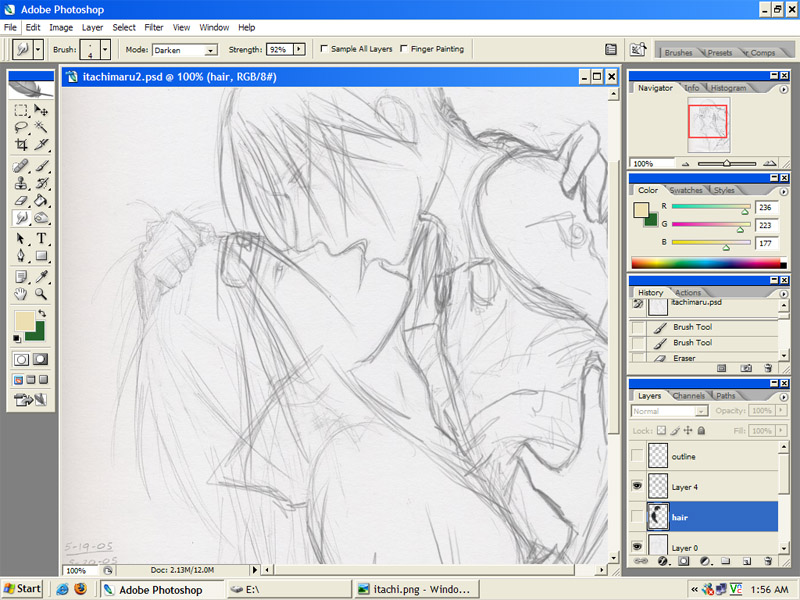
| Step the third. Here is where coloring begins. I usually start with hair. So, at this point we zoom in! (at the moment, I am working in semi-realism style for the hair) What you do is you take a large brush and put color in the areas of the hair that you know are going to be solid.
Then, use the smudge tool in "darken" mode with a strength of anything from 80-98%. (You can try other percentages, but.. something in that area usually works for me.) Here I'm using the smudge tool at 92%. I usually use a smaller sized smudge tool--4px wide here, but larger ones can work too. It all depends on how fine you want the strands to get. (a tablet is kinda necessary for this part, but using a mouse and varying brush sizes can work too.) |
| --- |
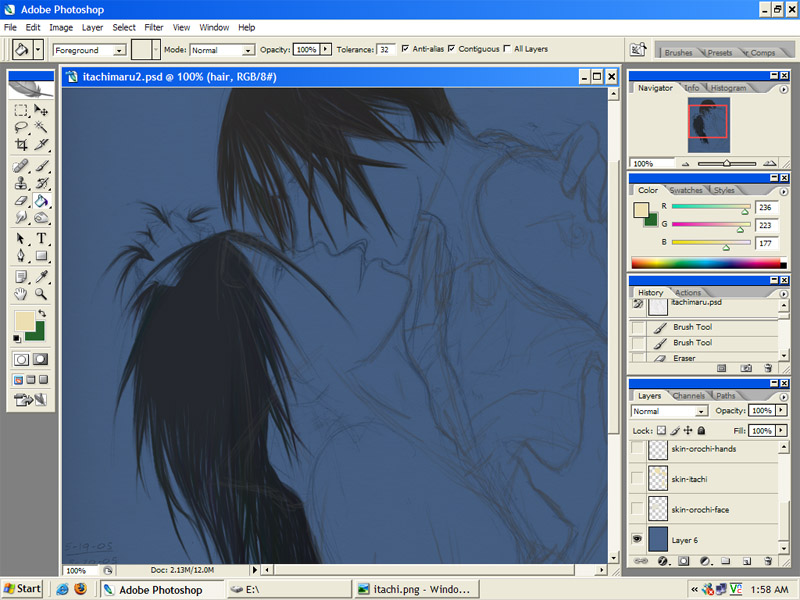 |
| #4: The Step. After I get the hair done, I like to do skin. Usually I will put this on a layer below the hair so that I don't have to color around every single piece of hair! O_O Skin can be tricky on a white background, because it's easy to miss spots when people (like, say.. Orochi.) are stupid and have skin that is overly light. When this is the case, I like to make a temporary dark background so that I can make sure I get the skin area fully colored in. Thus, the current blueness of my background. |
| --- |
 |
| Step five. Begin to color the skin. I generally find that brush size doesn't really matter for this part--just something not so big that it covers the screen and not so small that you're doing large-scale pixel art. I don't pay much attention to lines in some areas, but for aesthetic reasons I like to stay in the lines on the faces. XD You do not have to do this. Some people prefer to just color over the whole area and erase away the parts that are outside the lines. I'm all for that and do it all the time--just not with faces. |
| --- |
 |
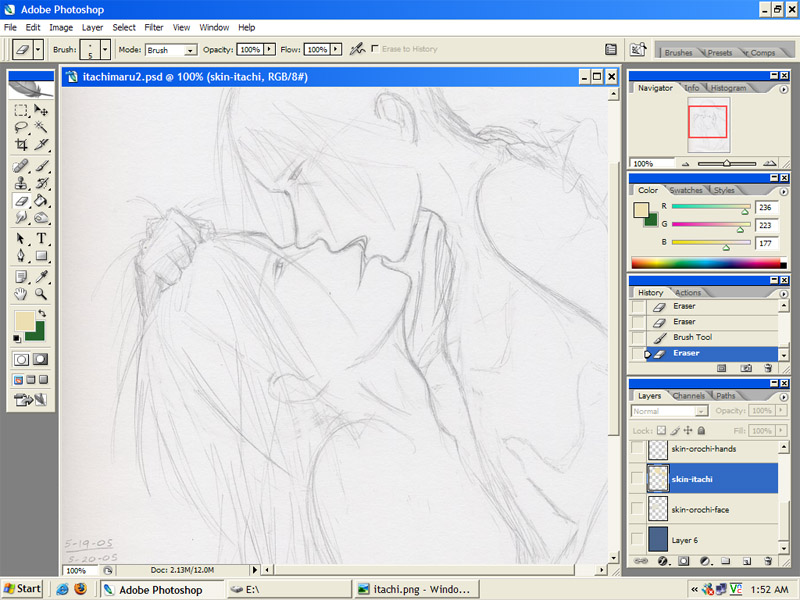
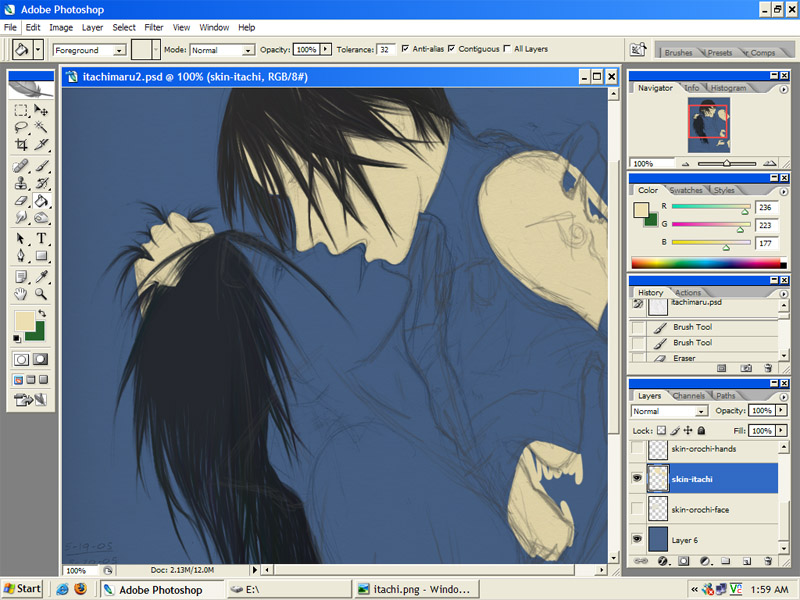
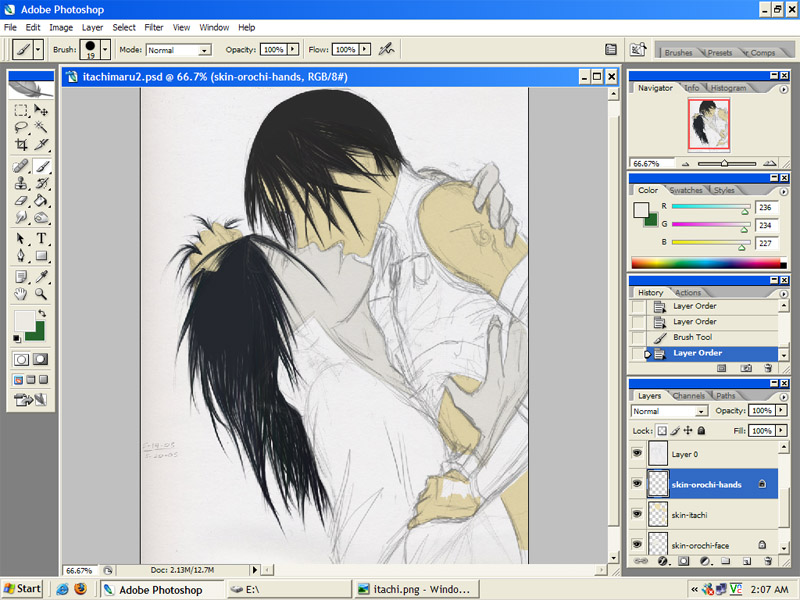
| Six. In cases like this, where there are two or more people in a picture, I'll often make a separate layer for the other person's skin if too much of it is touching the other person. (In this case, skin is touching too much for it to be on the same layer.) As Orochi's head is behind Itachi's in some places, I have made it its own layer, underneath the Itachi skin layer. (This is a bad tutorial and you are not learning anything yet--I know. It should get better once we get to shading, because you already know how to color probably! XD) |
| --- |
 |
| Step 7. You can't tell in this picture, but I have made another layer for Orochimaru's hands--and that layer is above Itachi's skin layer because.. well.. his hands overlap Itachi's skin in several places. I also find it helpful to make the other person's skin layer disappear when doing things like this, as the contrast between different skin colors is not always enough for me to tell exactly where I'm coloring. |
| --- |
 |
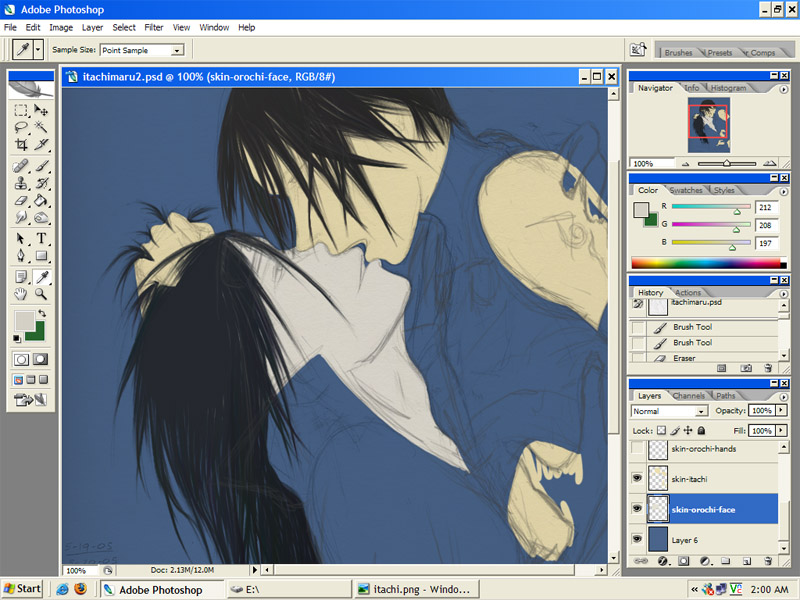
| No. 8. Not much explanation required. I've made Itachi's skin visible again. |
| --- |
 |
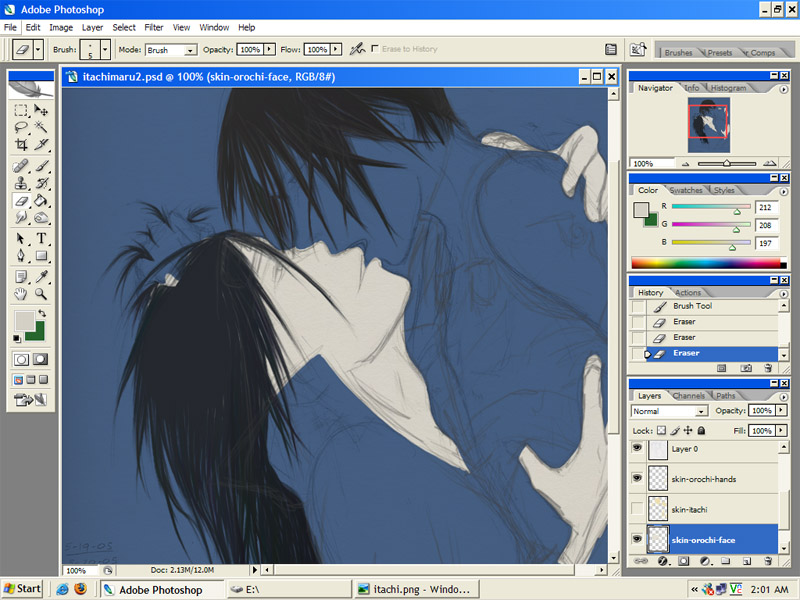
| Ninth--and last--step (for tonight). I no longer need the blue layer for skin coloring (though it will probably make another appearance around the time I have to color Itachi's ANBU outfit), so I have hidden the blue layer and zoomed out so that you can see what has been done so far. (which is nothing that you needed my help to do! I'm just.. doing uber step by step-ness) As this is a coloring tutorial--and not a drawing tutorial--you are encouraged not to notice the disproportionateness that is running rampant at the moment. It will get better as the picture goes along. (I hope) |
| --- |
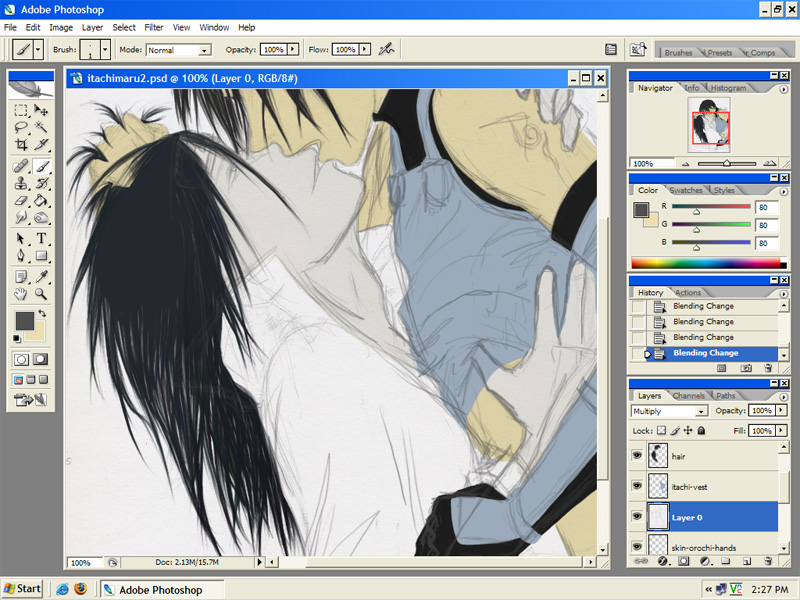 |
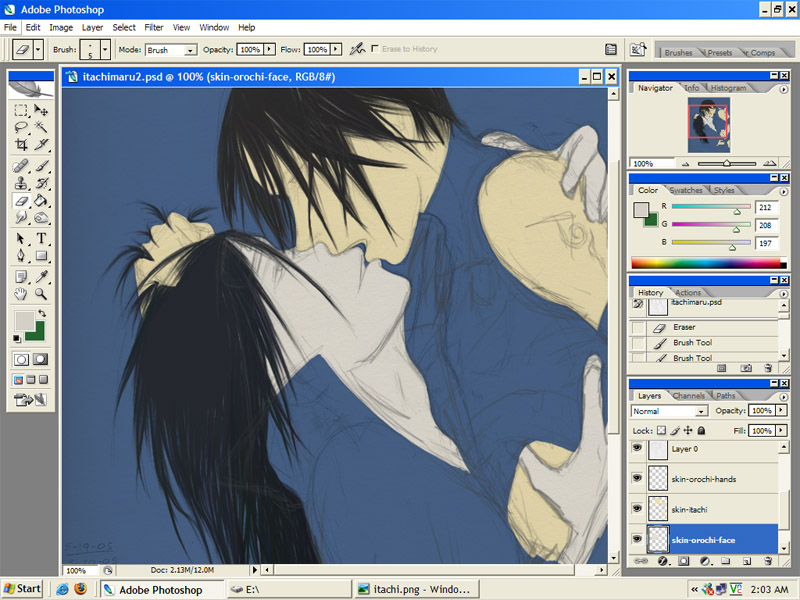
| 10th step. Okay.. here I have added color to Itachi's vest (in a light blue, because white does not show up well and I wanted to be able to see it. I shall go back and change that later) |
| --- |
 |
| Step 11. Added some color to Orochimaru's coat and then I did some basic eye coloring. (gave eyes outlines and colored them in) |
| --- |
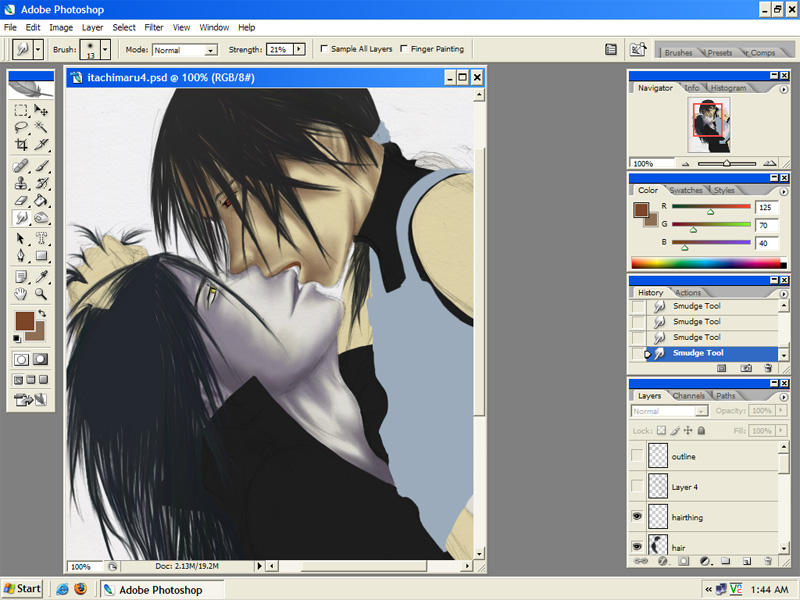 |
| TWELVE. Ok. Having finished base coloring, I am now allowed to begin with the shading part. What I did was go to the color chooser palette and pick the color that their skin already was, then I made it darker and added mor blue to it (or purplish, in Orochi's case). Put down a small amount of that color along areas that you want to be shaded and then grab a decent-sized (I used size 13) smudge tool and smudge it out a bit. To get it to look slightly more blended, I then smudged out more at the very edge of the last area so that it was a lighter color, and then continued to do that until it had covered all the area I wanted it to. Got an even darker shade and repeated the process to make it darker in certain areas. |
| --- |
 |
| 13. Finished off the skin using the above method. Then I worked on Itachi's vest (again, using the same method). You can see on part of Orochimaru's coat (where the darker outlines are) the way that this process begins. Little bitty outline-ish type lines to begin with and then the smudge tool does the rest. |
| --- |
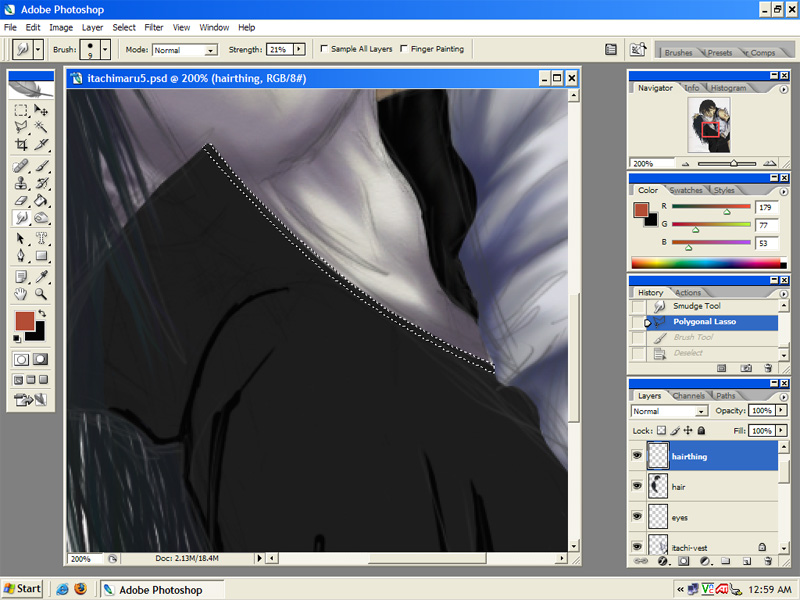 |
| It's the 14th step. I remembered at this point that the Akatsuki coat has that red lining thingy, so rather than try to draw it right by hand, I used the selection tool. |
| --- |
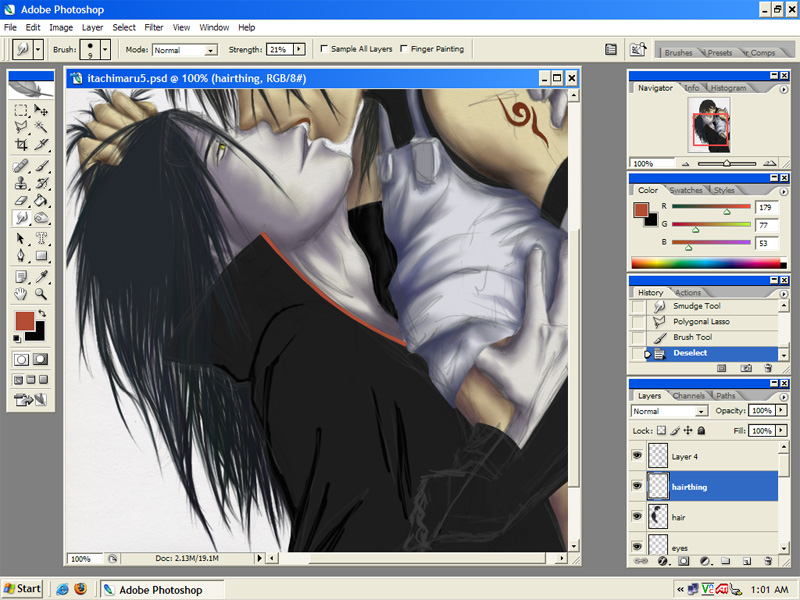 |
| step--15. Now you can see the red thing and more outlines on Orochi's coat. Itachi's arm protector on his ANBU outfit has disappeared because I decided it was weird that he'd stripped down his right arm but done nothing to his left. Now it is in the process of getting naked. |
| --- |
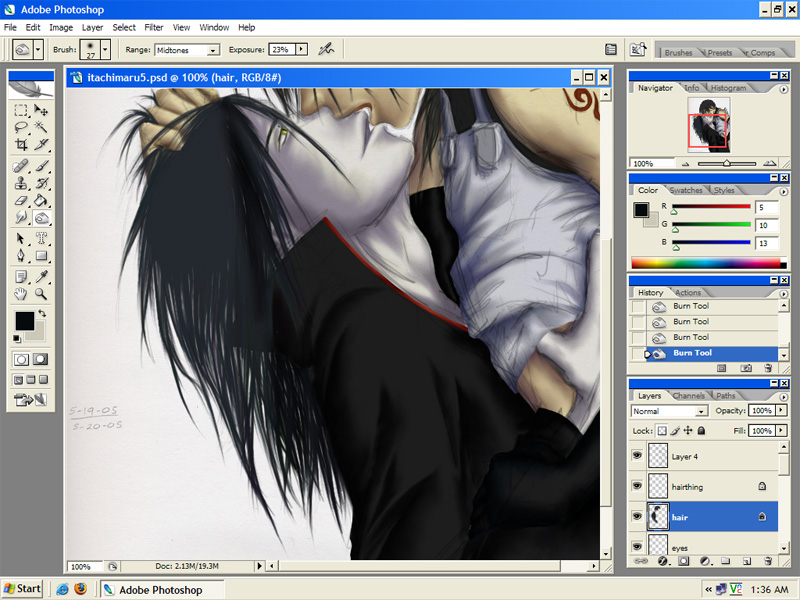 |
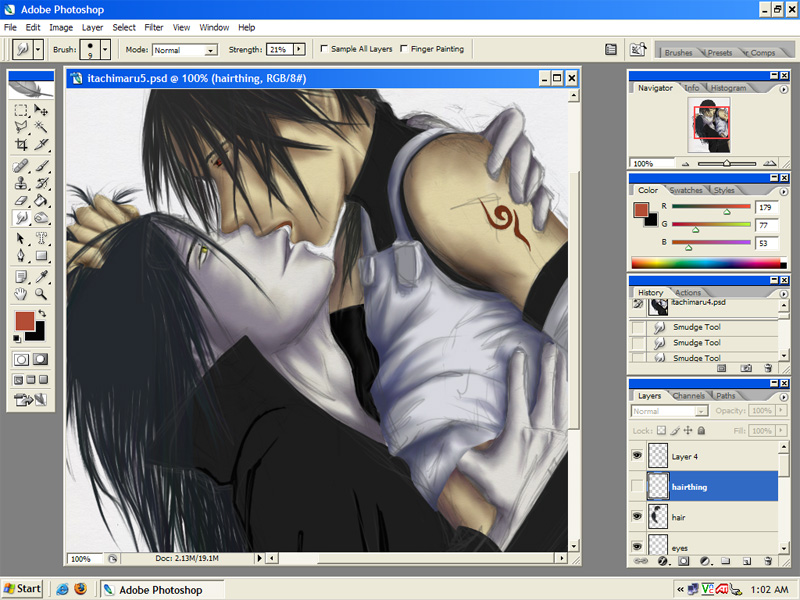
| 16th steppy. Shaded the coat using the same method as was used for all other coloring. Itachi's hand was done partially with this method and partially with the burn tool, because it was being a pain. (burn tool on low exposure [25% or less] and mid-sized with soft edges) |
| --- |
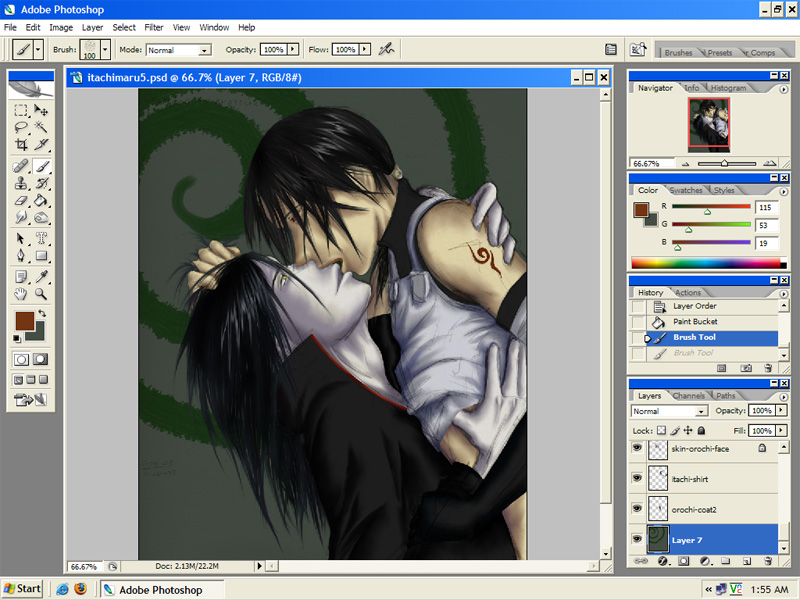 |
| seventeenth step. Here I have added shading/highlights to the hair. For shading I take a fairly large sized burn brush (soft edges and low exposure) and put it in areas where I think there would be the most darkness (around certain parts of the edges and at the sides of particular strands of hair). To give it more depth I then take a small burn tool (size 2 or 3 on higher exposure) and make little lines with it that go in the same direction the hair seems to be going. Highlights are done by making a new layer above the hair layer. Take a small brush in the color you want the highlights to be and make like a halo around the head (wherever you think the highlights would generally fall). Then smudge them up and down like lightning bolts, but have them go in the same general direction the hair looks like it's going (curve where the hair does, etc.). Now I tend to take the eraser to it on partial opacity. Small eraser first--removing random parts of the highlights or areas near particularly dark shading. Then I take a large eraser with about 25% opacity and soft edges and run it quickly over the part of the head that is farthest from the intended light source. Usually do this several times until it looks right. And then I usually add some sort of craptacular background that I think up off the top of my head at the last minute. And there you go! The method to Monty's coloring madness! |