
|
| Ghost Recon Skin Tutorial |
|
|
| This is a fairly basic guide to Skinning for Ghost Recon. Although, at this point in time, I�ve only released one skin MOD, I have made several other personal skin MODS. I am fairly disappointed to see that there are no complete skin tutorials for Ghost Recon (If there are, I haven�t seen them). So, I decided to make my own. In this tutorial I will show you how to make my Black Sheep Wool skin. What you will need: ~ Ghost Recon RSB Conversion Utility ~Adobe Photoshop ~RSB Plugin for Adobe Photoshop ~Ghost Recon Mod Manager is reccomended ~And preferably an advanced knowledge of the program of your choosing. (I don�t know if there�s a plugin for paintshop pro or not, so we�ll use Photoshop) How To Get Started First things to do is decided what characters you would like to edit. Whether it is a certain specialists, or just the average demolitions men. Just pick someone. For this tutorial I will use Buzz Gordon. Now, first go to your mods\origmiss\character\specialists folder. Select everything (Ctrl + A) Right Click on any Icon, and Untick the Read Only box. So all the files in that folder should NOT be Read Only. I can�t stress this enough. |
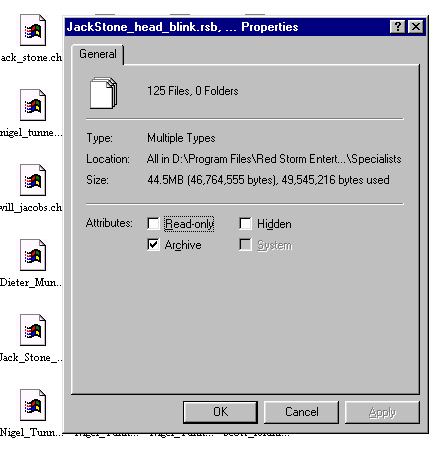 |
| (you will not have 125 files in your folder, I have some other things saved in there which is why I have more) |
| An additional note- to make life easier in the future, go ahead and do that for all the folders inside the origmiss\characters folder, and all the files and folders inside the origmiss\textures folder. |
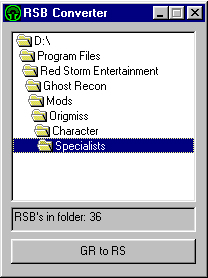
| Ok, so all of your RSB files in the Specialists folder are ready to be converted. Open your Ghost Recon RSB Conversion Utility, select the your ghost recon install path.\, then mods\origmiss\character\specialists |
 |
| Now click convert. You get this... |
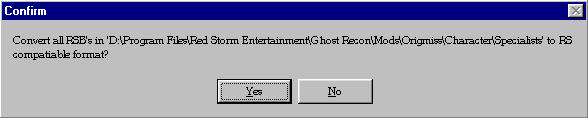 |
| Click Yes Within a split second you should get a box that says �Completed!� |
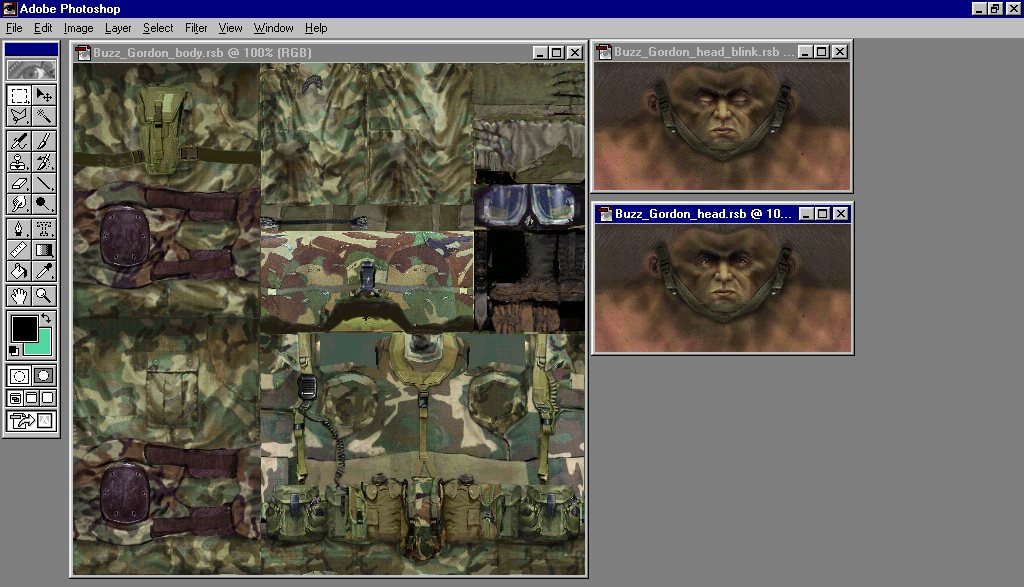
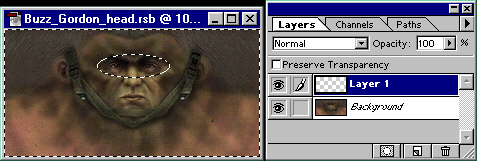
| Click ok and you�re done. OK, now we have to open up Photoshop. Now open up Buzz_Gordon_body.rsb, Buzz_Gordon_head.rsb, and Buzz_Gordon_head_blink.rsb. Lets start with the _head.rsb file first. I have yet to perfect the skill of adding a new face to a current one, but for now we�ll give him a wool face pullover. (I moved the three bitmaps for viewing pleasure) |
 |
| First Make a new Layer, go to your tool bar, go to Layer�New�Layer. Or if you�re too lazy, Shift + Ctrl + N. Get you Elliptical Marquee tool, and make a fairly thin O shape around his eyes. Kind of like the Oakley O (DO NOT DESELCT THIS SELECTION!). Now, on your tool bar, go to Select� Inverse. So now everything except his eyes are selected. |
 |
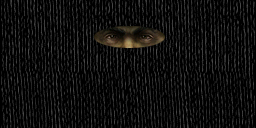
| Now go to Edit� Fill. Now pick the color wool you want. Flaming Pink, Neon Green, whatever, it really doesn�t matter. But I chose black because it is the easiest. And looks better. So you should see a big black thing surrounding his eyes. Now the cool part. Go to Filter�Texture�Texturizer. Make your texture Canvas. Now you can play with the other stuff, but I have my Scaling at 100% and my Relief at 4. But again, it is your choice. Now select ok. TA DA! You should have wool. |
 |
| Now open up your Layers window, Window�Show Layers. Right click on this new layer, that should have only a bit of transparency in the middle for the eyes, and select Duplicate Layer, do not hit ok yet. See the pull down bar? Yeah that change it to Buzz_Gordon_head_Blink.rsb, like this |
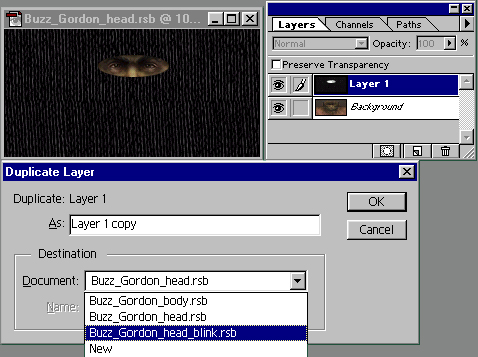 |
| NOW click ok. You will have two identical face masks, for Buzz. So when he blinks it will not move! YAY! |
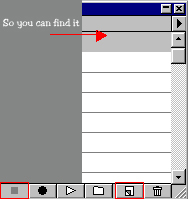
| But do we have to go through the fill, and texturizer for every selection we make? No, I�m way to lazy for that. Now select in your tool bar Window�Show Actions (if its already open, don�t be stupid and hide it). No click the new button (the one on the right) |
 |
| And you�ll get this |
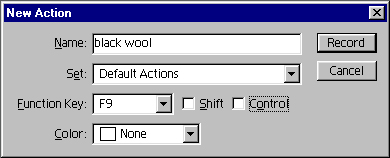 |
| Name it �<your color> wool� now, see the pull down menu? Pull it down too, Oh say F9. Now press Record. Now do the fill and the texturizer again, and then hit the button on the left of the other picture(which will be usable when you�re recprding), and your done. Now, whenever you have a selection, you simply hit F9 and your wool has been made. This is very useful if you want all of your specialists to have the same kind of skin. Ok, now here is a picture of the original Buzz_Gordon_body.rsb, I HIGHLY recommend you save it as a PSD before you start to edit it |
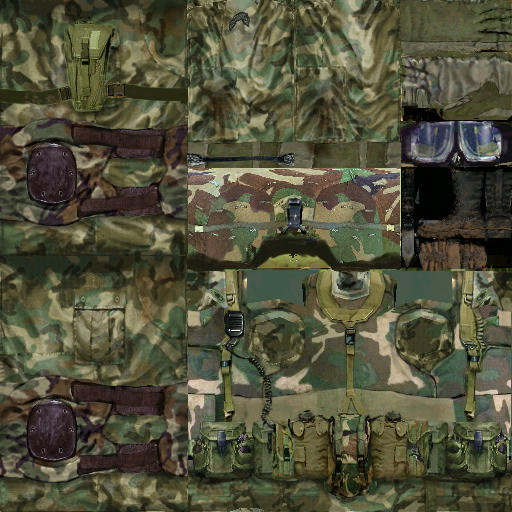 |
| You can make an action for this too, if you want. Makes things easier. Ok, here I�ve labeled each part of the texture so you know what to edit. |
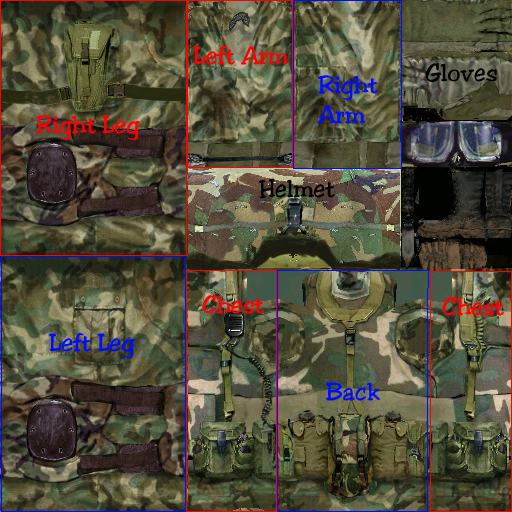 |
| For some reason, every skin has the goggle above the boots, the ones you see mounted on the helmet in your kit selection are on the helmet in the texture |
| Now, because of the 3D model you cant really take away the Bags or the Helmet from the texture with out it looking really strange. So, simply select all of the camouflage around it, using polygonal lasso,�like so |
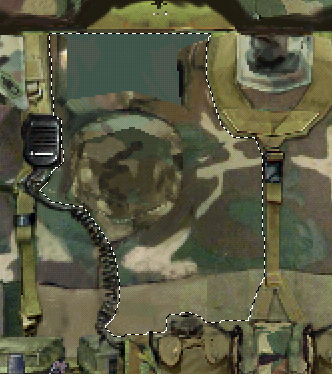 |
| And hit F9. If you get too nitpicky it will give you a warning about the area being too small to texturizer, or something of the sort. No problem, select more and then try again. Repeat the selection process for the legs and arms, and obviously the rest of the body. Here�s that specific area after my wool |
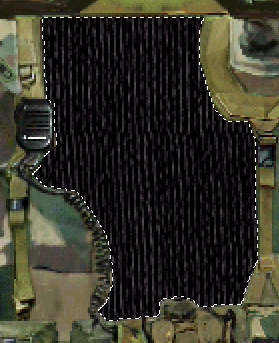 |
| I decided to keep the holster and kneepads, its up to you if you want to keep them or not. But I think it just adds more to it. But the Camo doesn�t go well with the black does it? Nope. Make a new layer. Change the opacity to say around 50% works best for me. Make sure your Layers window is open for this next step. Make sure you�ve selected the new layer. And hit F9 again. Now, if magic happened you should be able to see the bags and kneepads still, but with a slight black wool hint to them. Cool huh? Again, don�t mind the goggles, that little experiment there didn�t work, and makes no difference in the game. |
 |
| Wow, we finished already? Not quite, minimize Photoshop. Now open up my computer, and make your way to the Ghost Recon install directory, commonly C:\Program Files\Red Storm Entertainment\Ghost Recon� I have a second hard drive so mine is in D drive. Anyway open your Mods folder, and make a new folder, by Right clicking anywhere in your window, selecting New..Folder. Rename it to anything you want. I called mine �BlackSheep� and we probably should fro this tutorial. (Your folder should not have spaces, otherwise Ghost Recon gets confused) now with in you new folder make another called character, and inside that one, make one called specialists. Ok, go back to Photoshop and save your three RSB�s there. But you�re still not quite done. In Bajabravo�s tutorial he recommends Hackman, and changing some commands in these next files, when really there is no point. BUT, your skin will not work if you change the file name of the original RSB to something else, so if you started with Buzz_Gordon_bosy.rsb, that�s the name you will need in YOUR mods folder. Ok, now press the up button ( <picture>) till you get back to your mods folder, now go to origmiss\character\specialists. Now if you haven�t already noticed there are nifty .chr files in there also, you want to select the three for your character. it will be .. <the character you chose>.chr <the character you chose>_a.chr and <the character you chose>_b.chr each for the three Levels of Detail, High, Medium and Low. If you don�t understand LOD don�t worry, it doesn�t concern skinners. just copy those three files into your mod folder, such as mods\BlackSheep\character\specialists and you are one step away from being done. Now go to you BlckSheep folder, rightclick anywhere in the window, and make a new Text Document, rename the new file to �ModsCont.txt� now open this up, just double click, and paste this in to it: |
| // Mods Contents NAME "Black Sheep Skin" AUTHOR "Your Name" SUPPORT "[email protected]" VERSION "1.00" MULTIPLAYER "Server-Client" |
| And that is it, once you make you own skins you will obviously change the name of it. I had to wait to the end to put this so I didn�t confuse anyone, but here are the names and locations of the average joe skins� Remember, these are the BASICS, once you have mastered this, move on to bigger and better things. I don�t want to see �Pink Wool Skin� and �Orange Wool Skins� out there, things like �Funky Clown Men Skin�, well not that exactly, don�t scare me, but be creative and have fun with it. And don�t be afraid to submit your skins, by the looks of things, we could use some. Although Bajabravo�s G8 Specialists skin is coming along nicely, and Jesters TRG skin is amazing. Look forward to transparencies in skins�once I figure it out HAVE FUN! �and to do so, open up mod manager, and activate your new skin!- Ruin [email protected] |
| origmiss\character\allied\ica_us_demolition_body.rsb origmiss\character\allied\ica_us_rifleman_body.rsb origmiss\character\allied\ica_us_sniper_body.rsb origmiss\character\allied\ica_us_support_body.rsb |