<Testing and repair ignition-coil units.
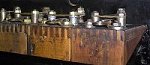
If you still have the original coil units made of wood and they look in reasonably good conditioning from outside, keep them. They are often much better than new made and you save a lot of money. After cleaning and minor repair they can be as good as new. Click here for drawing.
Unscrew the terminal nuts on top and pull off the 2 contact points. Clean the 5 mounting studs and nuts from rust with a steel brush. Inspect the points. If they are in good condition ( plenty of contact left etc.) clean them and perhaps polish the point surfaces with a carborundum stone to remove any pits and corrosion.
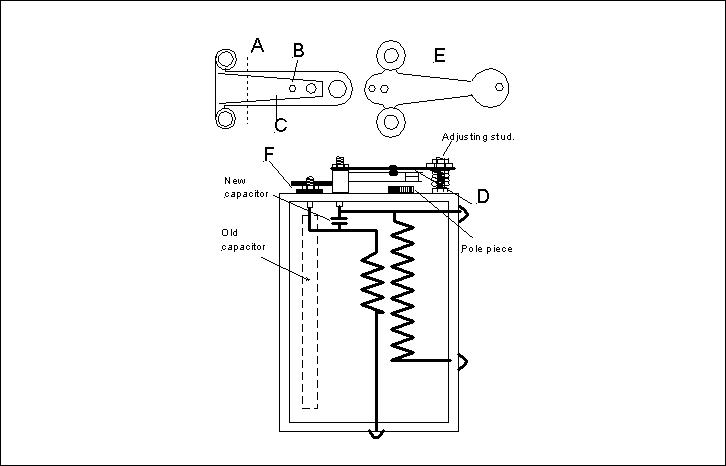
The upper contact point has a movable bronze spring-like support C for the contact point. This support must be free to move up and down at D within the limit established by the rivet B. If not, bending the support at A will do the trick. (Very important).
Very often the wood around the studs has become compressed over the years. If so, fill the depression with a washer under the 2 spacer to raise the point mounting to the proper position level with the top surface at the box. This is important for proper later adjustments of the points. The lower point mounts directly on the wood surface and is secured with one nut on each stud. The upper contact assembly mounts on two spacers, and is also held with one nut on each stud.
Before tightening the mounting nuts align the points so that the contact points are square and in line with each other, the hole in the upper point is centered over the adjusting nut, and when all is in order, tighten them securely.
Tighten the nut on the adjusting stud so that there is 0,8 mm between the points when the lower vibrator is held against the core (pole piece). Tighten the lock nut to hold this position.( Not that this clearence is between the points, NOT between the lower vibrator and the pole piece.)
If the car is equipped with battery the final adjustments can be made with the coil placed in the coil box. When all of the above has been completed place one of the coil in the box. Take one spark plug out from any cylinder but keep the cable connected. Make sure the threads on the spark plug are in good connection to ground,( i.e. cylinderhead bolt). Turn the ignition switch to battery. Turn the motor slowly by hand until you hear the coil buzz."Keep your fingers away from sparkplugg. It´s high voltage."Watch the spark plug and the spark. This should be solid and blue. With the coil operating also check the ammeter reading on the dashboard. Even though it reads in two-ampere increments, it should not be to difficult to determine when the coil is drawing around 1,5 amperes.
The coil is adjusted by bending the lower vibrator point E at its mounting F. Bend this mounting bracket up by using a screwdriver, or down by tapping carefully with a hammer, to decrease or increase the tension of the vibrator E. This changes the current drawn by the coil. Correct setting is 1,3 - 1,5 amperes.
Continuing test all four coils at the same way. If any coil has a weak spark on the spark plug and a heavy blue arc on the points, the condenser is open and have to be renewed. Remove the side panel on the coil box. This panel is generally held by two nails at the bottom and will slide down when they are removed, exposing the inside which are covered with tar. It is not necessary to melt the tar to remove the old capacitor. By carefully inserting a screwdriver between the bottom of the box and the bottom of the capacitor, and prying up, in most cases the capacitor will easy come out. You should notice two wires that connect to the bottom of the capacitor, and one that connects to the top. The two wires at the bottom are cleaned and tin-solded together. The new capacitor are now tin-solded between the top and the bottom wires. The capacitor used for replacement are not at all critical. It can be anything between 0,25 - 1 mfd. and from 200 to 400 volts, The higher volts the better. Such capacitors can be bought in any electronic supply. Since modern capacitors are smaller than original it has to be secured by a piece of cardboard or a wood to keep it from vibrations. Reinstall the box cover and replace the two nails.
I have my coil boxes treated with a mixture of lenseed-oil and terpentine. It protects them and gives a nice light brown color.
GOOD LUCK
| Home |
|---|