If you want to ask me any questions, you can reach me at [email protected].
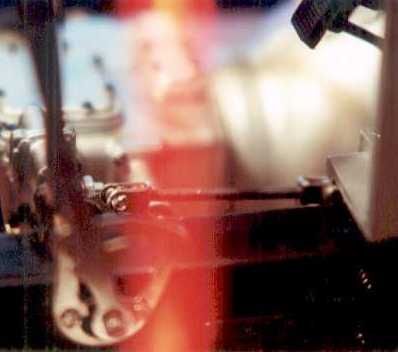
Now it was time to go back to the brakes. The brake system takes lateral motion from the pedal and converts it to rotational motion in the shafts (much in the same way as a piston moving up and down rotates a crankshaft). From the shafts, it converts the rotational motion back into lateral motion again when it goes to the rods. From there, it goes through the conversion from lateral to rotational and back a couple more times before it finally makes its way to the shoes. All these conversion points introduce very small space gaps in the system and are also sources for bad rotational angles. Individually, the gaps are virtually negligible but combined, they can add up to a whole lota nothin'. The excessive play (slack) in the system was a hurdle that needed to be overcome. The first thing I did was to increase the amount of pedal travel. To do this, I shortened this piece by about 3/16 inch.
This not only increased the amount of pedal travel to its maximum (without changing the length of the return spring) but it also had the effect of better rotation angles meaning more rotation. More rotation means more linkage travel. More linkage travel means more of the slack inherent in the system can be taken up so that, in theory, all the slack should be taken up before the end of the pedal travel and, therefore, there should be enough travel left in the pedal to actuate the brake shoes.
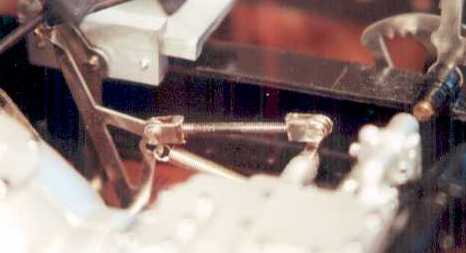
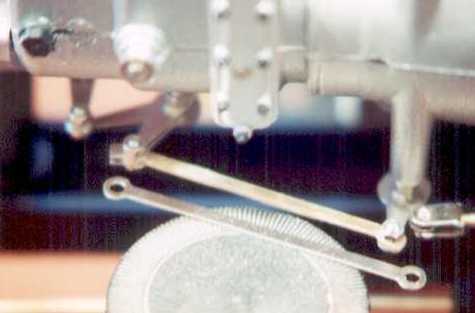
On the other side of the transmission, I had to make a piece of linkage that was about 3/16 inch shorter than the one supplied by Pocher to improve the rotation angles as well. By looking at the comparison below, had I kept the original piece, the shaft would be rotated so far that the movement of the clevis (the part attached to the end of the rod seen in the right-hand side of the photo) would have been perpendicular to the rod (moved up and down) instead of lateral (move length-wise). Kinda compare this to pedaling a bike. Think of the leg below the knee as the rod and the foot as the clevis, and the pedal on the bike as the part where the clevis is attached. When the pedal is near the top (meaning the leg is about as high as it will go) the leg hardly moves up or down while the foot clearly moves back or forth. You've got to make sure that your angles will enhance and maximize the amount of rotational to lateral conversion if you want to have any hope of getting the breaks to work.
That does it for the brakes for now. I was fortunate enough to acquire a copy of the Rolls Royce owner's handbook for the Phantom II on June 6. It's over 240 pages packed with photos and diagrams of the English and American chassis (essentially mirror images of each other). Beyond just the photos and diagrams, it's loaded with text about various functions and features which gives a better overall understanding of the car. That, in turn, explains why things are the way they are which adds more enjoyment to the project. For example, just starting the engine is a paragraph:
"First check that the gear lever is in neutral and the petrol turned on. Close radiator shutters by means of lever on the instrument board. Then, switch on both ignitions by moving right-hand thumb lever on switchbox to position marked M B and C (Magneto, Battery and Charge), and switching on separate magneto switch. Then, set mixture control lever over to Strong; fully retard the ignition and close the throttle by moving both the ignition lever and the throttle governor lever to the bottom of their quadrant. A small high-velocity carbuertter is provided on the induction pipe for starting purposes only, controlled by a small ever on the instrument board. Turn this lever to On position and depress the starter button firmly and to its full extent. As soon as the engine commences to run regularly, move the throttle governor lever about one-third up its quadrant and turn back the starting carburetter control lever to the position marked Off. The starting carburetter should not be used for more than half a minute before changing over to the main carburetter, and it should only be used when the engine is cold. The ignition lever should now be advanced through seven-eighths of its range."
Once I got a hold of the handbook I knew it was going to slow me down because I'm a bit of a stickler for detail but not so much that I would totally reconstruct an entire system, just enhance the model here and there. I definitely want to eliminate any major differences such as missing frame components and inconsistencies within reason. The difference in the firewall is an example of not within reason. With that said, I of course wanted to compare the model to the real thing. One of the changes I made was based on this diagram of the engine lubrication system.
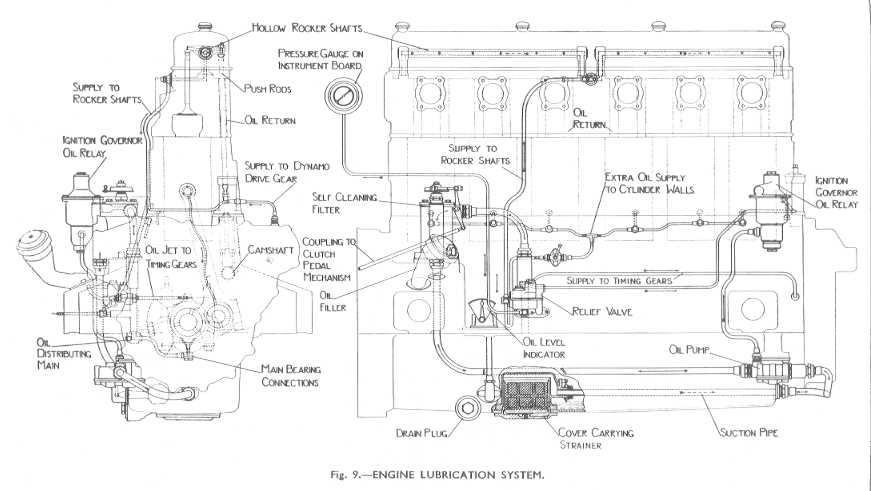
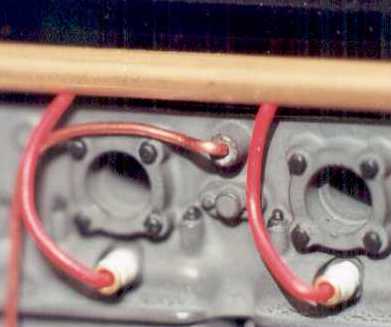
I added the line that went from the relief valve to the cylinder head.
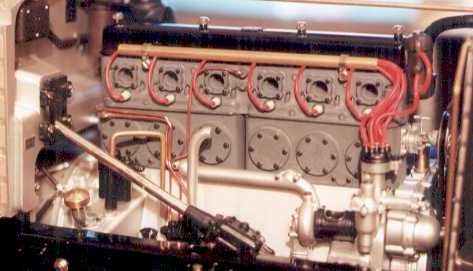
The cool thing was that there was already a post on the head and all I needed to do was drill it out. I don't know if I'll add the rest of the lines, it depends on how much it bugs me that the lines aren't there. So far, it doesn't bug me enough yet.
While I had the intake off, I repaired the carburetor intake further by using the heat from a soldering iron to soften the plastic to bend and hold it back into shape. Note that I only use the heat from the soldering iron, I never made direct contact with the piece. I placed the piece over the hot soldering iron to let the heat slowly rise and waited for a few minutes, then set the piece into the position I needed and repainted that part.

I know the carburetor label is in the wrong location and I have since corrected that problem. I also placed the motor number sticker where it was supposed to go.

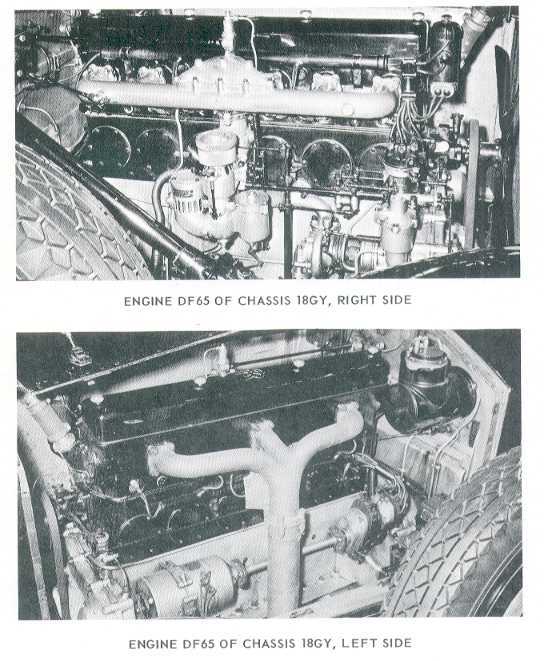
Here are two images of the engine from the Rolls Royce owner's handbook.
And, a close-up of the carburetor on the engine.
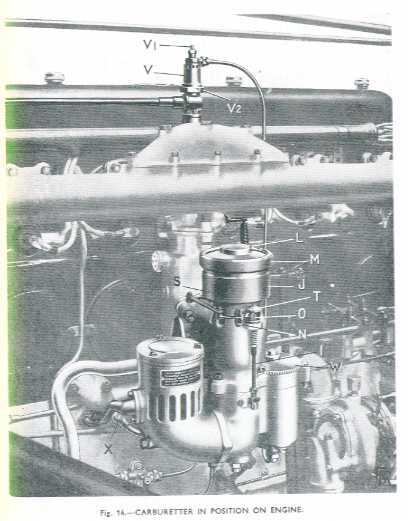
Looking and that, I think I will attempt to reproduce the needle valve actuator labeled as "I", "O" and "T" in the photo since the model looks kinda naked in that spot. The interesting thing is that the carburetor is smaller in scale in the real car compared to the kit. I wonder how Pocher let that happen.