Building the Argie 10
Last update: 10/5/2003
Introduction
in 1999 I completed building the Caravelle, a 14' boat designed by Mertens-Goossens. I have been sailing it since and it is a great boat. It's stability and capacity are remarkable. It is great for sailing with a bunch of kids or four adults, with a lot of spare room. Click here to see the building log and notes for that boat.
However, the Caravelle is large, requires a trailer, and for the sandy beaches of Israel requires a 4x4 vehicle to get it close enough to the water. Therefore it is now located at a sailing club near Ceasarea for quick launching. I wanted a smaller, car topable boat for those occassions that I do not want to make the long drive to the sailing club, which is 80 Km from our house.
There are many designs in the 10' range. Several options were considered, but I finally opted for the Argie 10 by Dudley Dix, which seems to combine low weight, a decent size and reasonable performance.
Since I had prior experience, I felt I had no need for full scale patterns and therefore ordered the discounted email version, which comes as HTML and GIF files. Printed on an A4 paper most details can be easily read, except for a few which require zooming the display on the computer screen.
The building method is stitch and glue, which my experience showed to be a great building method for this type of boats. However, the method reccomended by Dudley Dix is such where only the centerline and chines are S&G using FG tape, and the rest is based on framed bulkheads glued to the hull and secured with screws. I decided to make it an all composite construction, where all seams have a thickened epoxy fillet with FG tape, thus eliminating the timber frames in the bulkheads. It seems to be a quicker method (no need for beveling and fitting frames to the shape of the hull) and lighter. Tolerances are less tight since large gaps (10mm and even more) can be filled with epoxy paste ad FG tape without compromising strength. Additionally material is more available here in Israel (hard to find good timber and when found it is expensive). Therefore timber was used only where plywood could not be used as a substitute, such as cleats for seat support and daggerboard case. The mateial list therefore includes more epoxy and FG tape but much less timber and no glue nor screws.
By the way. If you build or intend to build a boat using methods involving plywood, epoxy and FG, take the time to pay a visit to the Mertens-Goossens site. Apart from great plans, there is a very active and helpful forum discussing boatbuilding using these methods. Obviously its purpose is to support builders of their plans, but "strangers" with a relevant questions or posts are welcome as well.
Building log
The following is a log and building notes of the building process. Times include preparation and cleanup of the working session.
July 2001 - Ordered the plans, received and printed them, went through all drawings and building notes twice. Bought the plywood, epoxy and FG tape.
4/8/2001 - 3 hours - Marked all pieces on plywood. Make sure to mark all letters on the pieces which are butted together to avoid mistakes later.
5-8/8/2001 - 3 hours - Cut all pieces
9/8/2001 - 1 hour - similar pieces were clamped together and sanded to match each other.
11/8/2001 - 1 hour - Butted together sides, bottom and front bulkhead. On the front bulkhead I made a mistake and connected the wrong sides. The FG tape butt is easy to make. It is an error which is easy to make becaus the result looks OK and I foundit out only when I came to fit the bulkheads after the hull took shape.
15/8/2001 - 0.5 hour - Laminated the parts forming the daggerboard and rudder. This procedures appears late in the notes but since it is not related to any other procedure it can be done at any time.
19/8/2001 - 1 hour - Epoxy saturated bottom and side pieces.
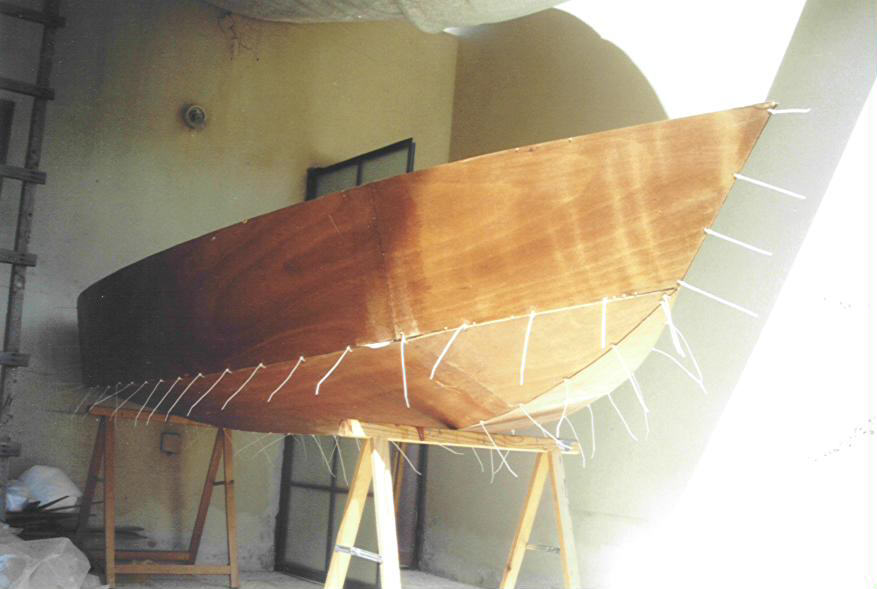
22/8/2001 - 1.5 hours - Stitched the bottom panels. I put them one on the other, drilled the holes at 15cm centers through both panels and stitched them with plastic tie wraps. then when opened like a book the bottom curve takes shape. This is not as described in the building notes. Next stitch the sides. This was done from bow to stern working symetrically on both sides. The plastic wraps were strong enough except for the centerline area at the transom where a copper wire was required to pull the pieces togehter effectively.
24-25/8/2001 - 1 hour - epoxy saturated all remaining parts.
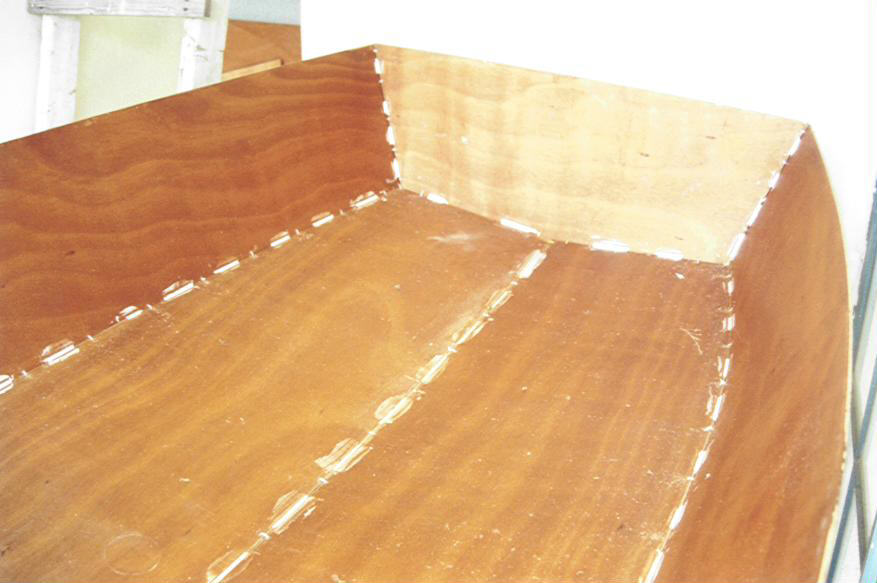
7/9/2001 - 1 hour - Stitched the transom. Made epoxy "tabs" (just like when welding) along the center and the chines between the tie wraps.
Epoxy tacks. Tie wraps may be seen between tacks
8/9/2001 - 2 hours - After epoxy cured, tie wraps were removed and a full fillet was made using thickened epoxy. This was made using approximately one part epoxy mixture, one part silica and one part microbaloons. The consistency is that of peanut butter where the silica makes the mixture less runny and the microbaloons give it volume and make it more "fluffy". Too much silica will make the mixture very hard to sand later on. Thew fillets were applied using tongue depressors. They have a nice radius at the ends, which makes shaping the fillets very easy. Next FG tape was applied to all fillets, except centerline. This is best done when the epoxy has not fully cured, so that the excess epoxy can be pressed and spread while applying the tape. Otherwise before applying the tape the fillets must be sanded well to avoid bumps. The method used is dry application. Epoxy is spread liberally on the fillet using a small paintbrush; the tape is applied on the epoxy and pressed with the tip of the brush. When it gets saturated with epoxy it turns transparent. Dry spots, which show as silvery patches get some additional epoxy.
Tiewrap stitches before removal
12/9/2001 - 0.5 hour - formed half of the daggerboard and rudder boxes. 13x13 mm wooden strips were glued to one of the sides. At this time FG was applied to the centerline was as well.
15/9/2001 - 2 hours - Bulkheads, except front bulkhead, were fitted in. since the bulkheads have almost no thickness (no timber frames), they were held between two small nails driven at several points at the bottom and sides. Again tabs of epoxy were applied to create the initial bond. The front bulkhead was not fitted because I found out at this stage that I made a mistake when I joined the two halves. At this session the daggerboard and rudder cases were completed as well.
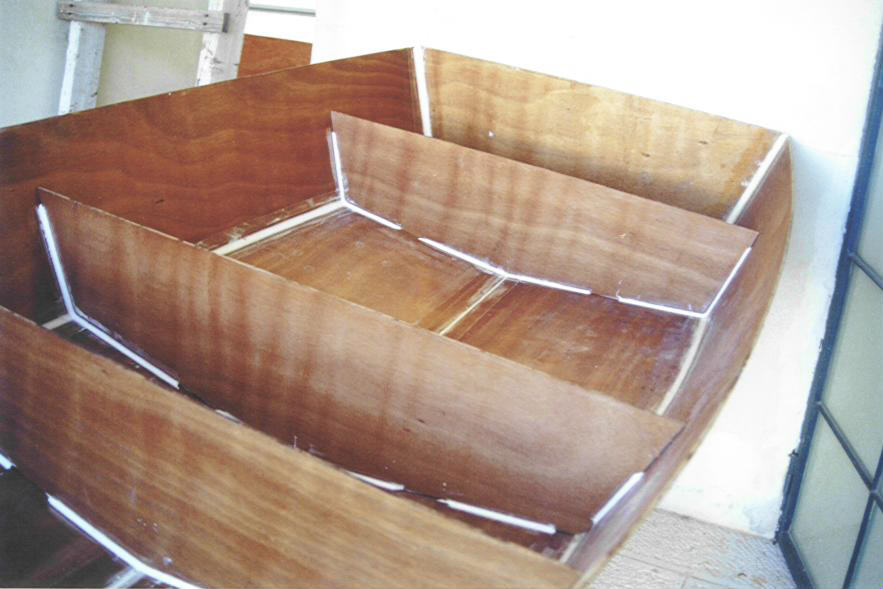
Mid and aft bulkheads. Epoxy fillets are not yet complete
16/9/2001 - 2 hours - Fillets for bulkheads made, FG tape applied as soon as the epoxy cured a bit. The front bulkhead was cut and joined again in the proper way.
17/9/2001 - 1 hour - inserted and "tabbed" the front bulkhead and the daggerboard case. According to the construction notes inserting the daggerboard case should be done later and the slot for the daggerboard should be cut prior to assembling the box, but I decided to install the box and later I will cut the slot working from the centerline outwards until I hit the box sides.
18/9/2001 - 1 hour - Made the fillets for the front bulkhead and the daggerboard case. Turned the boat over and using a plane removed excess material, smoothed and radiused a bit the chines and centerline.
19/9/2001 - 2 hours - FG tape applied to front bulkhead and daggerboard case. Boat was turned over and FG tape applied to chines and centerline. Two layers were applied slightly staggered to create about 2/3 overlap between the two layers. This assures two layers where it is important, while creating two small "steps" instead of one big "step". This will make fairing later easier.
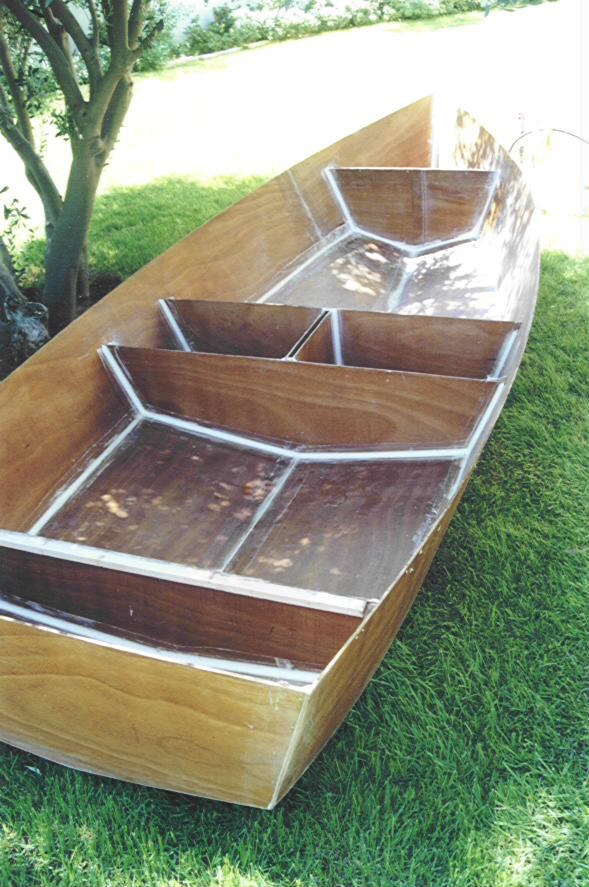
All bulkheads, including daggerboard case are in place
22/9/2001 - 2 hours - Cut and attached all cleats for the seat supports. Attaching was done using epoxy thickened with silica to a "rumayonnaise" consistency. Cleats were held in place until curing using clamps where possible and screws or nails elsewhere. Note that the stern and bow seats are sloping towards the center of the boat. This is not immediately seen on the plans when printed on A4 paper. Displaying the picture on screen using a graphic program, and drawing a line parallel to the WL shows the height difference, which is about 2-3 cm. Bottom opening for the daggerboard was cut open.
18/10/2001 - 1 hour - It took some time purchasing the inspection covers, which must be installed before the sit tops. Purchased two large openings for bow and stern seats, and smaller for the middle seat. It is better to purchase these at the beginning of the project and cut the holes for them before the bulkheads are installed - working with a jigsaw to cut these holes when the bulkheads are already assembled is awkward.
20/10/2001 - 1 hour - Epoxied the inspection covers to the bulkheads. Although they have holes for mounting them with screws, I decided to epoxy them, since I felt that the 6mm ply would not hold the screws well enough and I did not want to start fitting a backing plate for the screws. The U bolt at the bow was attached as well at this time as it would be awkward to do it after the front deck is assembled.
21/10/2001 - 1 hour - Fitted the mid seat top and the front deck. Cleats were planed and leveled. Epoxy paste was spread over the cleats and the top panels pressed against them. The epoxy creates a watertight connection. The aft seat top will be attached after the hardware for the rudder will be in place.
25/10/2001 - Oops! While turning the boat upside down, because of expected rain, it slipped from my hands and the bottom got hit and "punctured" by the corner of one of the supporting horses. A quick question to the helpful participants in the forum at bateau.com gave some advice how to fix it. I will do it later when I get to the finishing stages. Meanwhile - do not attempt to turn the boat alone - although light enough, it is bulky and slippery.
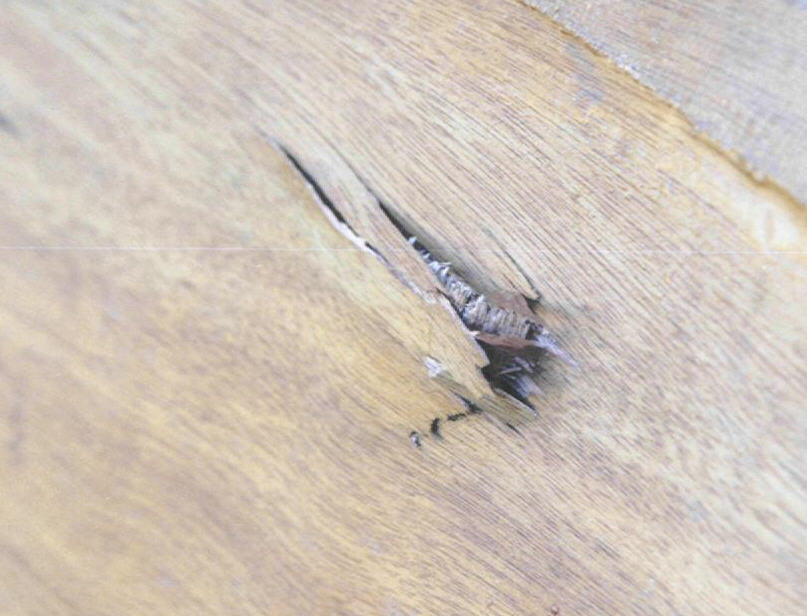
The crack - out and in
30/10/2001 - 0.5 hour - Epoxy fillets for the front deck and mid seat top. Also filled the voids where the epoxy did not quite fill the connection between the seat top and the cleats.
1/11/2001 - 0.5 hour - Cut the slot for the daggerboard at the seat top. Sand the deck and mid seat top fillets.
5/11/2001 - 2 hours - Instead of the rings for the mast specified in the plans, I made from 12 mm plywood two pieces, which combine the mast ring, and the stringer, which strengthens the edge of the deck. One will be epoxied to the top and one from underneath, giving a thickness of 30 mm to the deck aft edge, and the mast top support. Shaped the rudder and daggerboard foils. This was done using a sandpaper disc on a small angle grinder. It is not the best equipment to do this - the high speed revolutions make it difficult to control, but using 120 grit sandpaper it takes more effort to make crucial mistakes. Working patiently gives good results. I gradually removed the thickness of 3 ply layers from each side, leaving 4 plies at the edges. It is easy to follow the contour lines created by the color difference between the plies. From past experience, a better tool for this purpose is a belt sander. Also started fairing the outside seams using the same grinder.
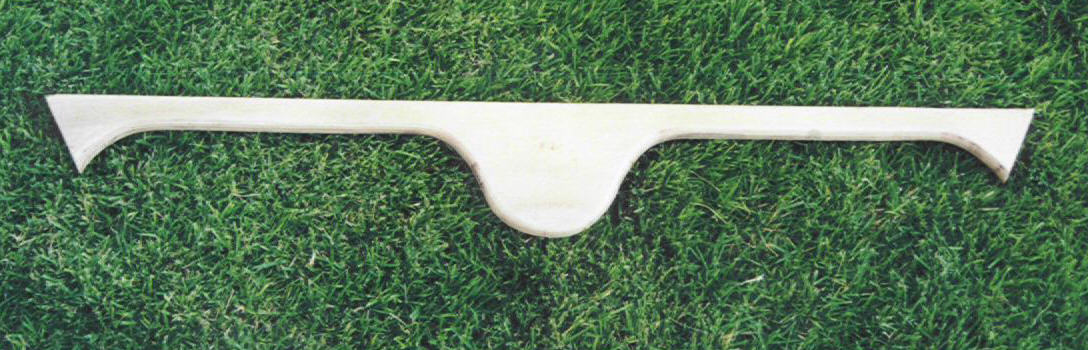
Two such pieces form the mast support and cleat for the aft edge of the deck.
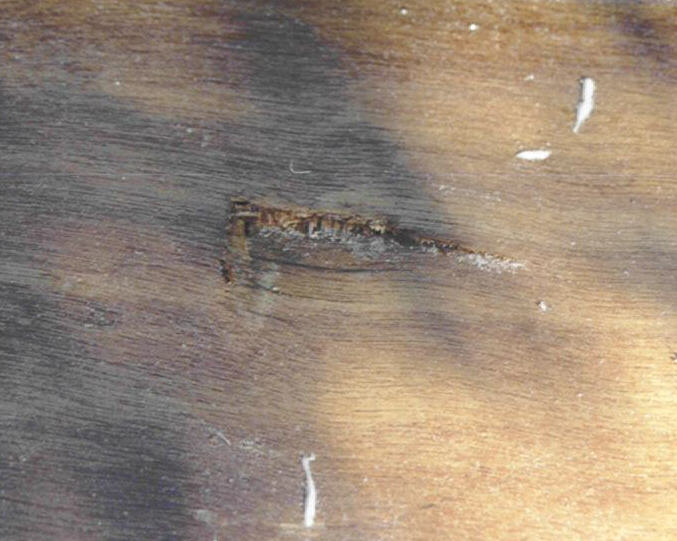
6/11/2001 - 1 hour - Started fixing the hole. The method is as follows - Push the plywood from the inside out as much as possible without creating additional damage. With a brush apply epoxy pushing it well into the wood between the small cracks. Place a piece of polyethylene over the crack and with a mallet knock everything back into place as much as possible. Place a heavy weight over the plastic layer and let the epoxy set. When cured sand down to the surface, fill with thickened epoxy if needed. Fill also from the inside, which will most likely have a dent shape (and not a bump as on the outside). Sand everything down. If the crack is quite large add a layer of FG on each side, about 50mm larger than the crack area. So far I did the outer surface.
Crack - fixed
8/11/2001 - 1 hour - Attached the mast support piece to the deck. Fixed the inner part of the crack and attached the top of the stern seat. This was done although I have not yet found the hardware for the rudder. I epoxied a 12 mm piece of plywood to the transom under the seat level so there will be enough thickness if I decide to attach the hardware with screws. If bolts will be used I will have to do it through the inspection port.
15/11/2001 - 2 hours - Found another problem. For some unexplained reason, the FG on the outer port side of the butt connection separated from the plywood. It seems that although outside the epoxy cured and hardened, between the FG and the plywood it remained somewhat soft. Since the boat is now stiff and supported by al the frames, seats and deck, I simply sanded the whole FG away and epoxied a new piece. Now thw connection seems fine. I also noticed I did not tape the transom from the outside and did this too. Sanded the outer surfaces - still more to come in order to prepare the outside for painting. Also finished rounding up all edges of the dagerboard and rudder in preparation for a final epoxy coat and varnishing.
1/12/2001 - 1 hour - made the skeg by laminating two 12mm plywood pieces. After epoxy cured the pieces were shaped to match the curve at the bottom of the boat.
10/12/2001 - 1 hour - applied final coat of epoxy to bottom and sides. Attached skeg to bottom - an initial stage - a fillet and some ttape will follow.
Skeg fitted and after final epoxy coat
22/12/2001 - 0.5 hour - Fillet for the skeg. Made the outboard motor plate from a piece of beech, tapered it so there are no sharp edges and epoxied it in place.
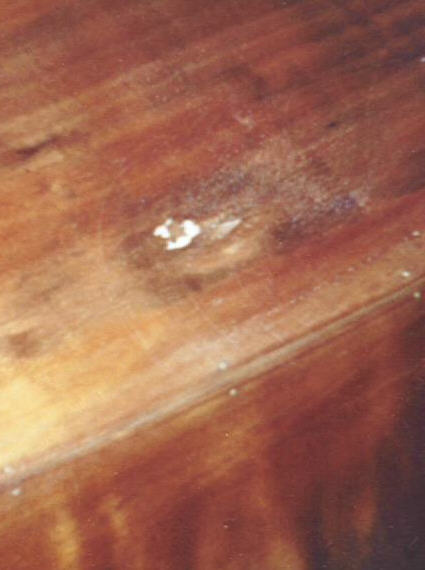
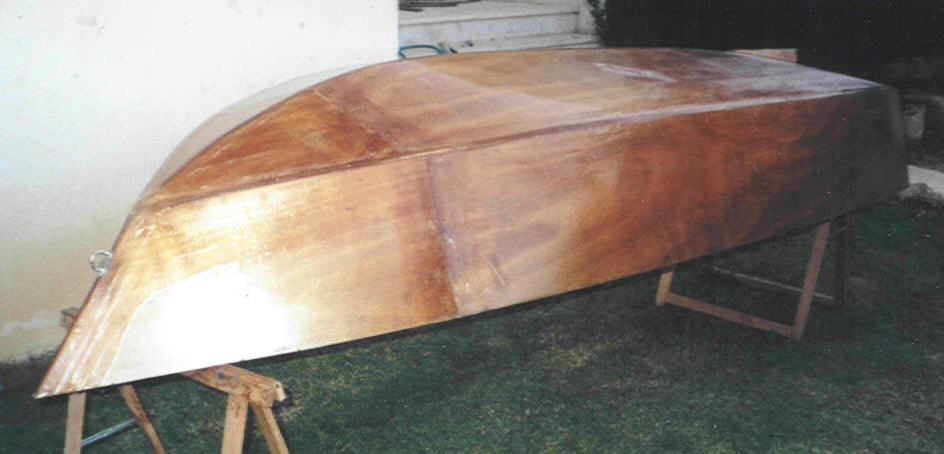
5/3/03 - 2 hours - Long time, no work - other obligations. I bought some mahagony strips for the sheer strakes and the underside runners. The sheer strakes were laminated as two layers of 8x30mm strips. 8mm is still feasible, but slightly less would have been better. work was done on both sides simultaniously to avoid any warp in the hull. The underside runners were even thicker and I could not bend them to fit the curve towards the bow, so I attached them throughout most of their length and then planed them towards their end until they were thin enough to bend an be attached. Since the boat was outdoors for all tah time, I found out that some areas were not epoxied well and water seeped in and stained the wood a bit, so I sanded these areas and gave the hull an additional coat of epoxy.

Sheer strakes and underside runners. Water stains can be seen at the bow.
Total hours to date - 40.0
Material
Plans - US$25
Plywood, Exterior grade, 6 mm, 4 sheets - 400 NIS
Mahagony strips -
Epoxy, Shell, 3:2 ratio, 5 Kg - 200 NIS
FG tape, 75mm, 50 Meters - 375 NIS
Inspection covers - two small and two large - 120 NIS
SS U bolt - 20 NIS
Consumables - 100 NIS
Total to date - 1325 NIS (approx. US$320)
Tools
Consumables