THE MAKING OF A CALABASH PIPE - PAGE 4 OF 8
THE CORK GASKET
The cork gasket is an important part of the pipe, because it holds the bowl firmly in place, and also keeps the chamber inside the gourd airtight. Making a cork gasket is a tricky process, but fortunately I had some experience from the restoring of an antique English calabash, when I destroyed the first two gaskets, because they were too loose. The gasket must be thick enough, to let the bowl enter very hardly for the first time (see page 7,"The Final Stage"), because later, by smoking the pipe, it becomes thinner, and less elastic.
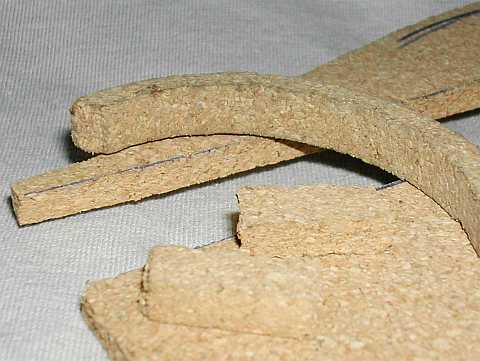
I was given this flat piece of cork by a friend. It is 5mm thick, and consists of very small pieces of cork compressed. It's a fragile material, and it can break or chip easily while you cut it or bend it. I found out that the best way to keep it elastic, is to keep it wet. It must be dry only when you sand it or glue it. After I draw two parallel lines 5mm apart on the surface of the cork, I cut a strip about 12cm long with a scissors. I shaped its sides flat and I thinned it a little bit, with grit paper. Then I wet it, and started to bend it.
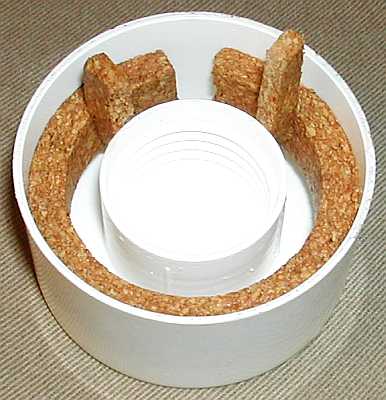
Keeping the cork strip wet all the time, I worked it by pressing with my fingers and bending it slowly, and carefully not to break it. I kept weting and bending, untill the ends met. Finally, I placed it in the inside of a spray-can cup, and kept it in place with two pieces of cork, in order to form an almost perfect circle. I let it dry for 24 hours before removing it.
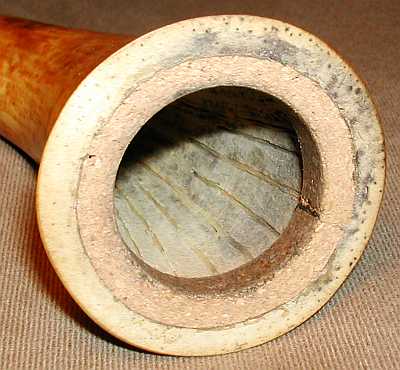
I had to place the cork in the groove and remove it several times, in order to check if it fits right. I achieved the right diameter of the gasket, by cutting thin slices of cork from both ends, untill the ends met. I used a multi-purpose elastic glue for cork, rubber, leather etc, durable up to 125C degrees, to glue the gasket in place. I let it dry for 24 hours by an open window, because the glue has a strong smell, and can stay in the gourd for a long time. After the glue dried, I cut the exceeding top of the gasket with a cutter, and sanded it, in order to be even with the top of the gourd. I also rounded a little bit the edges of the gasket, with a fine grit paper.
<= BACK
 HOME
NEXT =>
HOME
NEXT =>
