Feel free to rip off anything you like from this guide.
A few notes about getting started. I find that it's easiest for me to just get a bunch of paper cups, write the name of the playfield part I'm working with on the paper cup and then throw all the screws and nuts into that cup. I find that if I have a cup for say the sling shot plastics, when I go to reassemble it's pretty easy to deduce what goes where. Pictures are always a big help. Also, whenever possible put the screw or nut back into the part it came out of.
Also, before I begin I lay a while towel (hotel towels are great for this, but I've never shopped a pin in a hotel before) in the bottom of the cabinet. When parts drop they are much easier to find.
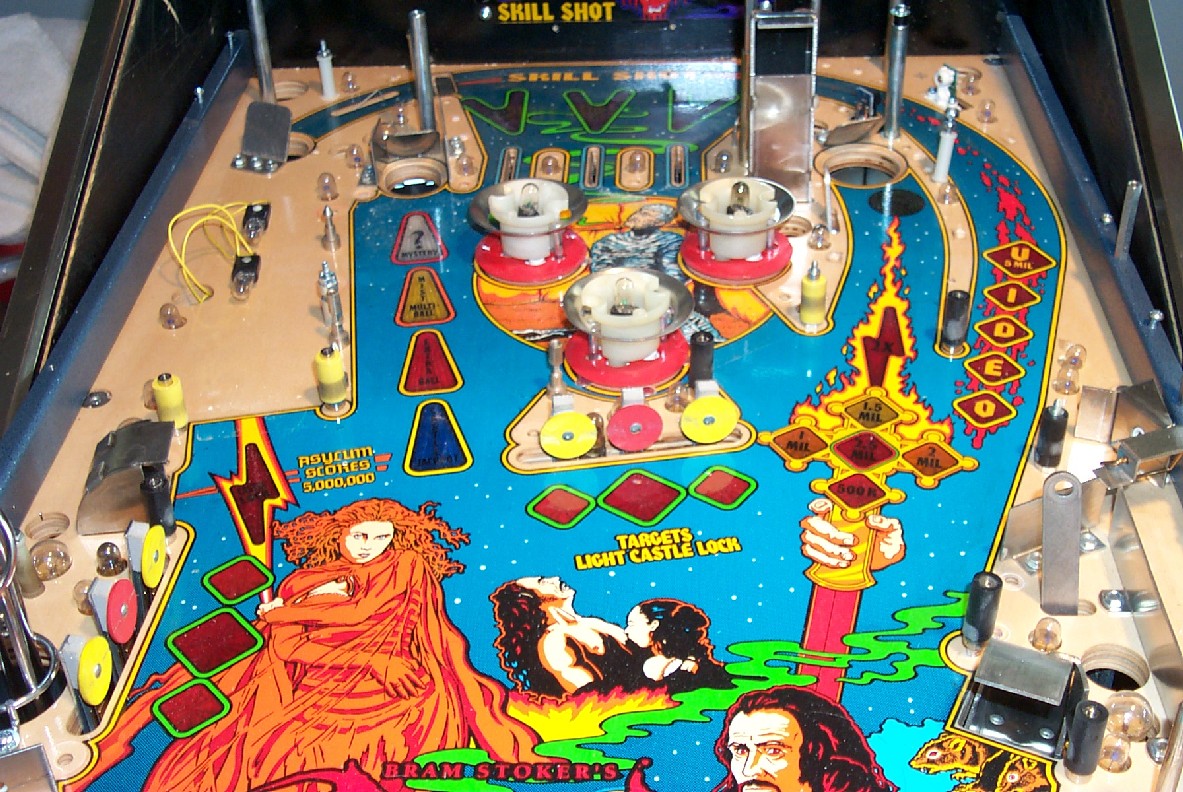
Starting pictures:
And here we go
Remove 4 balls. There should be 3 in the trough and one in the mist multiball trap.
Raise playfield and disconnect wires to ramps (basically any wire running though a hole to the top of the playfield). Make sure all wires can come up through the holes without any encumbrances. Label connectors so they will be easier to reconnect. I use a sharpie permanent ink pen and use the letters of the alphabet - a,b,c...
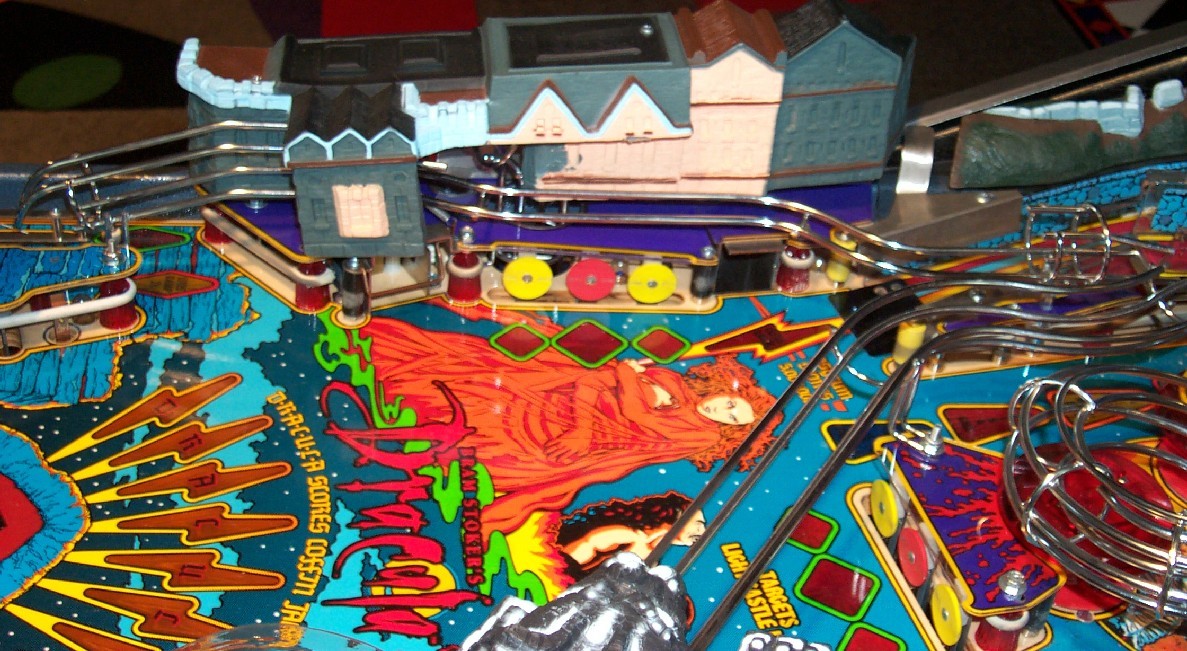
Remove village molded plastic on left side (2 screws, leave screws in top)
Remove red post in left rear of playfield mounted horizontally on the cabinet (wood screw).
Remove left slingshot plastic, rubber ring and posts. Note, the long screw is in the back to accept the habitrail.
Remove habitrail on left side.
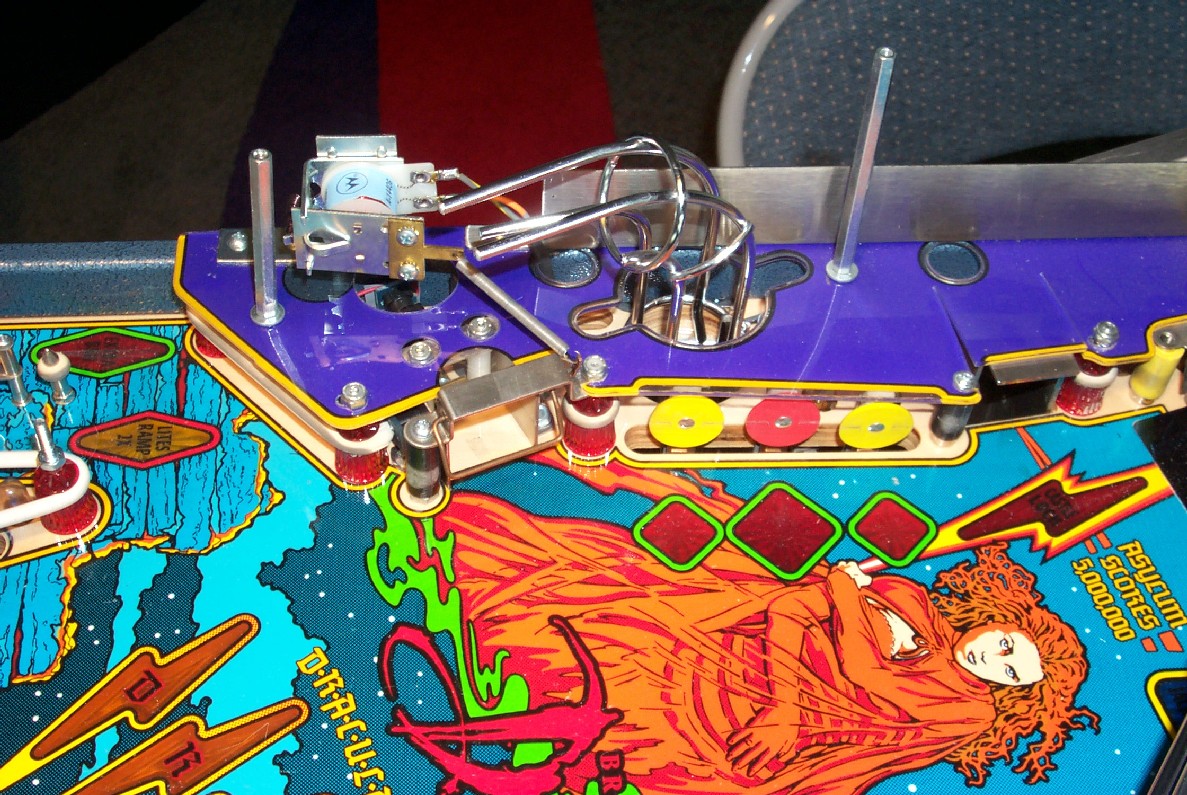
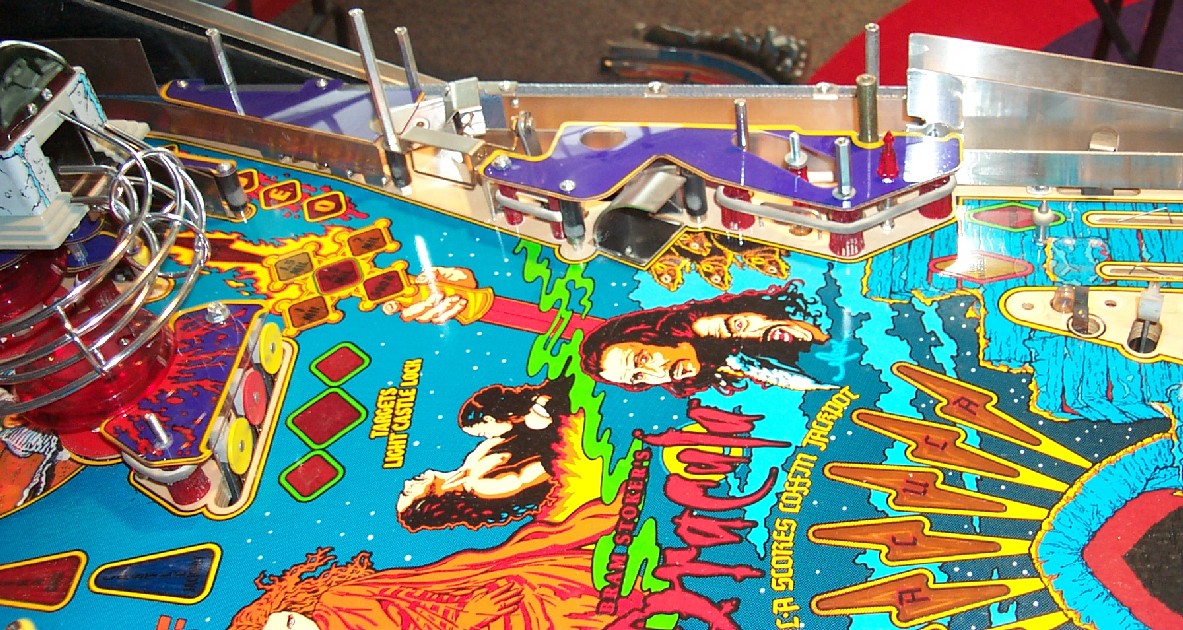
Remove diverter blade from rear ramp, two 4-40 nuts, use 1/4 inch socket or wrench. Put nuts back on diverter.
Now the goal is to remove the rear ramp (castle ramp). Notice that the rear ramp is set back into the rear of the playfield. This means that to remove it you have to lift up the front of the ramp and the pull it out.
Remove left post on the right ramp so you can slide the rear ramp over the right ramp.
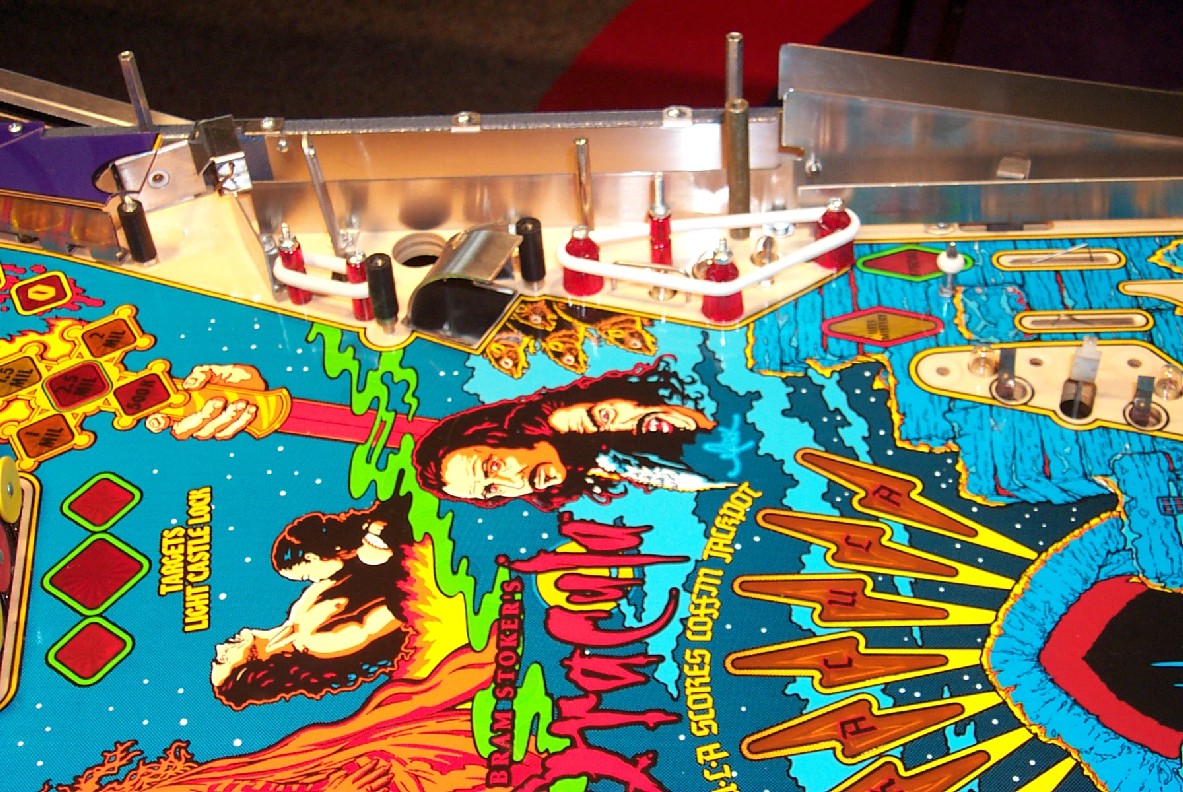
Also remove the habitrail that comes from the center of the rear ramp. Has locknut and washer in on top. To remove this you must remove the molded castle plastic on the right side of the playfield, leave the two screws in the top of the castle plastic. Carefully move the ramp out of the way to access the screws holding down the habitrail.
Now slide the habitrail out of the center of the rear ramp. It does not have to come off at this time - and you may not want to mess with the wires running under the coffin at this time.
Now you are ready to remove the rear ramp. Be gentle. Lift the left side over the right ramp and pull out the wires from under the playfield. Keep lifting the ramp and pull it forward to remove it from the back from the playfield cabinet.
Remove center habitrail by carefully fishing up the wire that was under the coffin and the wires for the coffin lock optos.
Remove the right slingshot plastics. There are two standoffs, 1 1/2 inches for the back and 1 3/8 inches for the front. There are no washers underneath the standoffs.
Remove sling posts and plastics
Remove inlane dividers. There are washers under the small screws against the playfield.
Remove apron by taking out the two sheet metal screws in the front on the playfield. push forward lifting the right side over the level.
-
Remove plastics under molded village on left of playfield.
There are two stand offs - 3 1/2 inch back, 2 1/2 inch front.
The front one has a screw with washer at bottom.
- Remove steel bracket from left side
Remove coils assembly for mist ball unhooking spring from ball trap
Remove plastic. You can leave the VUK habitrail on, but you may have to loosen it to remove the plastic.
Remove mist ball lock guide, washer on bottom of back side nut.
Remove rings - remove post near optos rather than yanking out the rubber.
Remove all posts.
-
Remove long plastic ramp for ball launch, you can leave standoffs
on bracket on right side. Note this is not the ramp that goes up
to load the mist multiball, it's the one at the end of the metal ramp.
-
Remove right playfield plastic below ball launch ramp. It has two standoffs,
front 1 1/8 inch with washer at bottom, back 3 1/4 inch no washers attached
to back of mist ball gate.
-
Remove clip from ball gate. There is a washer next to the clip.
Put clip and washer back on post when removed
-
Remove playfield plastic
-
Remove ball trap washer at bottom of plastic on front off ball trap
where lock nut goes
- Remove rubber rings and posts - washer under plastic on tall screw through tube post.

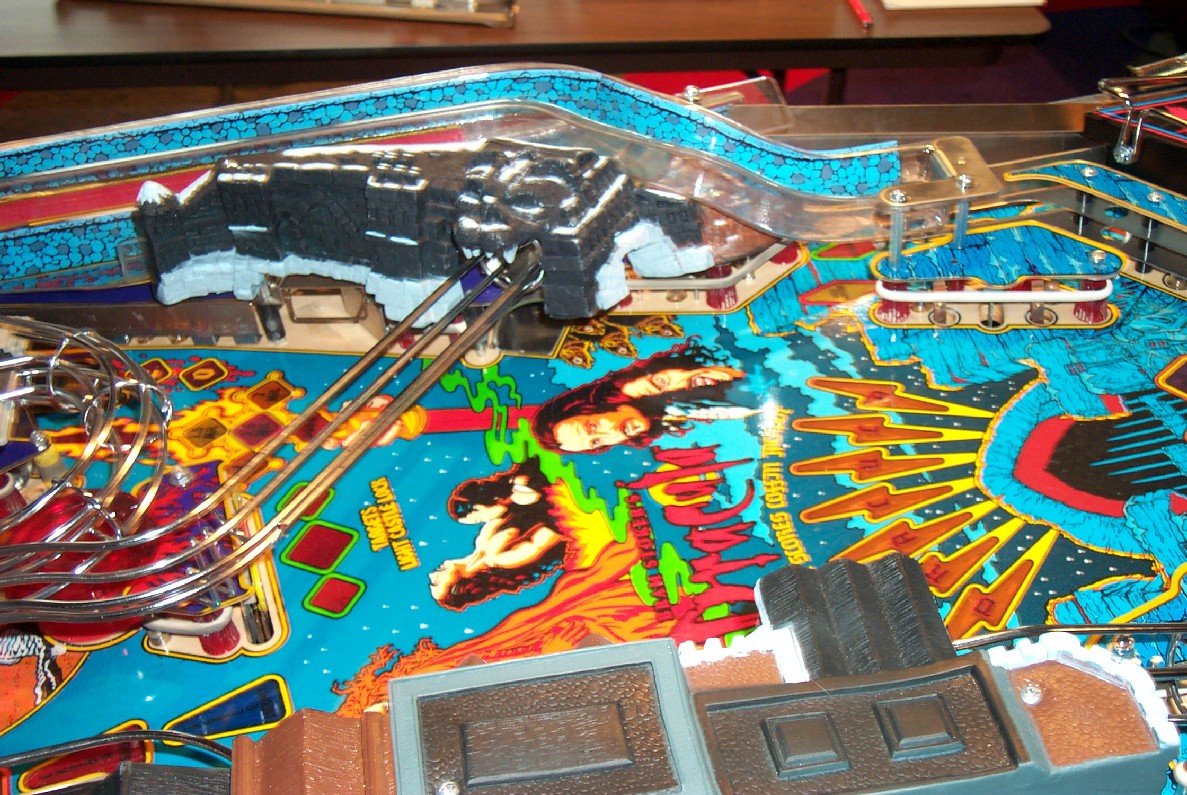
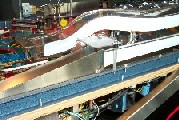
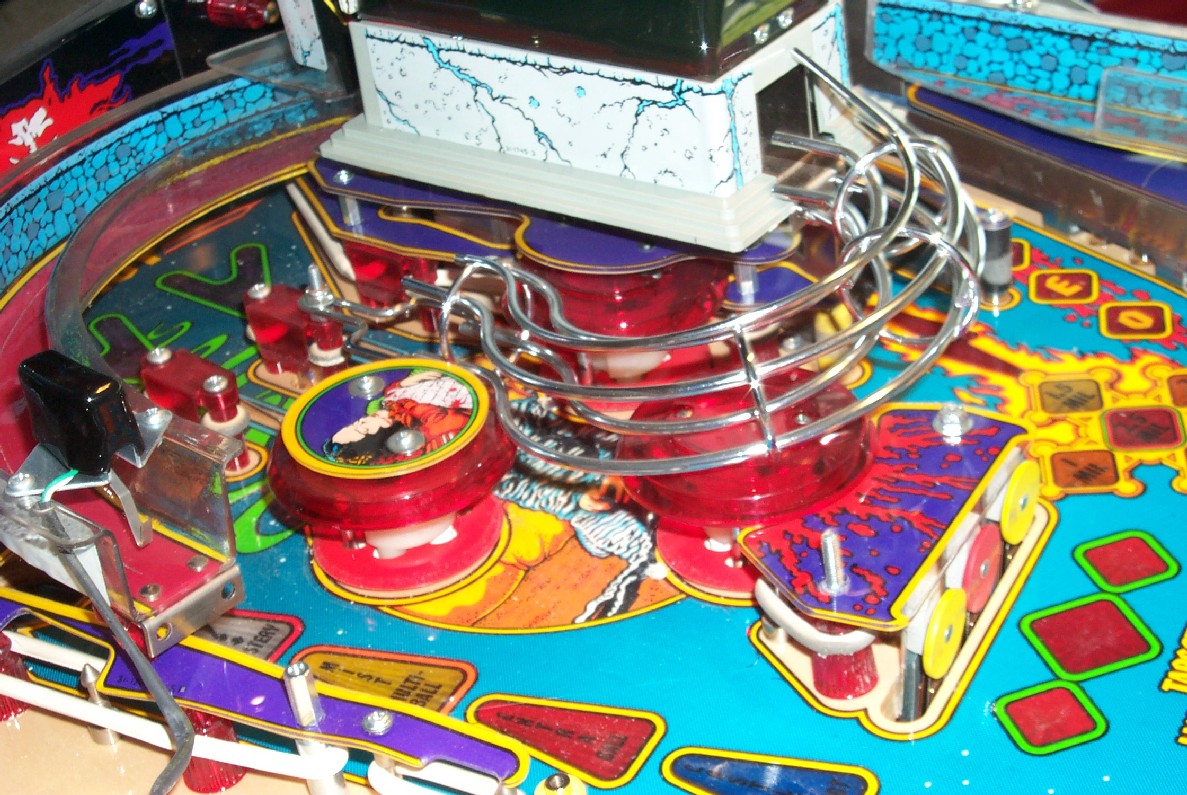
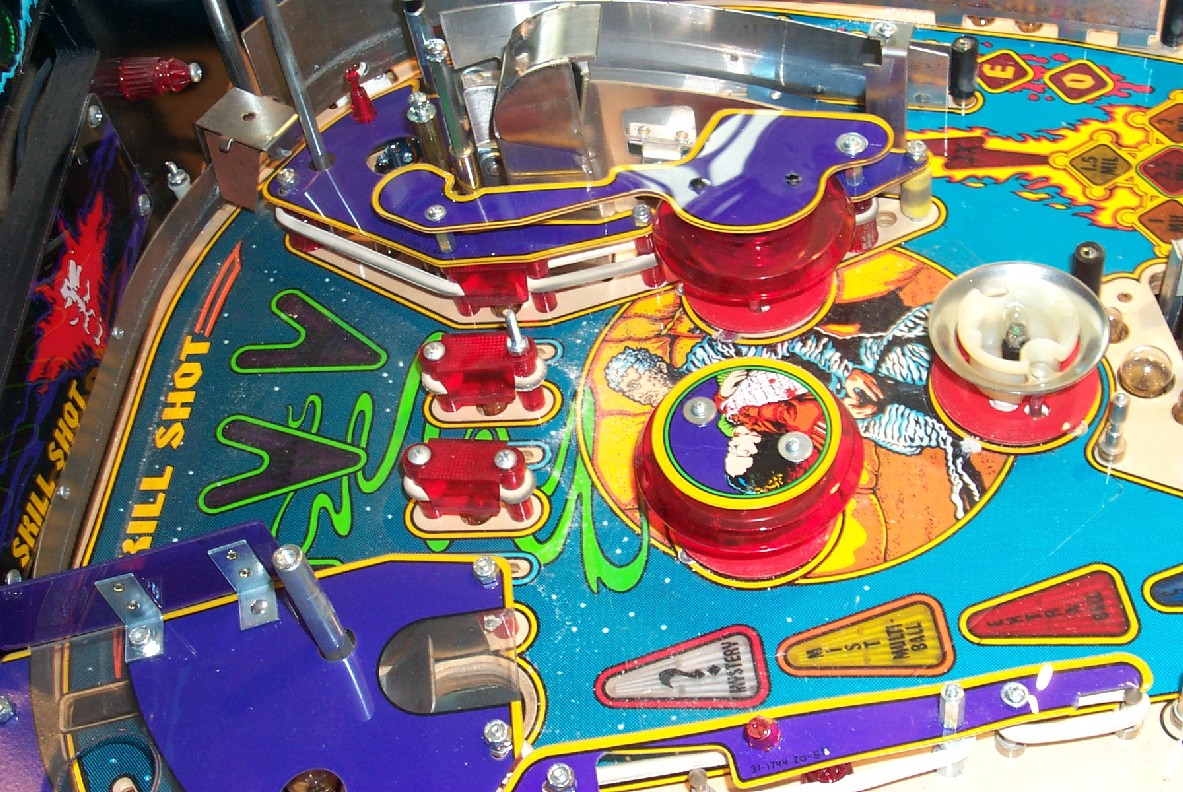
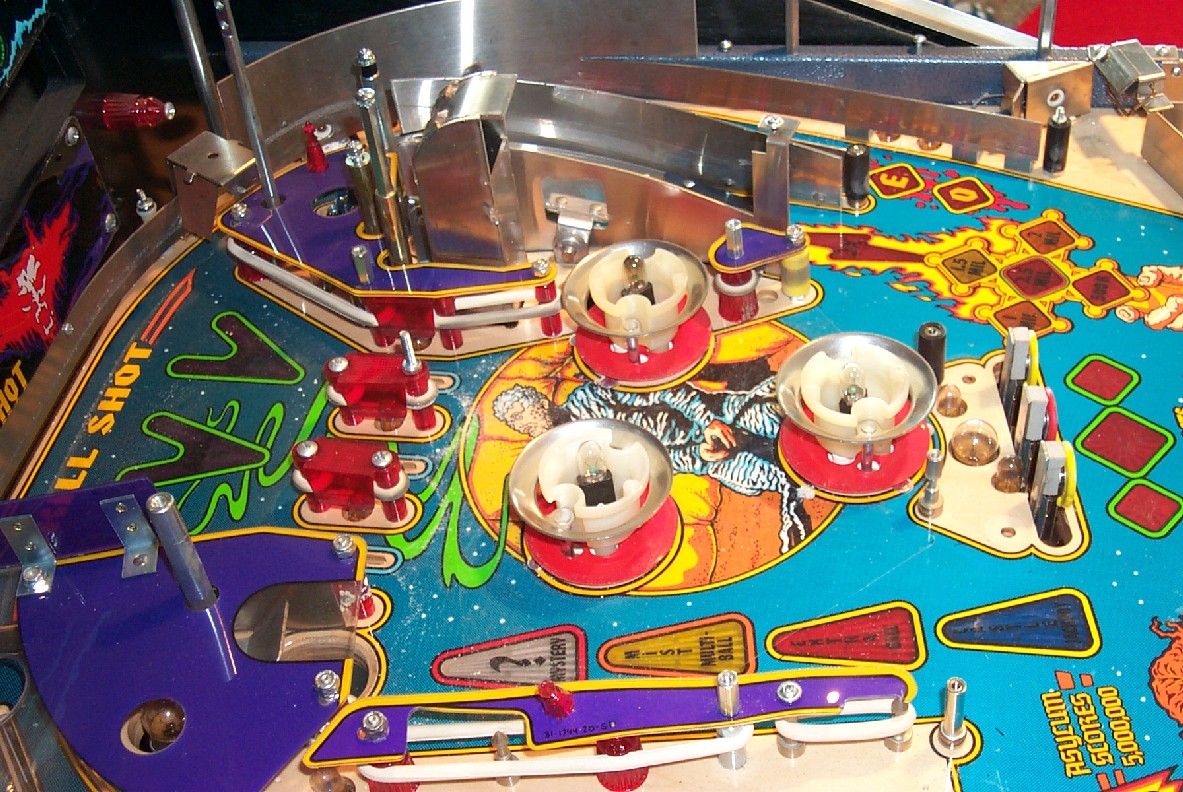
Pictures of ramp:
Remove the plastic in back of that one, rings, and posts.
Remove habitrail coming from coffin - washer on top of bracket.
Remove lower jet bumper cap.
Remove plastic above center targets, washer under locknut above plastic. Remove rubber ring and posts. Note the left star post has a 5/8 inch thread exposed for the center habitrail.
Remove long plastic to left of video
Now it is time to remove the coffin.
-
The coffin consists of a metal frame held in place by a screw in the
lower right hand corner and the left standoff of the lamp bracket.
The coffin plastic is mounted to the frame with 4 screws.
The red light holder with three #555 bulbs has to be removed to
access these screws.
- Remove the cover at the back of the coffin. There are three 2 1/2 inch standoffs at rear of coffin. Only the left one needs to be removed.
-
Remove the two screws in front of coffin holding the clear lid on.
Remove the bulbs with blue condoms and twist the sockets out of the way so you can get to the 2 screws below the sockets. Remove the 2 screws.
Now take off the light bracket that holds the blue covered bulbs and the coffin lid and pick up Dracula - he's just laying in there.
Remove the clear ball shield which is above the right ramp and below the right rear coffin corner. There is black spacer on right side above plastic.
Now remove the plastic ramp.
Remove the 2 screws holding the red board with lights under Dracula. Carefully pull the wires so you can twist the board. Now remove the 4 screws holding the coffin plastic to the frame.
Remove the back left standoff - the right one is attached to the frame and doesn't need to be removed.
Lift up and twist the coffin cover so you can see the screw in the right front of the frame. Remove that screw and take off the coffin frame.
Replace screws into frame so you won't loose them.
Note, when putting back together remember that the bracket that holds the coffin cover goes under the plastic coffin. Also, pay attention to the wires that need to be run under the playfield through the hole under the coffin. For example, the light bracket with blue condom lights needs to run down through here as does the center ramp switch (number 85). Make sure these wires are run BEFORE you assemble the coffin.
Remove playfield plastic from under the coffin - the front screw has a washer.
Remove jet bumper covers for remaining 2 jets.


Remove playfield plastic under right jet bumper, there is a 5/8 inch standoff in back. Remove posts.
Remove playfield plastic at rear. There is a 5/8 inch standoff in center position. Remove rings and posts.
Remove playfield plastic to left of "mystery" insert. There is a 5/8 inch standoff in the middle position. Remove two rings and posts
Remove playfield plastic in left rear. Remove ring and posts
Remove red roll-over lane guide plastics at top of playfield
- Remove plastic coffin ramp that raises up to reveal hole under the coffin.
Remove screws from the left metal guide
Remove right guide, two lock nuts with washers under playfield
Remove clip holding plastic ramp to rod, 2 washers next to the clip
Remove 4 screws (3 wood, one 5/8 inch machine with star washer) from back of ramp.
Carefully remove left metal guide.
Now lift out the whole ramp assembly.
Remove star post on right rear of playfield cabinet
Remove 2 wood screws holding one way ball flay gate at right rear of playfield.
Remove the 3 metal ball guides, remembering where the standoff goes in the left one.
Remove jet bumpers if you feel like it. I usually don't do this unless they are broken as I hate to deal with the metal leads.
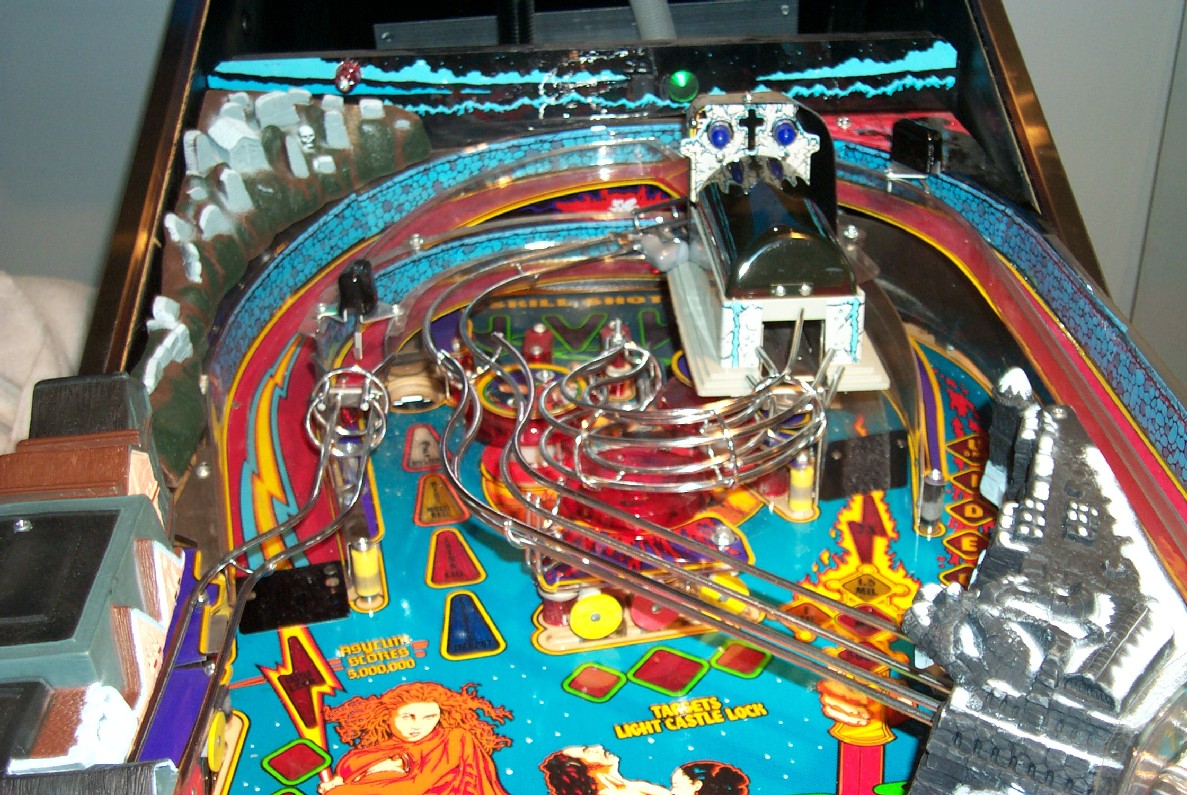
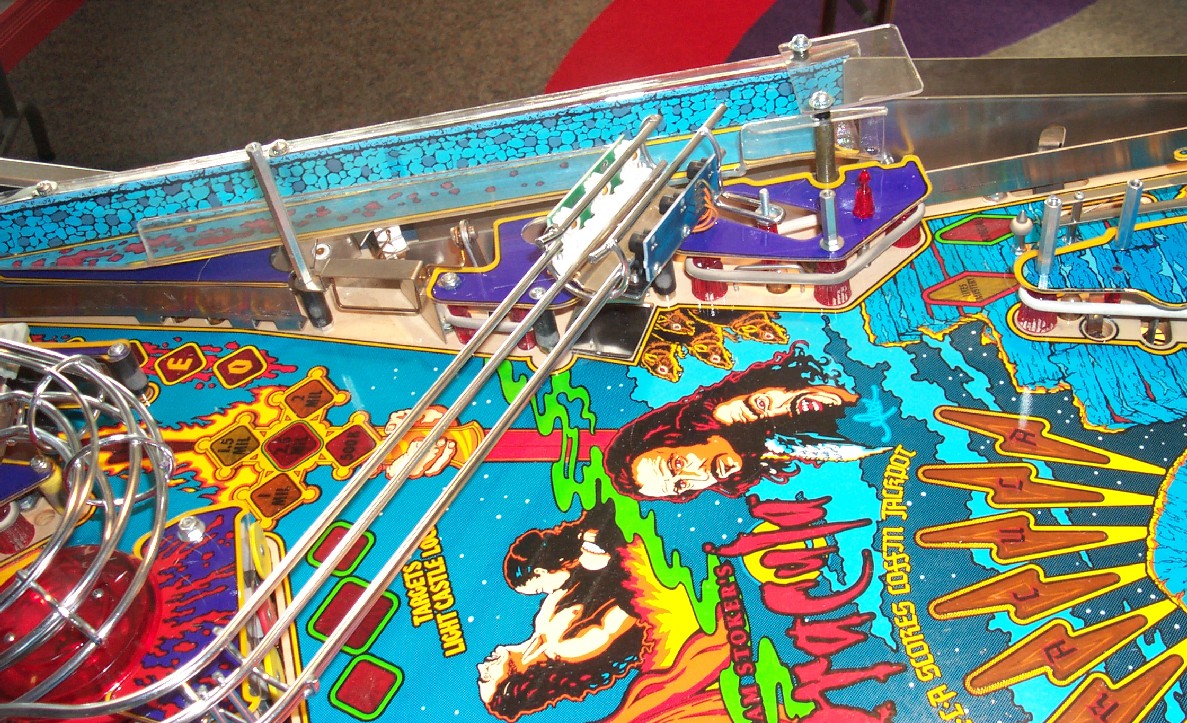
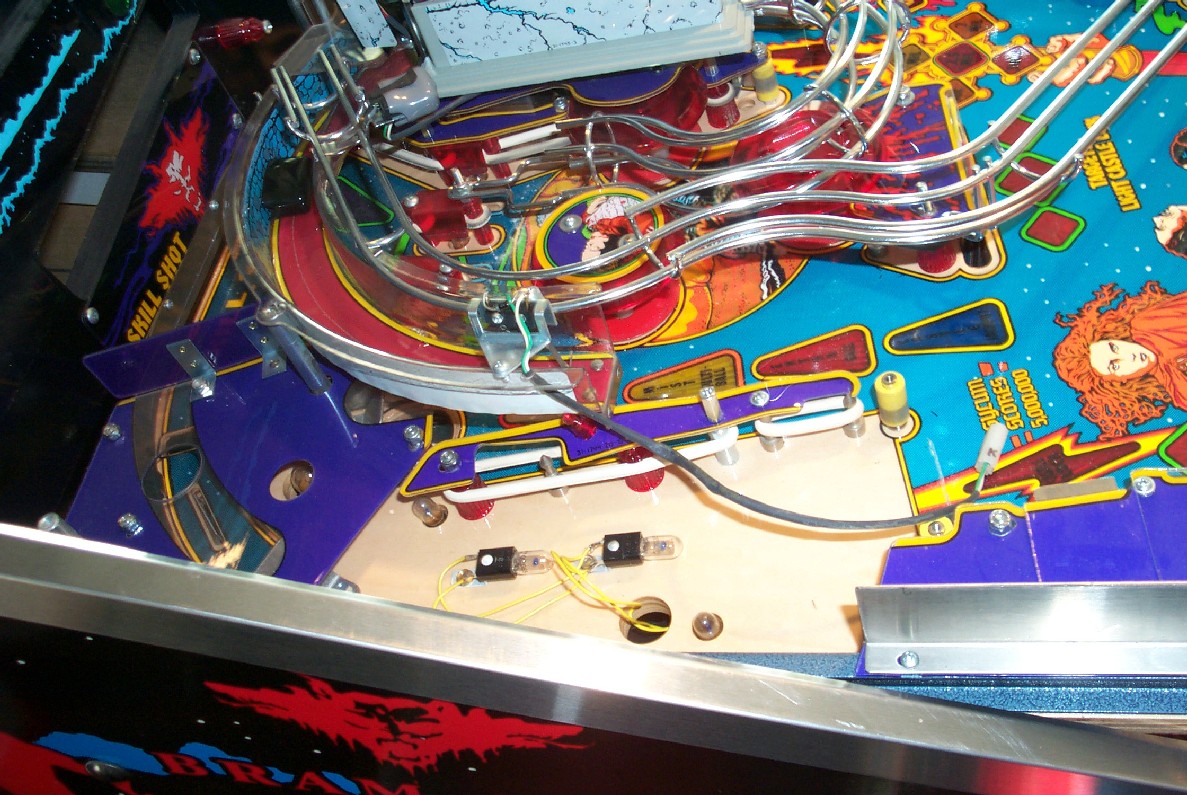
Here's a picture of what the playfield looks like with the above parts removed:
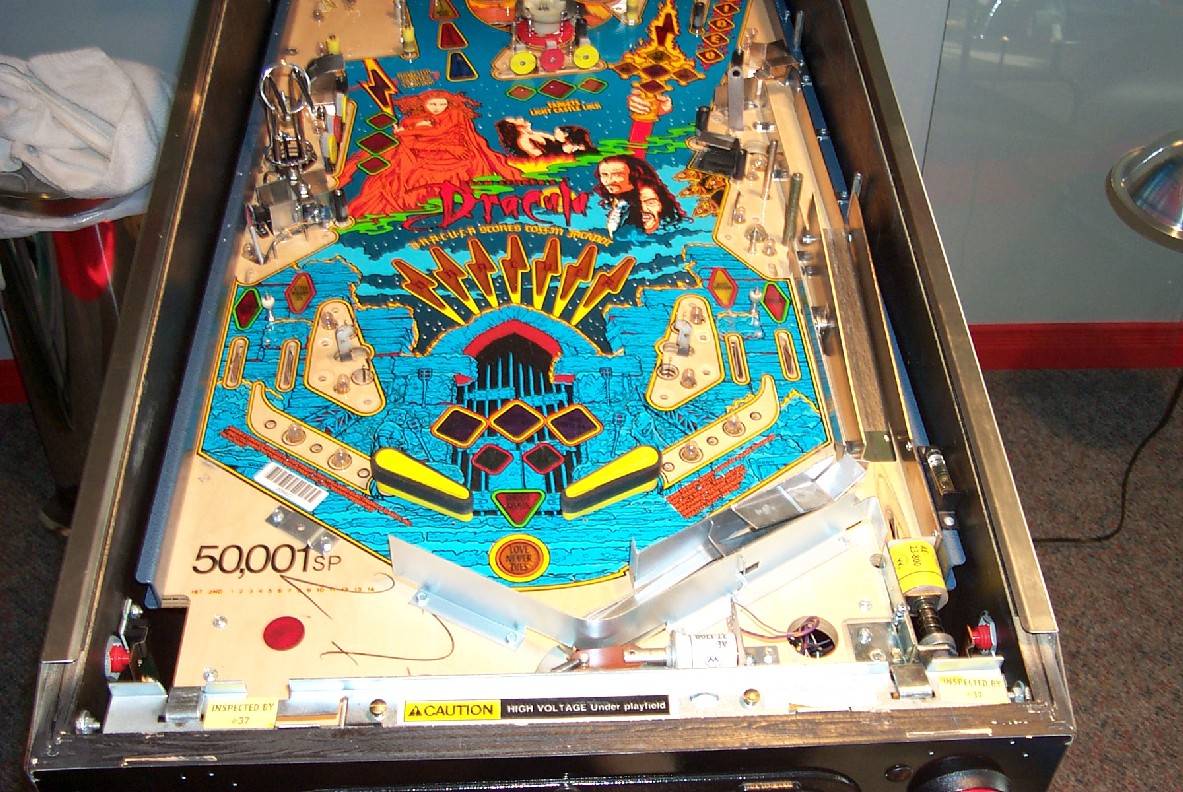
Done with top of playfield.
Note that if you want you can remove even more stuff. The ramp that raises to lower the mist ball comes off with a bit of work, but you can clean the ramp and underneath it easily without removing it. Also, you can remove any additional ball guides and posts at this time.
Raise the playfield.
If you are going to rebuild flippers, change coil sleeves, or links, remove the flipper shafts at this time.
Now remove the two plastic troughs on the underside.
Remove the left most one first. When removing just pull them through the wiring harness. And take you time.
Remove the 8 multi-light boards and the 4 boards with just one light. Clean the inserts from the back side with compressed air and then any ones that are still dirty use a q-tip with windex and dry with a clean cloth.
Done with disassembly phase.
Now for the cleaning phase.
Clean all the plastics, posts, ramps, lights, etc. Replace any lights you want, change to 47's if you feel like it. Make sure replace bulbs in the hard to reach places - under the coffin, jet bumpers, under the troughs, etc. My feeling is that you've already gone to so much trouble, spend the extra $20 and replace all the bulbs. It's takes about forty number 44 or 47 bulbs for the playfield.
Replace rubber rings and rubber posts.
Note, Dracula came with white rubber rings and black flipper rings.
Here's the rubber ring chart: