 Christmas
Tree & Accessories Tutorial
Christmas
Tree & Accessories Tutorial 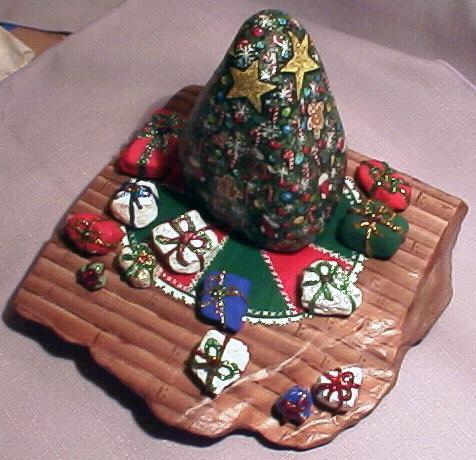
Christmas
Tree & Accessories Tutorial
by Jane Blatt
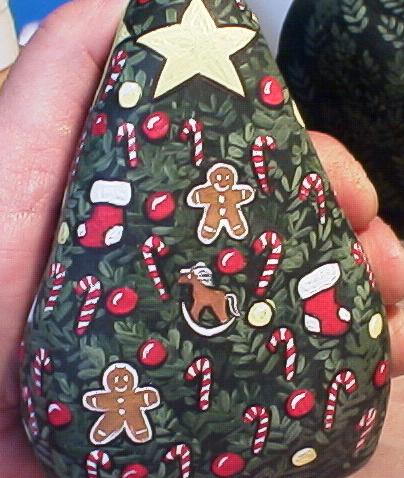
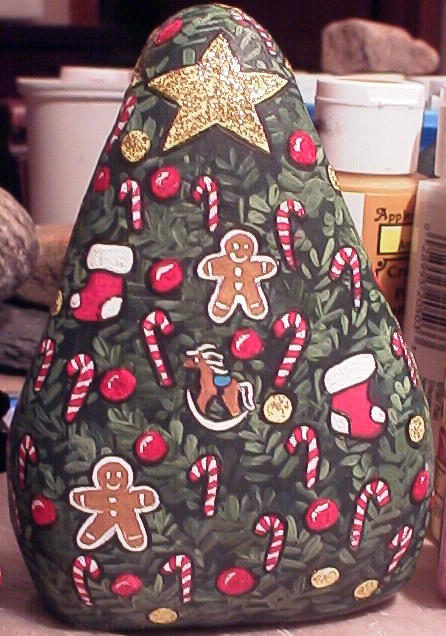
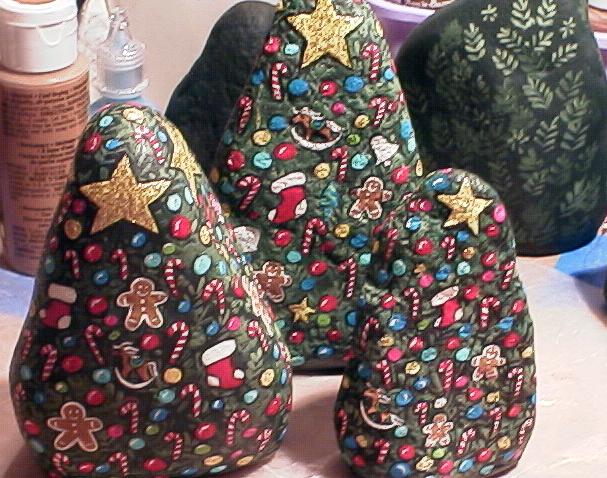
THE FINISHED SETTING
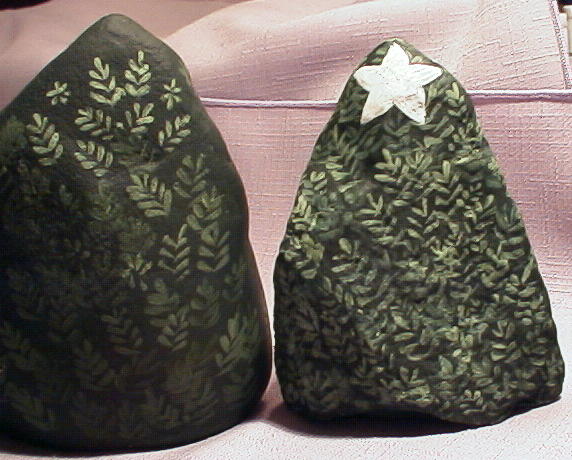
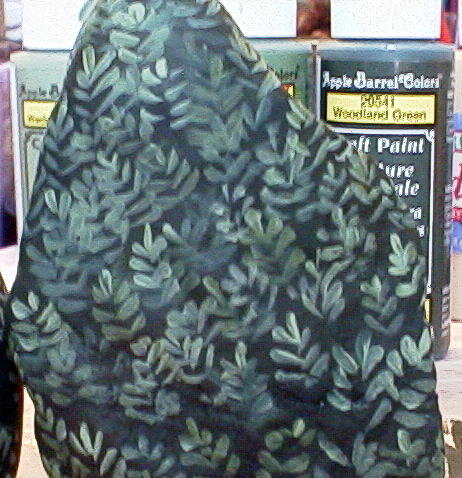
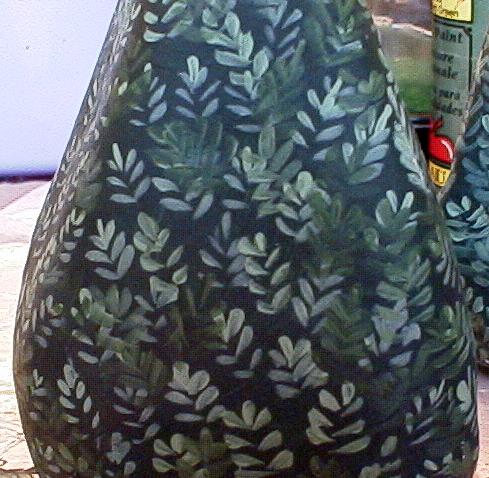
1. Base coat the tree with WOODLAND GREEN with BLACK mixed in., BLENDING WHILE YOU PAINT SO THE COLOR ISN'T UNIFORM. I mostly let the brush stroking mix the paint as I apply it so the shadows deep in the tree vary. ( All colors used are Apple Barrel)

2. BOUGHS: ...use 3 colors....VINEYARD, WEDGEWOOD, HUNTER ...pick up some of each color on the brush each time, don't mix them....you want the different shading to show...some boughs will be lighter and some darker. Try to get them spread out lighter over darker and vice versa, so you see them ...
HERE'S THE STROKE..... 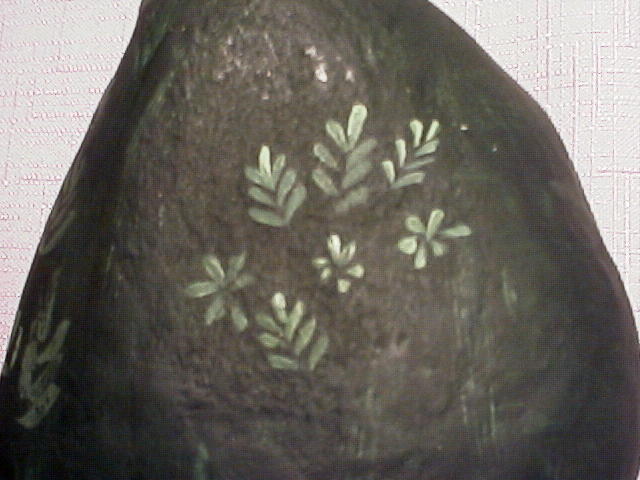
3. PLACE LOTS GOING IN DIFFERENT DIRECTIONS, BUT ALL SLANTED UPWARDS...DON'T COVER THE WHOLE TREE...WE ADD MORE AT THE END.
THE ONE ON THE LEFT IS IN PROGRESS..........THE ONE ON THE RIGHT READY FOR NEXT STEP
More examples...
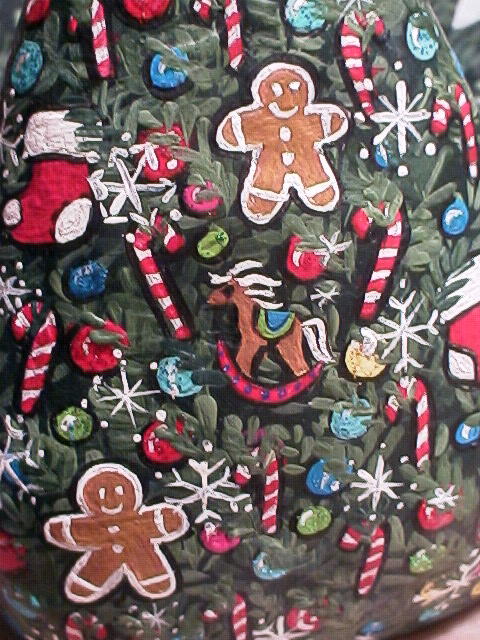
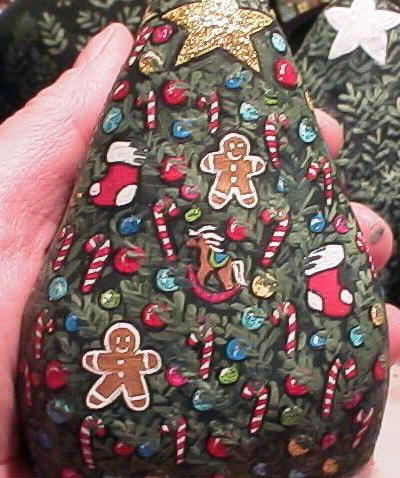
4. ADD WHITE.....PUT LARGE STAR ON TOP OF EACH SIDE OF THE TREE AND PLACE CANDYCANES EVENLY ABOUT, THEN ADD SOME CIRCLES AND OTHER ORNAMENTS...ROCKING HORSE, STOCKINGS, GINGERBREAD. DON'T FILL UP THE WHOLE TREE, LEAVE ROOM FOR MORE LATER (and don't worry if you arent' perfect....whatever is crooked or messy will get covered later....so don't even bother going back to green....just keep going).
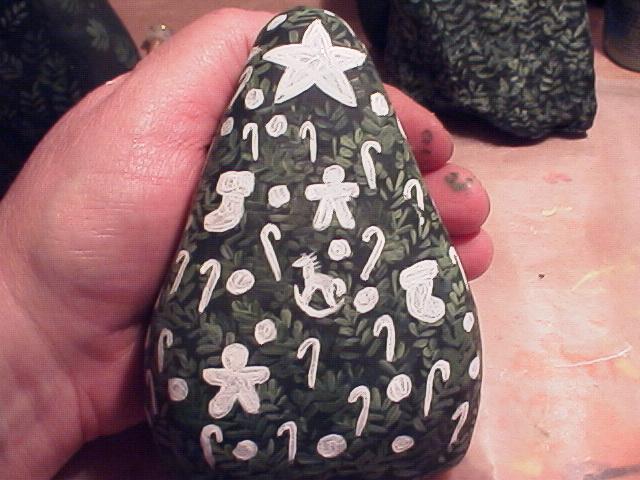
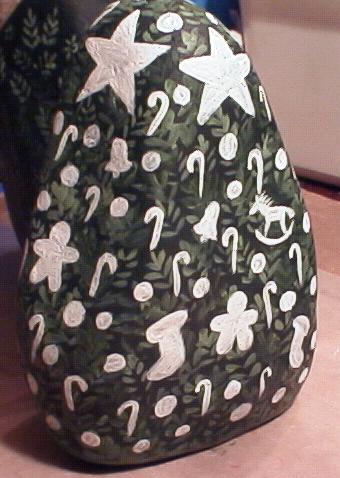
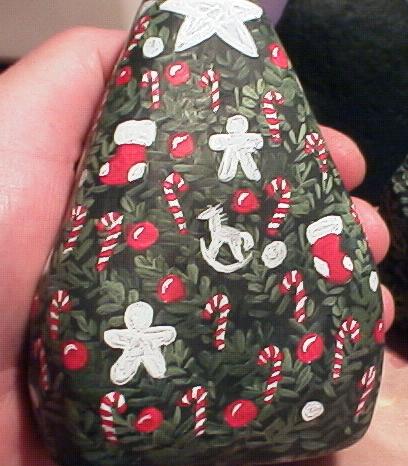
5. BERRY RED.....PAINT THE STRIPES ON THE CANES, THE STOCKING BOTTOMS, AND MOST OF THE BALLS (DON'T WORRY, WE'RE ADDING MORE COLORS LATER...YOU NEED THESE RED BALLS SPREAD OUT EVENLY FOR BALANCE) Don't worry if the canes aren't perfect...we'll get to that....just keep going...no touching up necessary.

6. See, I'm not that neat as I go along... BACK TO WHITE......HIGHLIGHT THE BALLS AND MAYBE NEATEN UP A FEW CANES....ONLY DEAL WITH THE CANE ITSELF...THE OUTSIDE EDGES AREN'T THAT IMPORTANT RIGHT NOW. ADD THE TOE AND HEEL TO THE STOCKINGS AND PUT A NICE SECOND COAT ON THE TOP OF THE STOCKING.
Everytime I use the white, I neaten up some of those canes....it's easier than doing it all at once...there's a long way to go, and many opportunities to do it too....lol
7. HONEYSUCKLE YELLOW FOR THE STARS AND THE REST OF THE BALLS.....
8. NUTMEG BROWN FOR THE GINGERBREAD AND THE ROCKING HORSES....THEN BACK TO WHITE TO HIGHLIGHT THE YELLOW ORNAMENTS AND DO THE ICING ON THE GINGERBREAD AND THE MANE AND TAIL ON THE HORSES
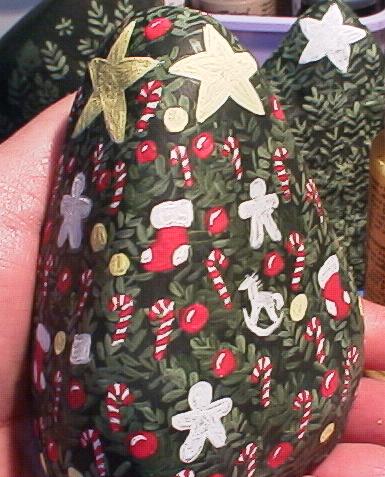
9. BLACK OUTLINE EVERYTHING YOU'VE PAINTED SO FAR... YOU ONLY HAVE TO BE CAREFUL WITH THE INSIDE EDGES....THE BLACK EDGE AGAINST THE TREE WILL BECOME PART OF THE SHADOWS. NOTE: only put black around the underside and part-way up the left side of the balls....you can see I went all around one yellow ball because it was too lopsided...do that too if you have any like that.
This is when I start getting excited about what it will look like finished....I like it neat, and all those messy edges disturb me until I get to this point. You probably could leave all the black outlines until closer to the end and do them all at once, but I do them now.
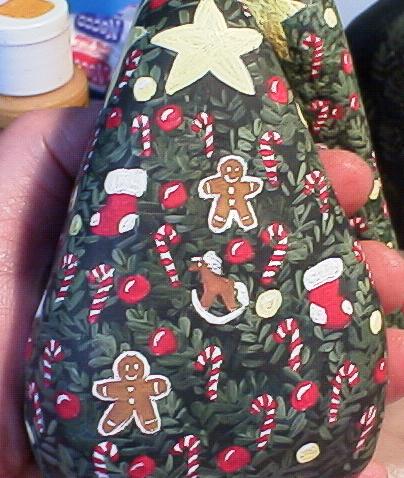
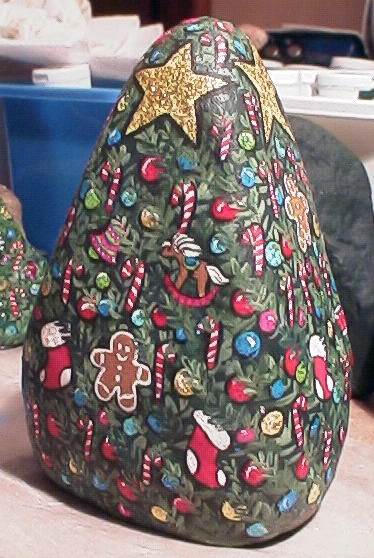
10. Bout now are you wondering if we will ever finish this tutorial? Well, Betty, I warned you, I am very thorough (I'm compulsive, remember) We're getting closer to the end......lol...then there's the base and the presents. Okay, back to work.... ADD SPARKLE.....I USE FABRIC PAINTS FOR THIS, WITH A BRUSH....GOLD SPARKLE OVER THE YELLOW, AND RED OVER THE RED.
EVERYTIME YOU GET A CHANCE, ADD SOME TO THOSE STARS....IT TAKES A LOT OF COATS TO GET IT REALLY GOLD AND STARRY.
11. NOW MORE COLOR....ADD SOME OTHER SHAPES IF YOU WANT.....AND DIFFERENT SIZES

12. ADD THE WHITE HIGHLIGHTS TO THE NEW BALLS AND OUTLINE THE BOTTOMS AND THE LEFT SIDES. I USED THE SPARKLE PAINT THAT MATCH THE COLORS...BUT A CRYSTAL WOULD DO TOO.
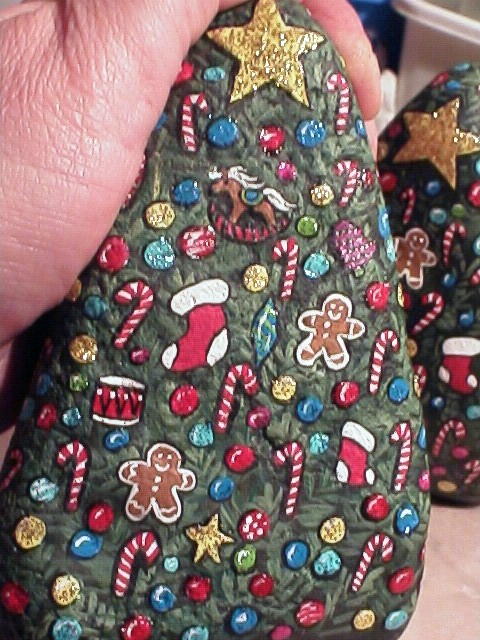
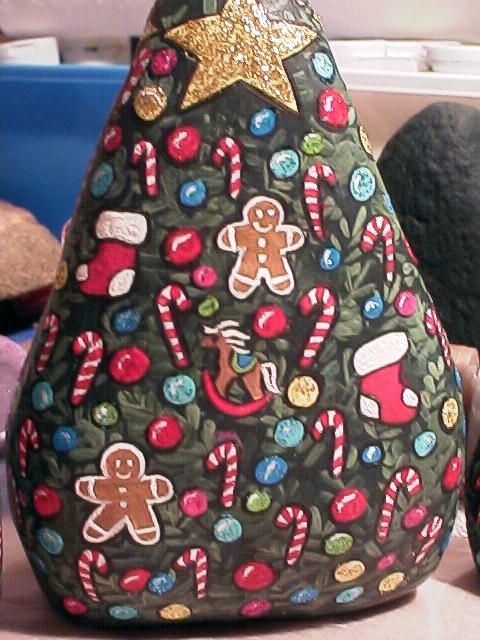
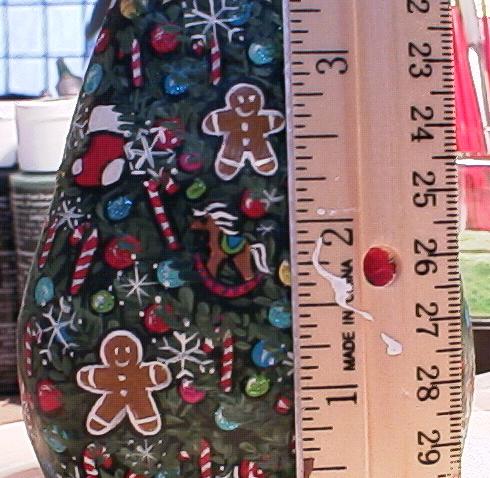
CLOSE UP ....ALL THE NEW STUFF, HIGHLIGHTED AND OUTLINED ...SEE THE SPARKLES? PROGRESS PIC......HERE'S WHAT THE TREE LOOKS LIKE AT THIS POINT ...DONT YA JUST LOVE IT SO FAR?
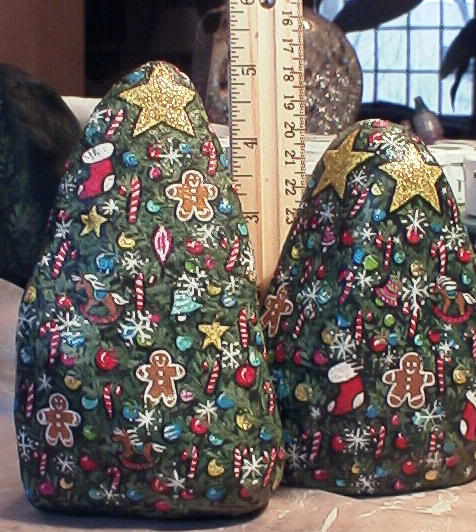
I put some different things on different trees...so here are a couple for ideas....the tree is complex enough with simple ornaments, I don't think I would try to overwhelm it with anything too intricate.
This is the checkpoint......if you want to add anything do it now....
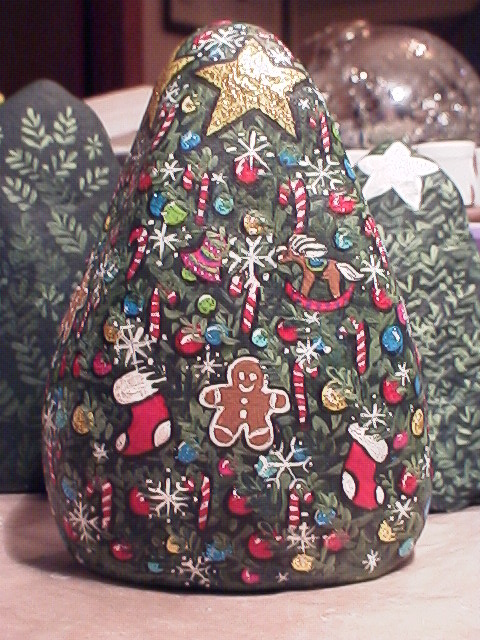
13. Now to make the decorations look like they are hanging on the tree add some greenery......use the same 3 colors, and the same strokes, I think you can see how I did that. I try to get them all, sometimes I miss a few, but that's ok too.
Here's another closeup to see the extra needles....
NOW THE TREE HAS SOME DIMENSION. ((yikes @ the closeup of my hand! I had to hold the piece to get better light....hahaha...can you block me out with PCP? ahhh....just kidding!)
ANOTHER VIEW OF WHERE WE'RE AT ...
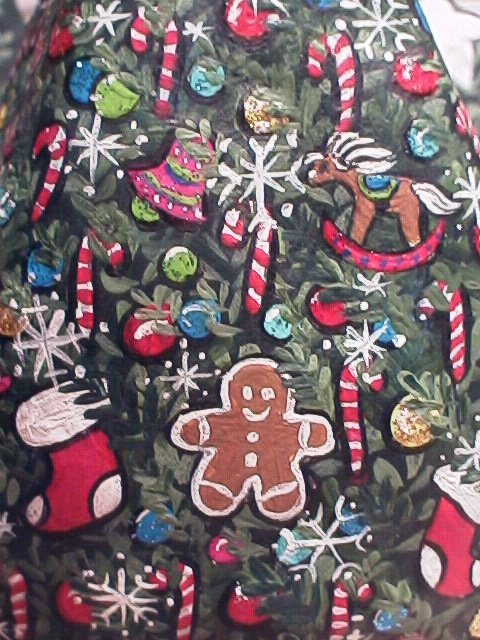
14. ADD SNOWFLAKES.......GO RIGHT OVER SOME OF THE ORNAMENTS BUT STAY CLEAR OF THE FANCY ONES..
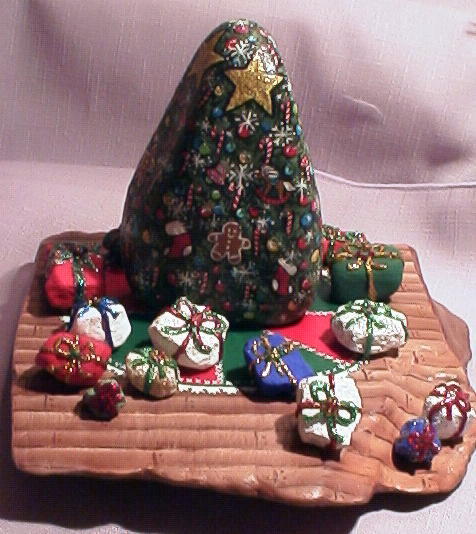
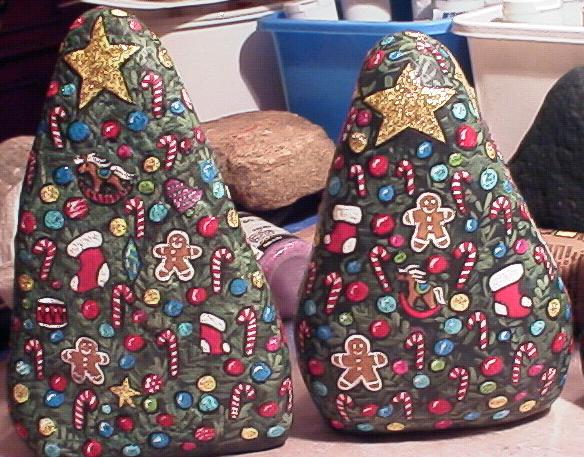
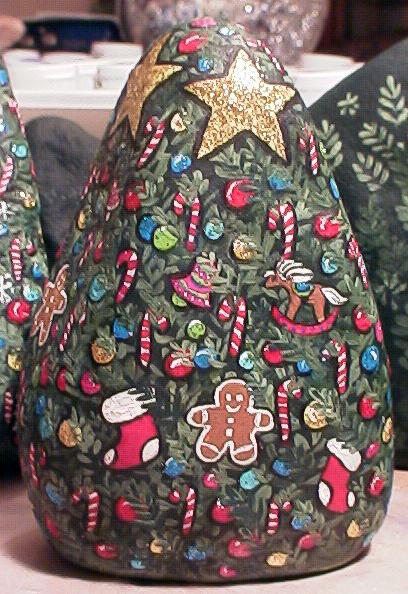
Finished Product
ACCESSORIES TUTORIAL
I've found that the tree looks best with about 15 presents...(can't make Santa look cheap)


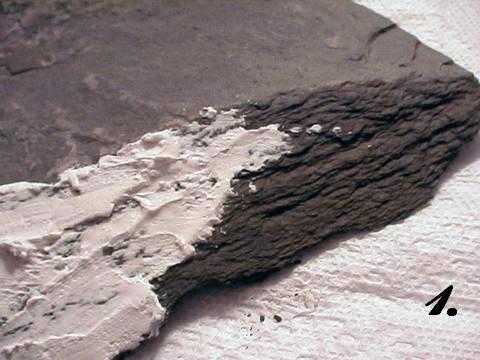
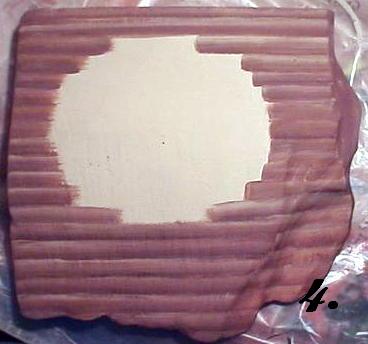
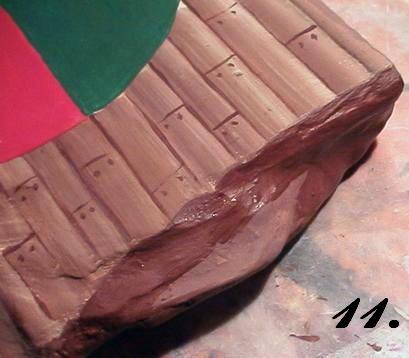
1. Smooth the raw edges of rock use wood filler or grout.
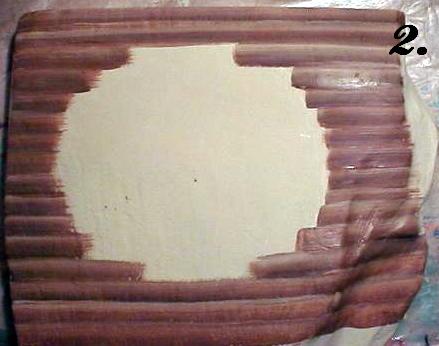
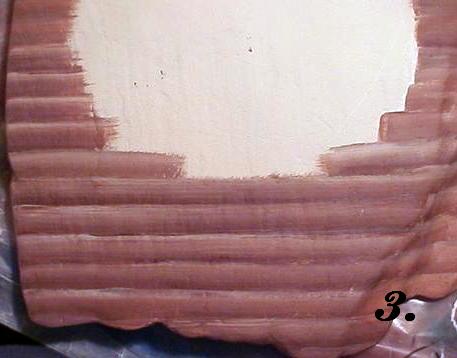
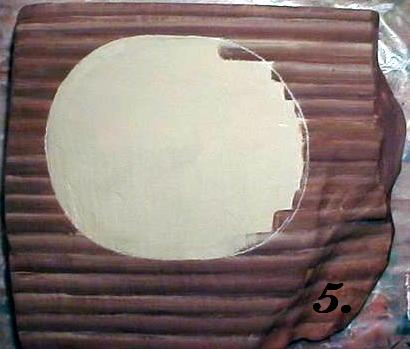
2. Basecoat using Goosefeather leaving rough circle add wood planks .... 3. & 4. 2B use Goosefeather, Nutmeg, Choc bar ..........pick up all 3 colors in that order and stroke across, put enough for 1 pass across.
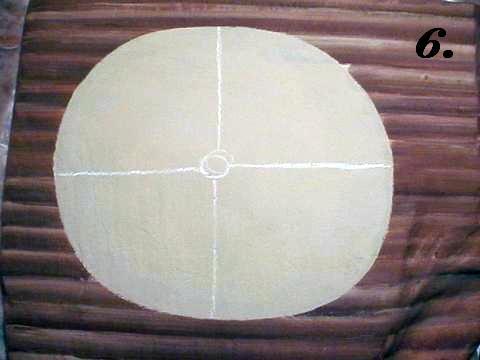
5. & 6. Draw quadrants and small circle in ctr, you dont have to be perfect, I freehand this all.
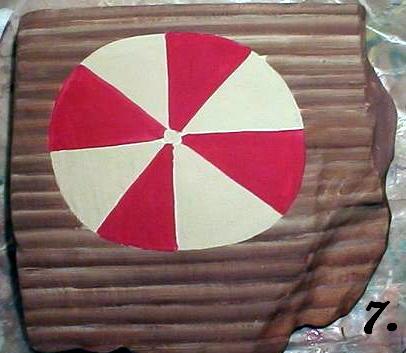
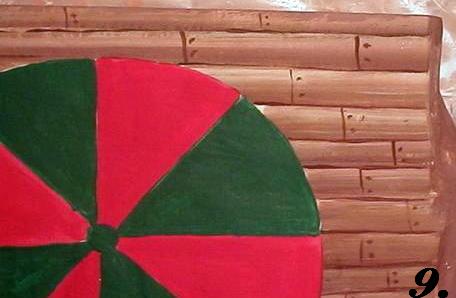
7. Paint half of each quadrant berry red 1. usually 2 coats needed .. 8. Christmas green 2 coats choc brn for the plank definition, go straightish, dont be perfect. (see the nails? )
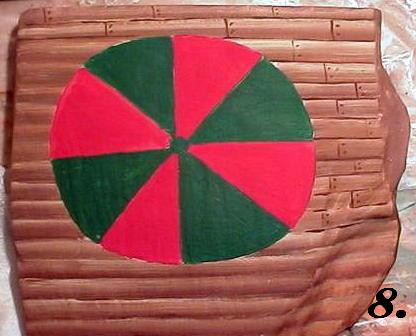
9. & 10. A & B FLOOR CLOSE UP , Now u can really see what to do.
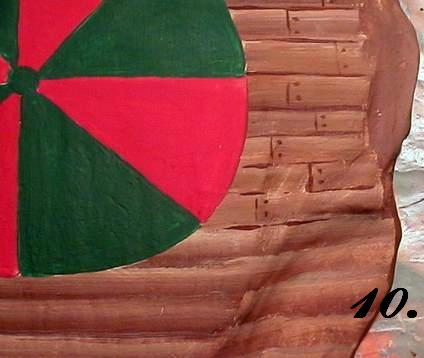
11. Do the sides that aren't planked, actually I made this lighter, it was too dark..use the floor colors, no planks tho.
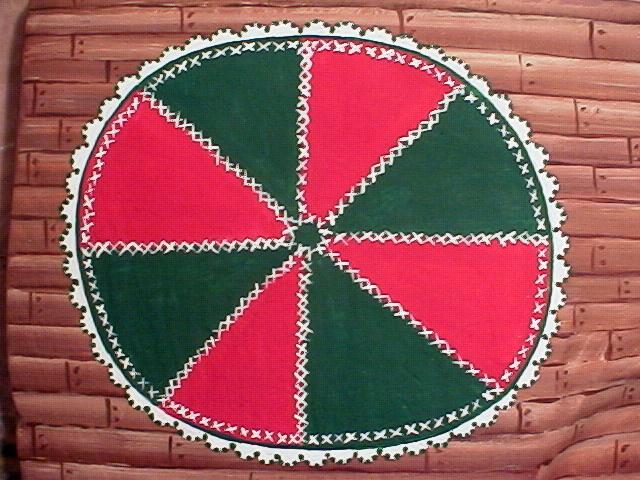
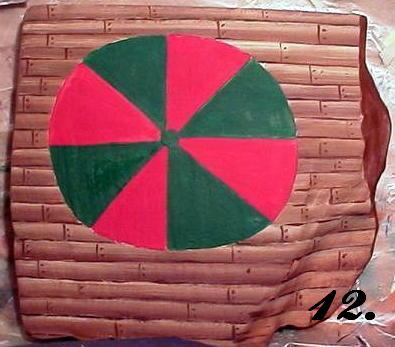
.12. PROGRESS PIC .... YOUR SHOULD LOOK LIKE THIS NOW
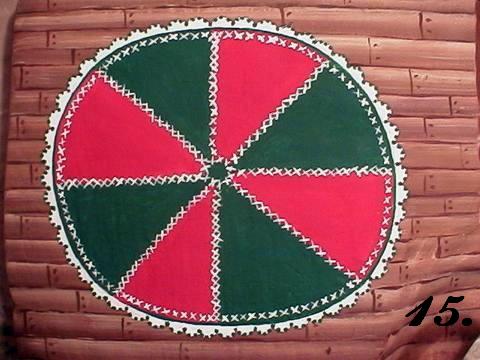
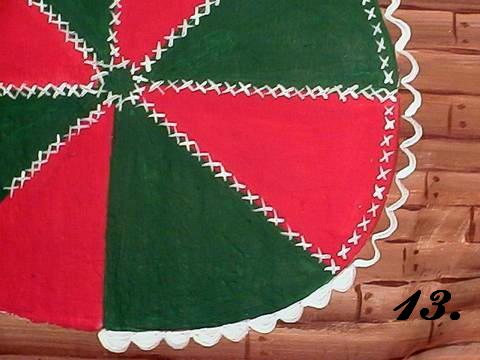
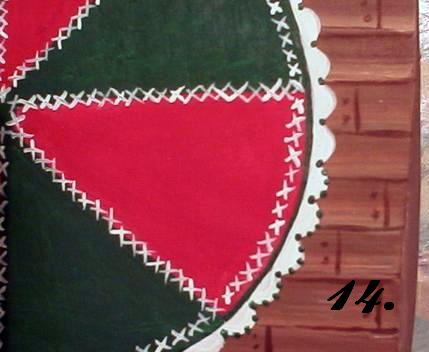
13. Use white and add x stitches as shown, scallop and fill in the perimeter with white. .. 14. Green around the whole circle, add the dots in green as shown.
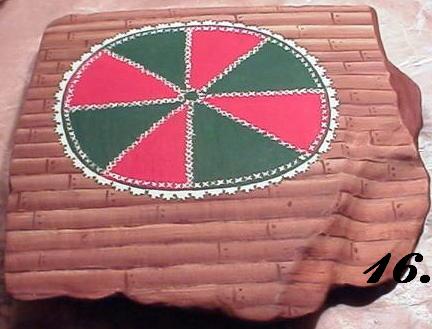
15. FINISHED SKIRT CLOSEUP, IT WILL LOOK LIKE ITS SITTING ON TOP OF THE FLOOR .................. 16. THE FINISHED BASE ... NOW WASNT THAT EASY?