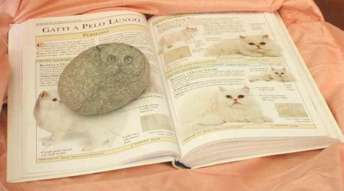
Rita's White Persiano Cat
1. In this project I shall try to give you the basic instructions on how you can paint a kitten on a rock.
First of all: the rock.... it must be smooth, slightly curved on the top and flat at the bottom to provide for a stable base. It must be washed and vigorously brushed to get rid of any dirt or sea salt. You will need acrylic paint in various colors (white, sienna, black, cobalt blue, flesh pink) and different size brushes (1 md to paint the base, 1 sm - 5/0 or 3/0 - to paint the details, 1 script-liner 2/0 to paint the hair of the fur)
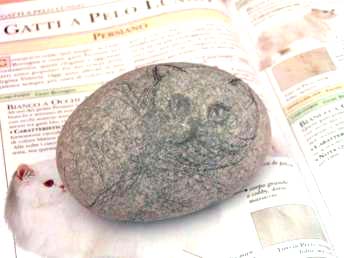
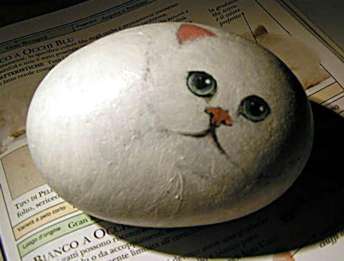
You should first decide (picture 1) which type of cat you want to paint (in this case it is a white persian) and start by outlining the cat profile on the rock considering that the head and the thigh are two circles of more or less the same size (picture 2).
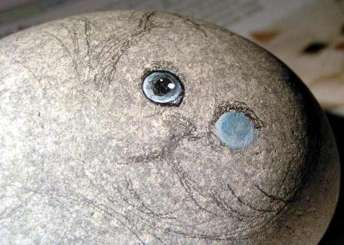
Then you start working at the eyes (note that the persian cat's eyes are very large and round-shaped) painting the base in a very pale blue (white+cobalt blue) and marking the pupils in black (picture 3).
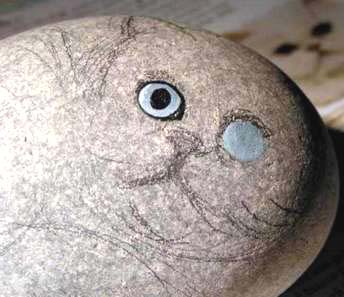
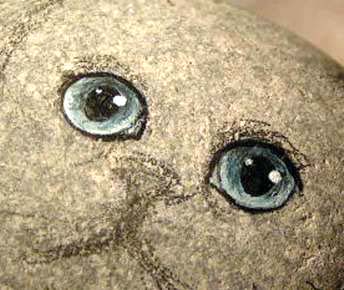
At this point you start painting the shadow of the iris on the sides of the pupils and on the upper part of the eyes using a slightly darker blue, possibly mixed with a drop of black , thus enphasizing the rounded eye shape (picture 4).
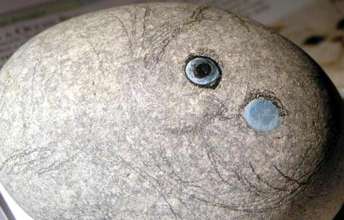
Give the final touch by painting the eye contour with a very fine script-liner dipped in the black color, and then highlight the pupil with two small dots (picture5).
As you can see from the picture of the completed eyes ( 6) there is a small, very light colored half moon at the bottom.
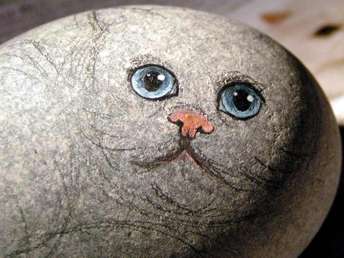
The next step will be the little nose: in the case of the persian cat it is up-raised, very near the junction of the eyes. You can see (picture 7) that it is T-shape, it is painted in a very light pink, and it is subsequentlly shaded with darker tones of the same color. The nose is then outlined at the bottom with a very fine black line which also defines the nostrils and the central "cut". With the same pink color, paint the contours of the ears, making them slightly darker towards the center (picture 8).

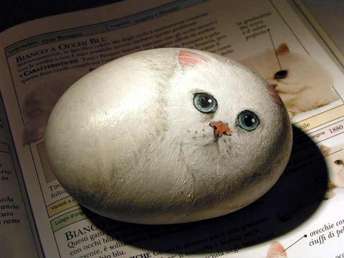
Now let's start with the hair. We can start from the face and from the thigh.... my only suggestion is that, as you paint, you follow the direction of the hair (picture 9).
As an example: the thigh is rounded, sphere-shaped so you will follow the hair direction by applying the paint from the top down to the bottom/outside ..... it sounds complicated, but if you look at the picture of a cat it will appear rather clear. Same thing for the face: the hair goes from the nose up to the ears, on the chin it goes from the mouth towards the bottom, and on the cheeks the hair starts at the base of the nose and from the sides of the mouth and it goes towards the outside. If you succeed in giving the direction of the hair already with these initial brush strokes, you will find it much easier to finish up the cat hair mantel. Proceed to cover the whole rock following this painting method (picture 10): remember that at the bottom you will have a nice, full tail which goes up to the cat face .... so you will not have to go thru the hustle of painting the legs since they will be covered by the tail !!!!
Now let's start with the shadings which will give a tri-dimensional body to our cat ..... With the white paint lightly dipped in raw sienna and/or black (a very pale ochre or an equally pale grey) let's shade the band around the thigh, the face and the tail. Let's take the script-liner (a very thin brush with bristles which are even twice or three times longer than the normal ones) and let's patiently start to draw the hair with the white paint alternated (where needed in order to give more volume) with the two very pale colors that we used for the shadings (pictures 11/12).
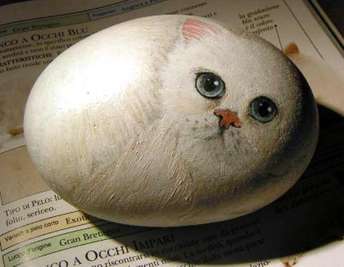
For the fluffy hair of the persian cat the brush strokes will have to be long and firm ..... The same painting technique will be used for the cat's face which will have to be "filled in" with the hair of the ears (this hair will also be very long), with the marks of the root of the moustaches (tiny grey dots) and with all the little finishing touches to be painted in black to define, as an example, the mouth.
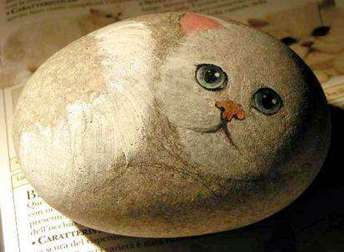
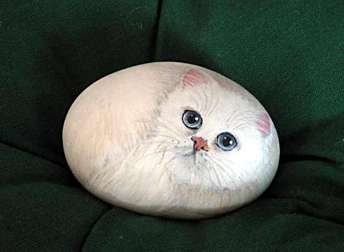
At this point .... are you still with me ?????? Yes ??????? Ok, then at this point we are only missing the "vibrisse", the cat's moustaches which give him the final touch. The moustaches (picture 13) are still painted with the script-liner, in pale grey: they should be long, firmly drawn and well curved: here's are little Persian cat !!!!
Will you show me what you came up with ????