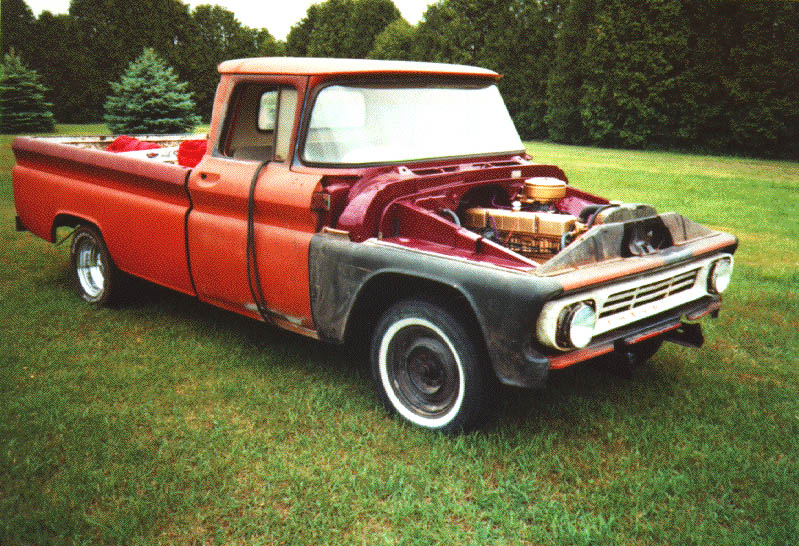
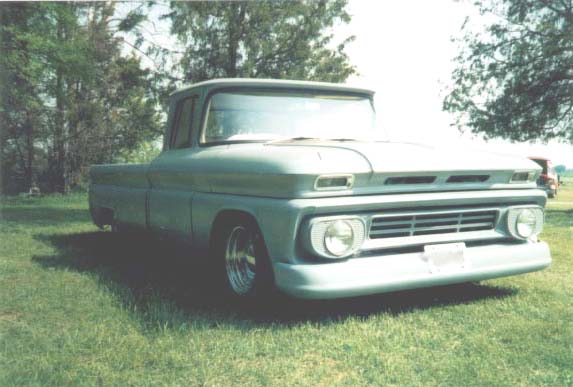
Project: 1962
Chevrolet C10 Pickup *scroll down for more info and pictures*
*3 NEW PICS ARE IN* Updated July, 2005*
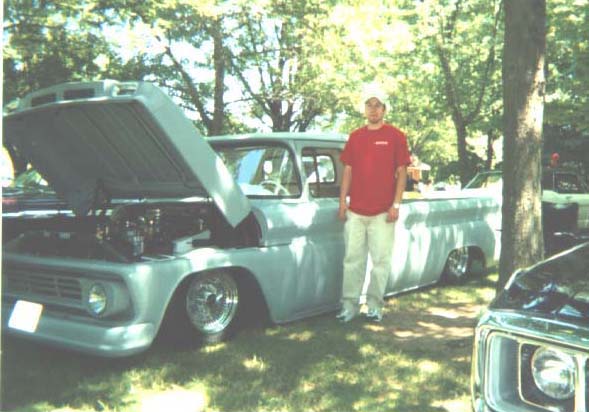
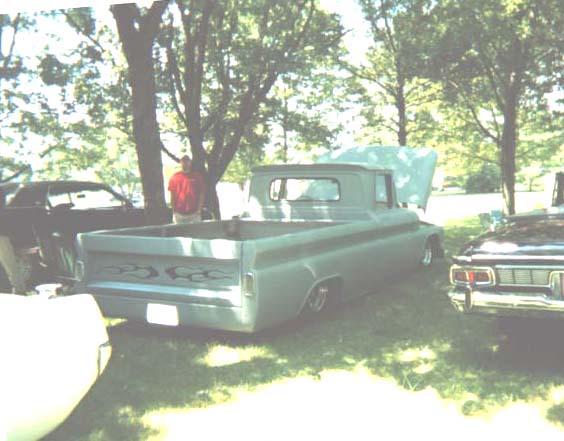
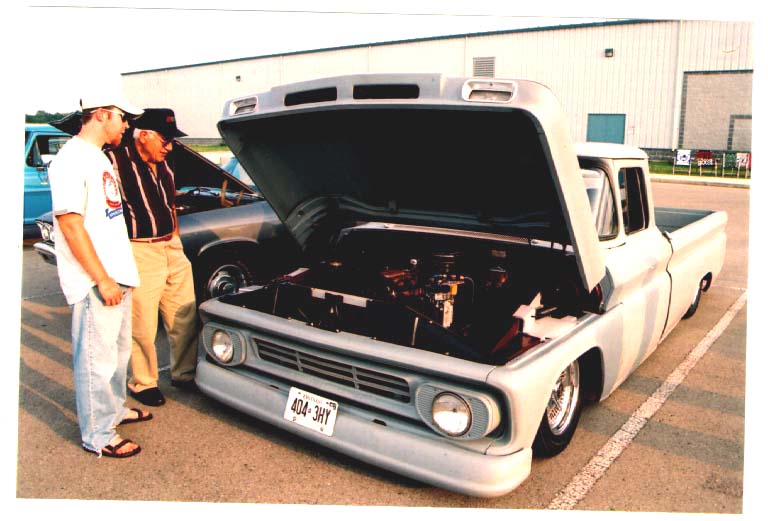
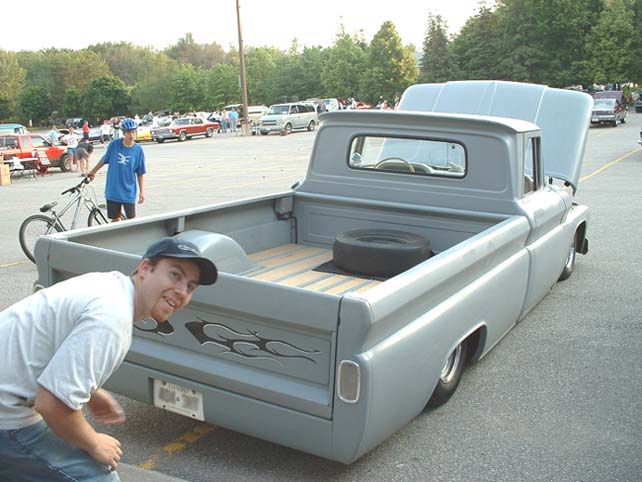
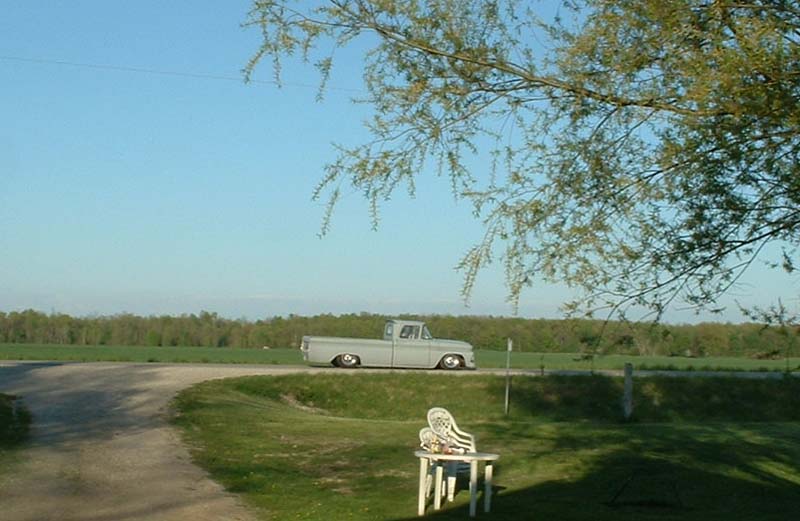
UPDATE*July, 2005* - Drag blocks installed and throwing sparks on the back!! Hopefully in a week or so i will have a short 10 second video of my truck throwing sparks. I am Working on my custom fiberglass console for my truck and i am about 3/4 finished. The back is now lower i built a bigger c-notch and bridge over the winter! (also had to raise the wood box floor about 3.5" not much height left on my box anymore! Also over the winter i repainted the firewall and inner fenders my new "secret" colour! I am planning on painting the whole truck this colour. New carpet installed and white bucket seats will be installed soon. Adding another 6 gallon air tank under the bed for more play time. :) A few new pics from last month i have added, Enjoy!
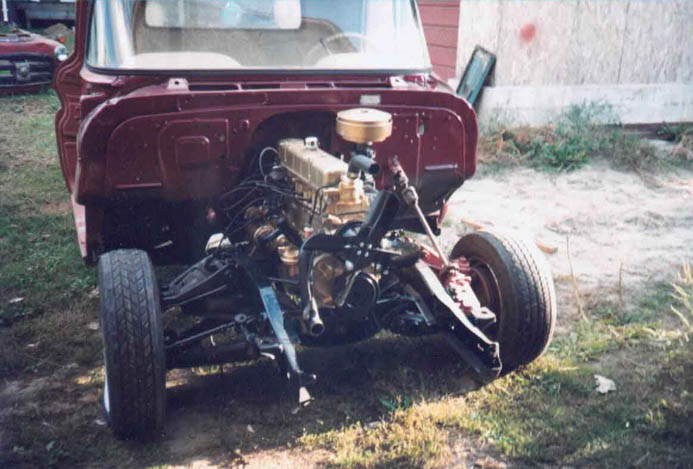
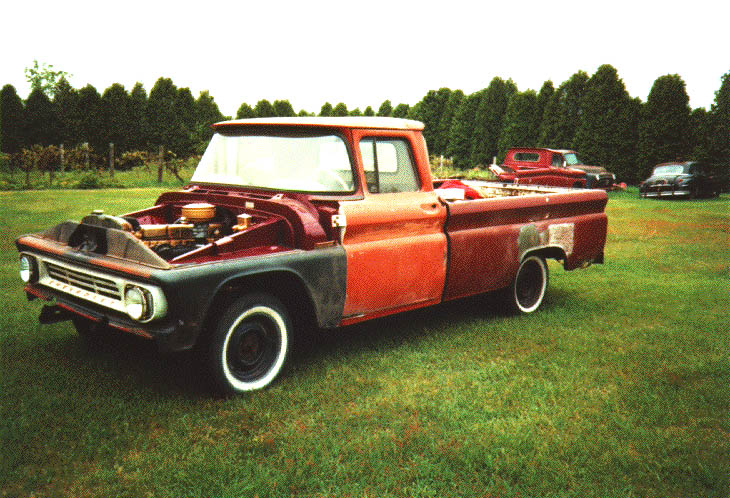
Engine: Original Thriftmaster 235 with matching #'s (1 bl carb.) 135 horsepower @ 4000 rpm. 217 Torque ft. Lbs. @ 2000 rpm. Rebuilt motor. Chrome valve cover hold down bolts, ignition coil cover, generator cover, oil cap breather & air filter. Custom made aluminum carburetor insulater plate, oil filter bracket, heater hose clamp & generater bracket. Custom made york a/c bracket.
Transmission: Originally was 3 speed on column (3 on the tree) but now has a 1986 S10 (truck) 5 speed!!
Tires & Rims: 15" x 7" Crown wire wheel 100 spoke rims, 205/70/15 Front 215/70/15 Back Goodyear Eagle
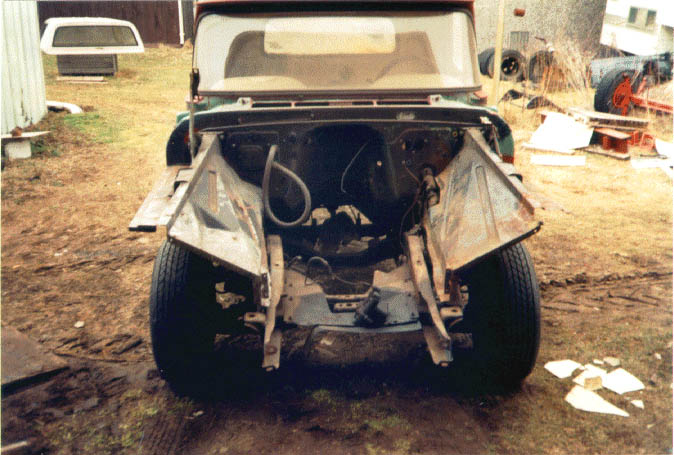
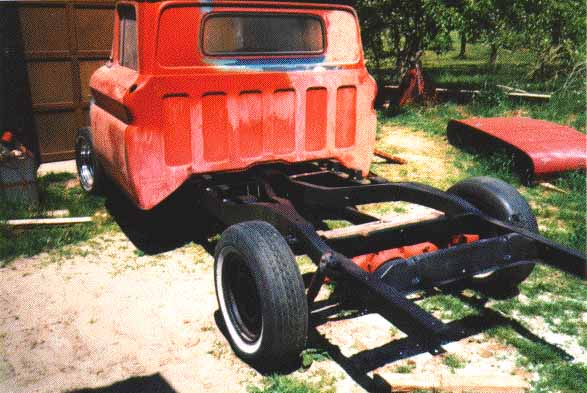
Restoration: Frame off restoraion with frame sanded & sandblasted. This truck has the X frame on it. New dual brake/clutch master cylinder and cluth slave cylinder. All new brake lines, brake hoses, brake fittings, wheel cylinders, brake shoes (Truck has 4 way drum brakes) DOT 5 brake fluid and emergency brake cables. Original ball joints are still on truck! New cherry bomb muffler and tail pipe. New fuel lines.
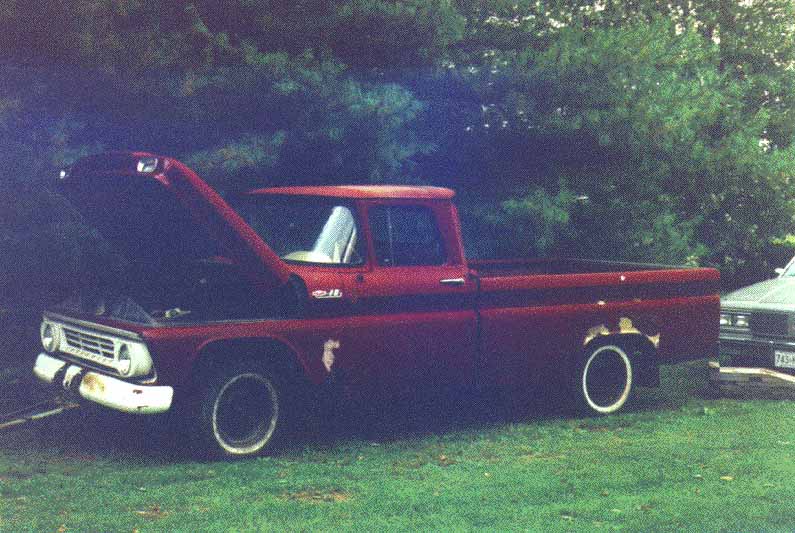
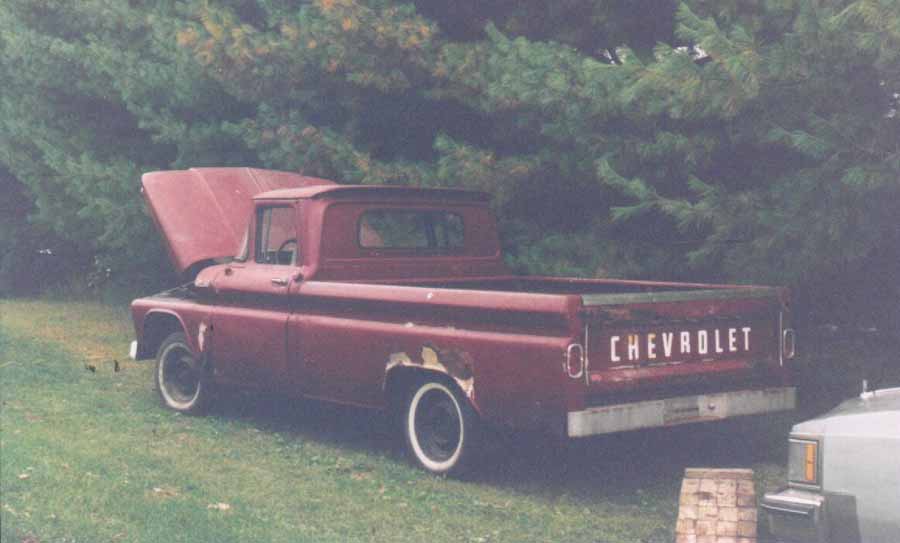
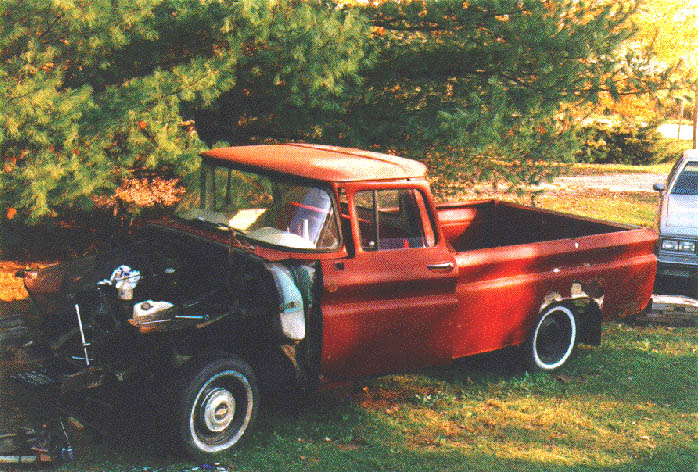
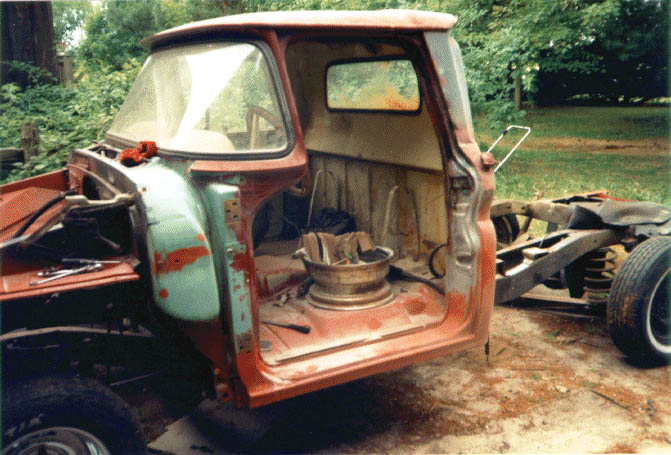
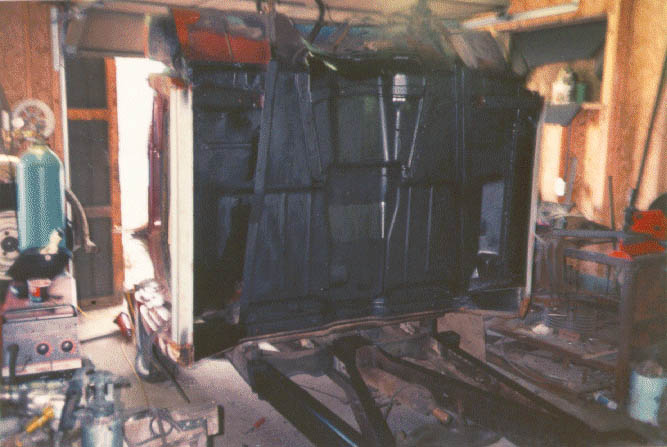
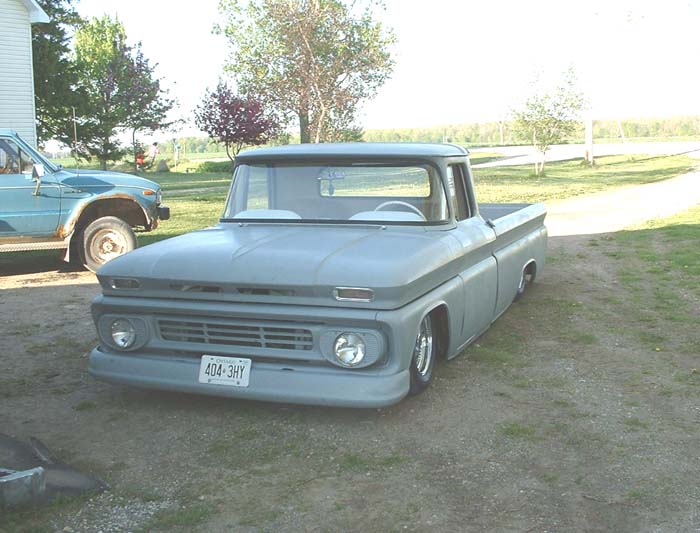
Bodywork: Welded on new rocker panels, cab corners, partial floor, door bottoms, box side over the wheel (on drivers side), Rad cradle area and inner fenders. Everybody panel needed welding except for the hood, grill and tailgate. Every body panel had dents in them somewhere i lost count at how many there were. Truck is now in grey primer (epoxy).
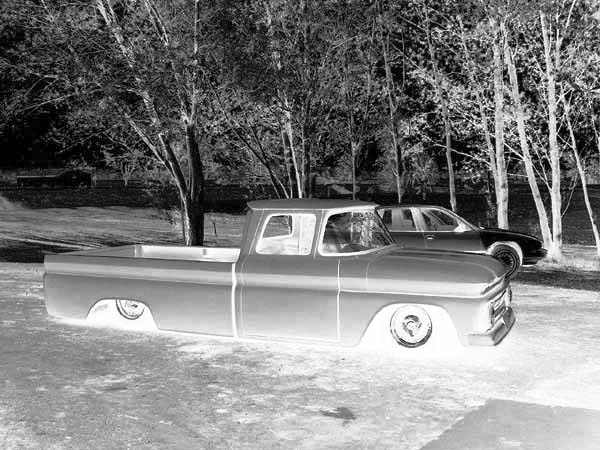
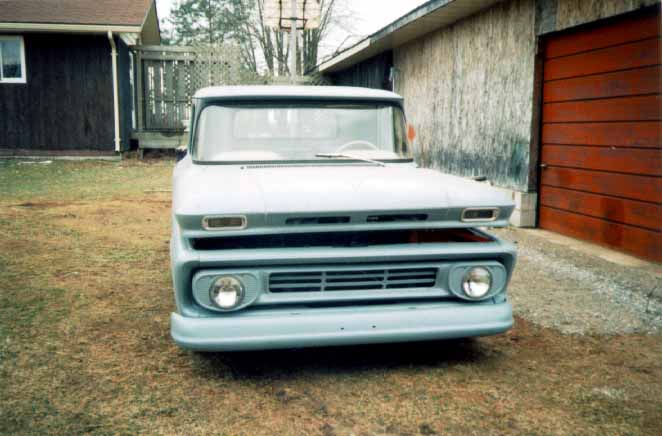
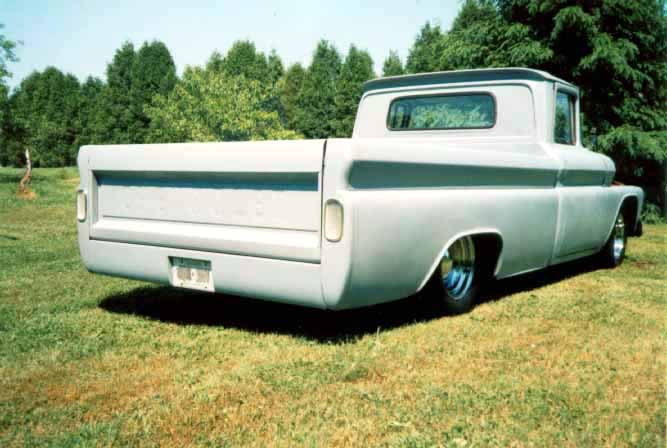
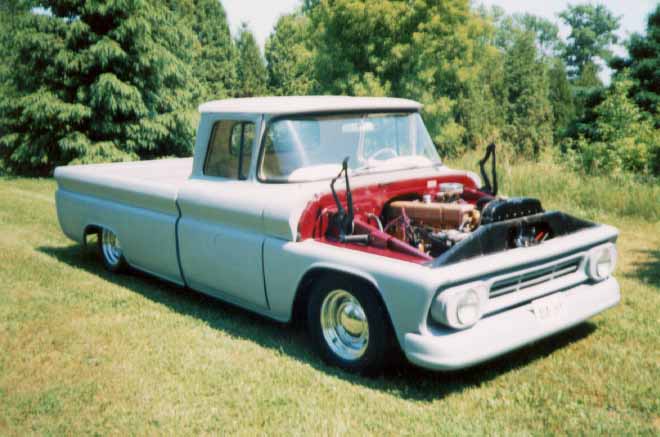
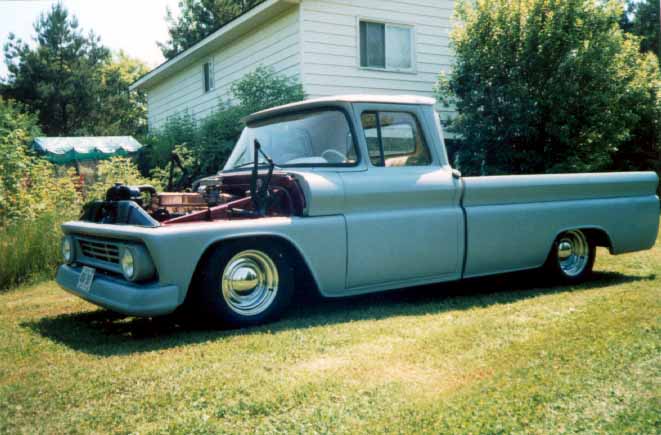
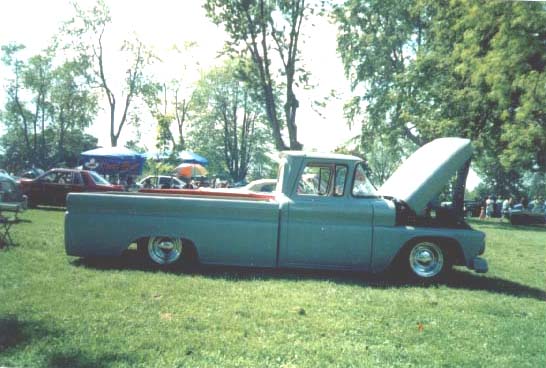
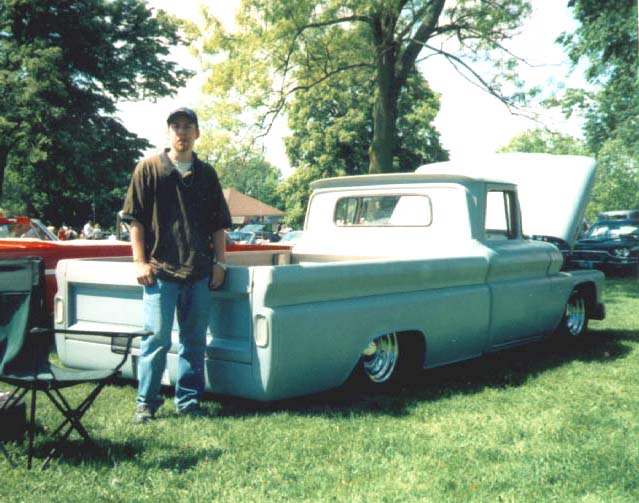
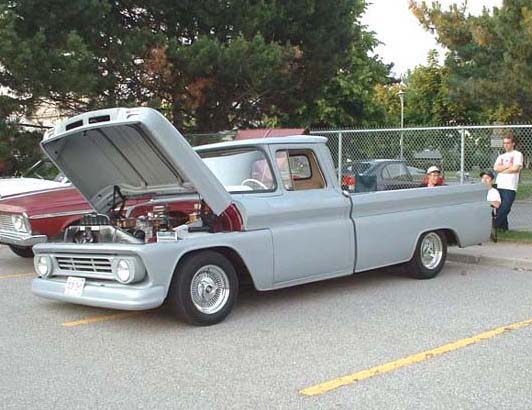
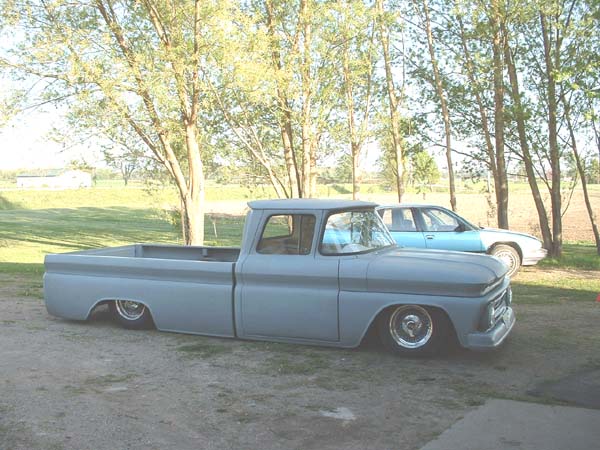
Current Mods: Bagged on the front and rear. 2 1/2" bodydrop (rocker panels are 1" off the ground at the present time), Shaved items include emblems, door handles, antenna, taillgate chains, stake pockets, rear bumper, side mirrors, "CHEVROLET" taillgate letters and front bumper bolts. Fibreglass front fenders. Red LED taillight bulbs. Custom made clear taillight covers & roll pan. Added a york a/c engine mount compressor for my air suspension.
Future Mods & Restoration: Finishing custom fiberglass console, suicide doors? chopped roof? custom grill? Lava lamp in the interior! Playstation and tv.


*How I bodydropped my 1962 (2.5")*:
 I found that 2.5 inches to be the perfect amount to drop the body on my 1962. I could not go anymore without doing alot more major fabricating and anything less than 2.5" would hardly even be worth doing all this work for. My goal was to keep the frame as stock as i could without cutting the frame in half! I achived this by only making 6 cuts on the frame. 4 were the frame cab mounts and the other 2 were the front frame horns (the front of the frame where the bumper bolts on too). I have devided up this article into 5 sections: Frame, Front Clip, Cab, Box, and other modifications.*Note the 2.5" bodydrop was done after i lowered my truck approx 3/5.5"
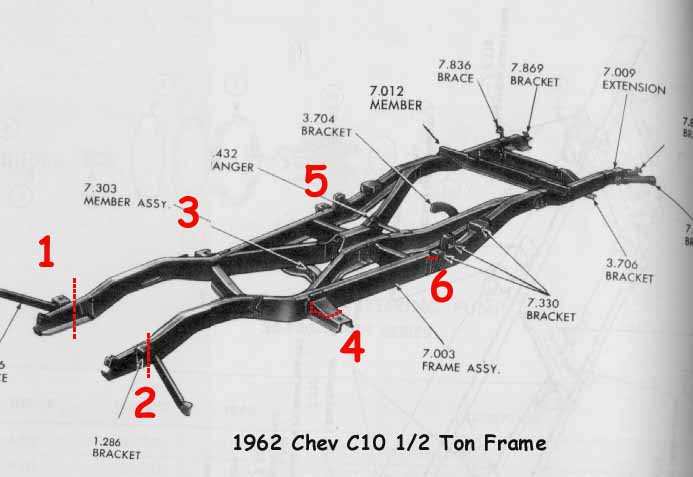
Frame Modifications:(Refer to picture 1-red marks indicate where i made the cuts on my 62 frame). Cuts 1 and 2 are just past the rad saddle panel mounting brackets. These are the frame horns and are lowered 2.5" (extra bracing added to make as strong as original.) This step is important because it will lower your hole front clip and bumper at the same time so your body lines up. Cuts 2 & 3 are the front cab frame mounts. These were cut where it starts to curve up and made flat (even with the end of it and the stock hole is still in the same spot) Cuts 5 & 6 are the rear cab mounts. The tops were cut of these then welded back on lower, Not the full 2.5 inches because i made the rubber cab mount bushings not as high. (Refer to picture 2 - This is how the frame looked after i cut it and did the rewelding. (Refer to picture 3 - this is some pitures i found on a website showing how the front frame horns should look like after its been cut and dropped. *Note this pic is from a 63 Frame and it is more than 2.5" drop. Looks more like 3.5" or 4"?)


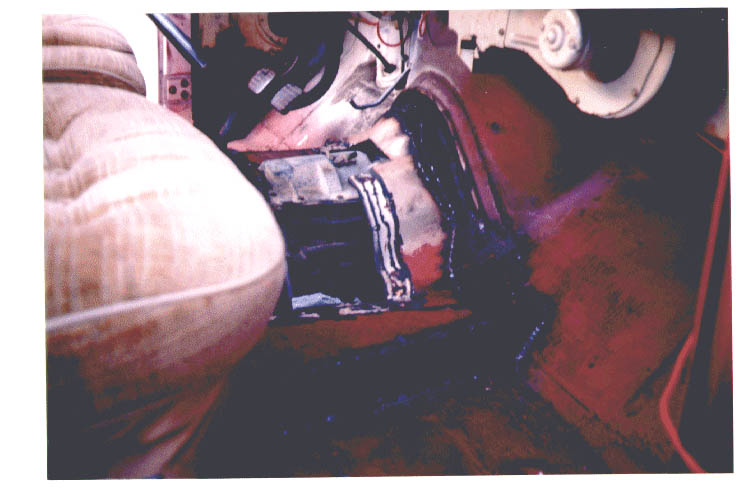
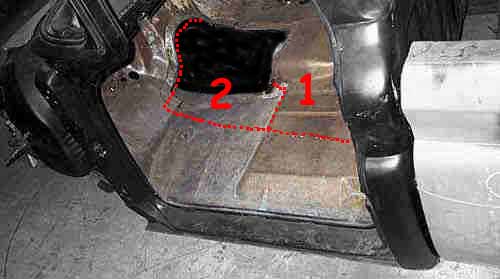
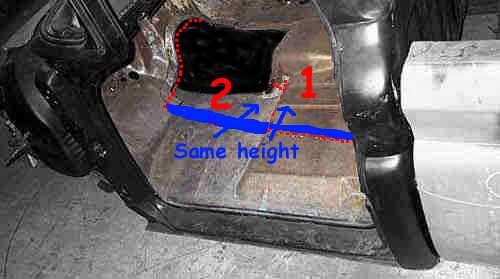
Cab Modifications: The cab modifications are the next step i did after the frame. I found the cab to be the hardest of all to do and the most time consuming. I marked on the cab floor where the outside where the frame rails run along. Then added an extra 1", 1.5" or so and remarked the line from the back of the cab to the front. I first cut the area of the floor hump an and inch or so underneaththe seat area.(red #1) I raised this section to the height of the highest spot on the back the floor (the part the gas tank sits on). I welded in a 1" or so strip on long both sides connecting the orignal floor and to the raised part. (picture 2 - red #1) Next i cut out area 2 (picture 1) and raised this 2.5". Added in a strip of metal along both sides. (Blue indicates the new metal welded in almost straight up but on a slight angle inward. The hardest part was around the transmission hump part it was like putting a jigsaw puzzle back together since the metal goes in two differnt directions. I had to make about 25 cuts in the hump area alone. Also i had to do some fancy cutting for the area that the clutch slave cylinder goes under. I cut the hump part about within .5" of the factory seam at the top. I had to raise the front cab mounts approx 1.5" and notch out the brace on the cab floor (that goes from the front to the back) just the area beside the cab mount and reweld the notch back in to make as strong as factory. The rear cab mounts on the cab i left they way they were. I also had to notch the brace in the middle of the back (the brace between the 2 rear cab mounts crossways at the back) So it would clear the middle of the x frame box where the driveshaft goes through. I cut about 4" off this for the length then rewelded back in (about 1" height was takin off this as well). After i set the cab back on the frame i had to remake the front rubber cab mounts and the rear ones. The rear ones are now about 1/4" thick. I also had to cut the lip off the back of the cab in the middle about 4" long to clear the x frame box where the driveshaft goes through.

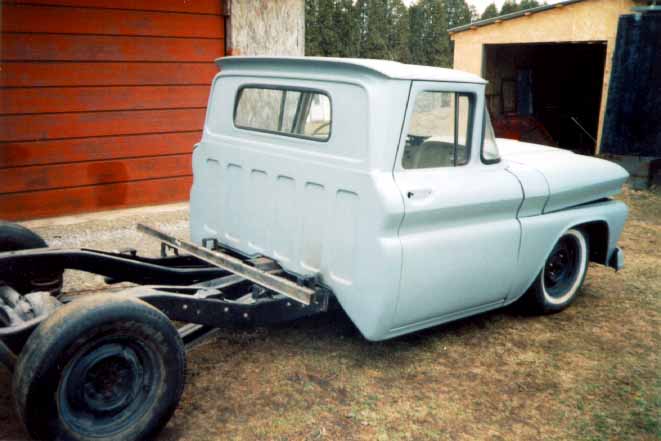
Front Clip Modifications: Next I did the front clip modifications. This was actaully very easy! With the cab back on i had to notch out the inner fenders at the bottom to clear the control arms, shocks and any other components. *Note i did this AFTER the inner fenders were painted!!* Which was tricky but i used a bodyshop method to i did not burn any paint. That is all that has to be done to the front sheet metal! The front rad saddle panel bolts in and is now 2.5" lower because of the front frame horn was cut and lowered. Now that the cab is 2.5" lower and the front clip is back on it it now looking like a truck again. Bumper is also straight forward bolt on because of the frame horn being cut and lowered.
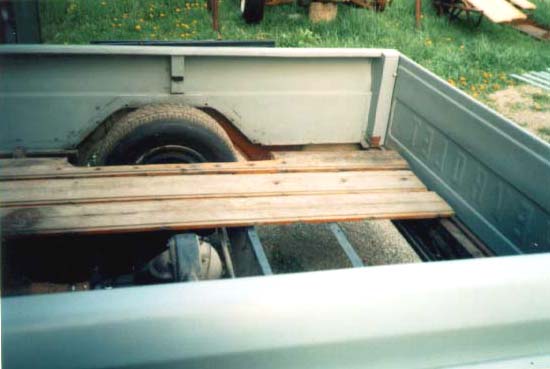
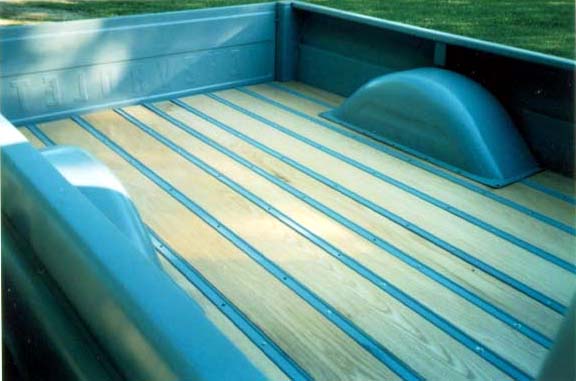
Box Modifications:The next step i did was the box modifications. I had to come up with some creative thinking so i would not have to cut the box sides at all but also did not want to have the frame come up through part of the wood floor cause that would look goofy. I decided to cut the ends of the bed rails off about 1.5" on each side of the 5 braces. I then made "L" shaped brackets and welded on the ends of the braces with a hole drilled in the bottom part. These "L" shaped brackets are exactly 2.5" lower than the top of the bed cross braces. I also added a thick strip of steel underneath the new "L" brackets and extended them to under the bed cross braces about 3 inches. Next i got a 3/4" strip of wood 1.5" wide and cut them to set on the front and rear bed cross braces. Drilled holes in this piece of wood to align with the "L" shaped brackets and the box side holes. This is for support cause thes new "L" brackets (and thin srip of wood are what your box sides bold on to now! (the wooden strips are bolted underneath the box side lip and over the new "L" shaped brackets). The last thing i did was the rear brace (where it bolts over the frame) i made the part on the brace thinner and put it inside the frame, this gave that piece the 2.5" drop that i needed. The only other modificaion i made on the box sides was to notch out the stake pocket brace under the whell well about 1 inch so the wheel well would fit under. So now the box is 2.5" lower but it retains the stock floor height and the wheel wells are also same height as stock. The only other problem is now there is a 2.5" step when i open the tailgate.
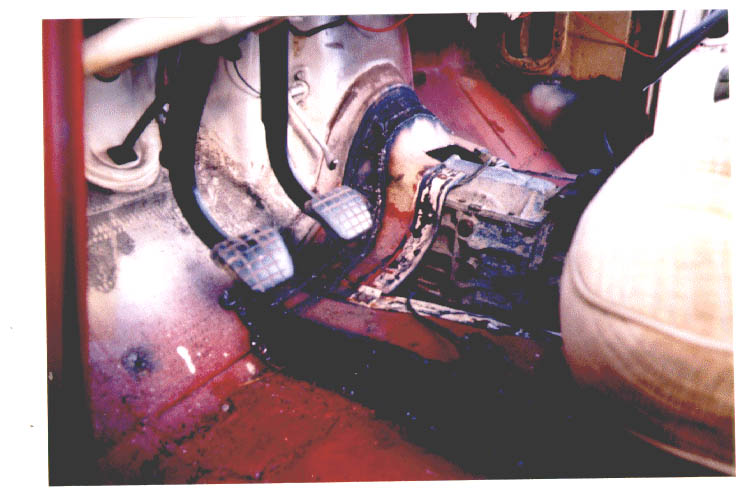
Other Modifications:After i had the whole body dropped and bolted back on the frame there were a few other modifications i had to make. 1. This is one of the most important thing to look for. The steering column shaft. Lucky for me someone had already put the wrong steering wheel shaft in my truck which had a universal joint in it. This allowed the steering column to hook back up under the dash in the original spot. If your truck does not have a u-joint on the shaft you will have to put one on or do some other kinda modification. 2. I had to shorten a brake line that ran down the firewall from the master cylinder 2.5". 3. I had to make the gas pedal linkage (on the firewall part) into a "z" shape because original was too long and was hitting the motor after the drop. 4. I had to raise the radiator approx 1.5" (because the motor is at same height but now the rad is 2.5" lower) I wanted to rais it more but i couldn't because the hood would not close. I am still using the origianl radiator hoses but the bottom one had to be tied back so it would not rub on the fan. The top hose works fine but it just kinked slightly. 5. I had to readjust the choke cable and gas linkage length (from the fire wall to the carb.) 6. The front bumper braces (that go from the ends of the bumper to the frame) have to be modified. Since where they bolt on the bumper to the frame now has a 2.5" step. 7. A few other things to consider are my brake pedal is now 2.5" closer to the floor so it takes a while to get used to. I thought about cutting the pedal braket shorter to raise it up but i am used to it now the way it is. Another thing is the gas pedal is 2.5" higher than before. Another thing i had to get used to. The linkage rubs behind higher on the pedal but i have not had any problems so far. I still could cut the linkage shorter but chose not too. 8. I had to get a lower profile air filter assembly to replace my stock oil-bath filter.
*Words of Advice:Before ya start cutting anything measure everything about 5 times! And NEVER sacrafice looks for safety! Where new metal has to be welded in use the same guage thickness as old metal or thicker! I am happy with the way the 2.5" bodydrop turned out it was more of a challenge for me to see if i could do it. And i accomplished my goals to keep the frame as stock as i could, leave the motor the original height, not to "Z" the frame, not to put in a different front suspension and to keep the body panels as stock as i could. If i ever have to replace a body panel i won't have to do any cutting to them. (except inner fenders and 1" notch on the middle stakebed pocket boxes) 90-95% of the people that see the box don't notice that i lost 2.5" for the depth. Also when i put the mat back in the cab floor the step notch in part of the floor is covered and not that noticeable either. This is just how i did the bodydrop and i feel it is the best way for how i want to keep my truck. My 62 now has approx 5.5/8" drop with the original 4 way drum brakes and original spindles! *note the frames on 63-66 are diffferent than mine.