I've learned to use te image tag and its attributes: src, width, height, border, align, alt, hspace, and vspace. Let me demonstrate:
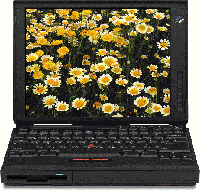 This image was taken from Barry's Clipart. I accessed http://www.barrysclipart.com,
searched for computer, and found this image on page 5. I right-clicked the image
and saved it to my lesson3 folder as exer3.gif. Notice the placement of text
around the image.
This image was taken from Barry's Clipart. I accessed http://www.barrysclipart.com,
searched for computer, and found this image on page 5. I right-clicked the image
and saved it to my lesson3 folder as exer3.gif. Notice the placement of text
around the image.
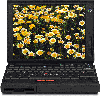
 I opened this image in Microsoft Photo Editor and changed the image size to
100x95 pixels and reszved it in my lesson3 folder as exer3a.gif. I know that
I must always determine the exact height and width to make the image load
efficiently. Notice that the image is smaller.
The default for the border attribute in newer browsers is "0", but for those
using older browsers, I should specify "0" so they won't see a border. I can
specify a border by stating the value in pixels. Notice the addition of a border.
The default for the align attribute is bottom, but I can specify top, middle,
left, and right. Notice that the image moved to the right side the paragraph
and text now aligns to the top.
The default for the align attribute is bottom, but I can specify top, middle,
left, and right. Notice that the image moved to the left side of the paragraph
and text now aligns to the top.
This image is aligned to the top.
This Image is aligned to the middle.
This image is aligned to the bottom.
The default for the alt attribute is no description, but I can add
a description of the image for clarity or for those using text-only browsers.
Point to the image and notice that a description appears. This description is
only available when an alt attribute is used.
To add space around the image, I use the vspace attribute to add space
vertically and the hspace attribute to add space horizontally. This space
is specified in pixels. Notice that the text is now a distance away from
the image.
I opened this image in Microsoft Photo Editor and changed the image size to
100x95 pixels and reszved it in my lesson3 folder as exer3a.gif. I know that
I must always determine the exact height and width to make the image load
efficiently. Notice that the image is smaller.
The default for the border attribute in newer browsers is "0", but for those
using older browsers, I should specify "0" so they won't see a border. I can
specify a border by stating the value in pixels. Notice the addition of a border.
The default for the align attribute is bottom, but I can specify top, middle,
left, and right. Notice that the image moved to the right side the paragraph
and text now aligns to the top.
The default for the align attribute is bottom, but I can specify top, middle,
left, and right. Notice that the image moved to the left side of the paragraph
and text now aligns to the top.
This image is aligned to the top.
This Image is aligned to the middle.
This image is aligned to the bottom.
The default for the alt attribute is no description, but I can add
a description of the image for clarity or for those using text-only browsers.
Point to the image and notice that a description appears. This description is
only available when an alt attribute is used.
To add space around the image, I use the vspace attribute to add space
vertically and the hspace attribute to add space horizontally. This space
is specified in pixels. Notice that the text is now a distance away from
the image.
 I opened this image again in Microsoft Photo Editor, used the transparent tool
to make the white background transparent, and saved the image as exer3b.gif.
Image files which are in the Graphics Interchange Format (gif) allow me to
make a specified color transparent. This make my image look better on a colored
background.
I opened this image again in Microsoft Photo Editor, used the transparent tool
to make the white background transparent, and saved the image as exer3b.gif.
Image files which are in the Graphics Interchange Format (gif) allow me to
make a specified color transparent. This make my image look better on a colored
background.
 I went to http://www.barrysclipart.com, clicked Animations, clicked Computers,
clicked this image, then right-clicked the image, and saved it to my lesson3
folder as exer3c.gif. I opened it in Microsoft Photo Editor to check its size.
I know that I cannot apply a transparency to an animated gif. This image was
already transparent.
I went to http://www.barrysclipart.com, clicked Animations, clicked Computers,
clicked this image, then right-clicked the image, and saved it to my lesson3
folder as exer3c.gif. I opened it in Microsoft Photo Editor to check its size.
I know that I cannot apply a transparency to an animated gif. This image was
already transparent.
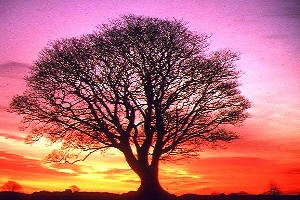 I went to http://www.freefoto.com, clicked on Nature then Trees then the first
picture. I right-clicked the image and saved it to my lesson3 folder as exer4d.jpg.
I opened it in Microsoft Photo Editor and resized to from 600x400 to 200x133
and resaved it.
I went to http://www.freefoto.com, clicked on Nature then Trees then the first
picture. I right-clicked the image and saved it to my lesson3 folder as exer4d.jpg.
I opened it in Microsoft Photo Editor and resized to from 600x400 to 200x133
and resaved it.