 |
|
|
|
|
|
|
|
|
|
|
|
|
|
|
|
|
|
|
|
|
|
|
|
|
|
|
|
|
|
|
|
|
|
|
|
|
|
|
|
|
|
|
|
|
|
|
|
| Simple Barrel UV mapping by Peter Chovanec (Wings3D AutoUV) |
|
|
 |
|
|
All right, if you've so much as used AUV in the past, you can probably move on now. This is for the ultra newbie types, who have perhaps been too intimidated to even try AUV.. Nothing advanced here.. not even medium for that matter. All real low level, basic, as-easy-as-it-gets work. Just something for people to try, get their feet wet so to speak as far as AUV goes. Also note that you shouldn't get too hung up on the workflow here, it will vary from model to model. And in most cases you would start the UV process first, and only then create the texture. But since this case's so easy and basic, we can get away with starting with the texture first (have it ready to go I mean, rather than drawing it according to a UV template later) ��P.S this was done in Wings 0.98.31, so if in doubt.. download that version or newer.
EDIT (Don't use 0.98.34 though, see the text just to the right and below for more info on that) |
|
|
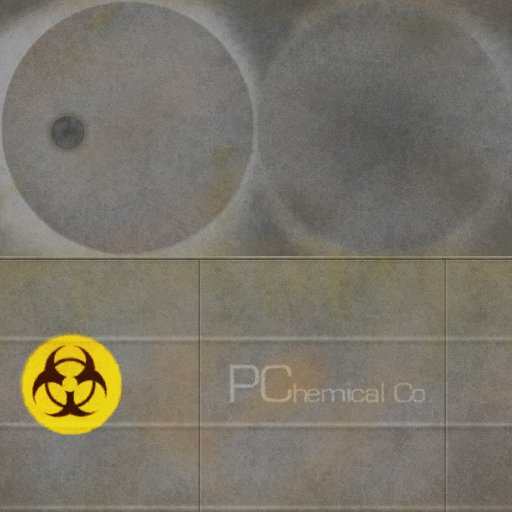
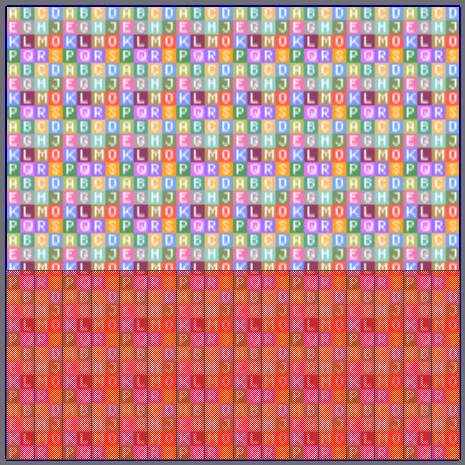
| So then.. let's get started. Save the picture below to your hard-drive, that's gonna be our texture.. |
|
 |
|
|
WAIT!
Problems with 0.98.34
July 2006 edit
The Wings 0.98.34 release uses a slightly different UV unfolding algorithm which unfortunately prevents anyone using it from following this tutorial a 100% step-by-step..
(See Here for more info)
The problem has now been resolved in the latest Dev release (0.98.35), so please download and use that if you wish to do this tut.
Alternatively some older versions will work fine as well.. (Not too old though, anything between 0.98.31 to 0.98.33)
- Peter |
|
|
|
|
|
|
| [1] We're gonna start with a default 16 sided cylinder primitive, so Right Click > Cylinder to create one. |
|
|
 |
|
|
[2] Now, lets make it more "barrel-like" by making it a bit taller..
Select the object in Body mode and Right Click > Scale Axis > Y it up to 130% (To make it easier, hold down the Ctrl key to snap by 10% increments, or simply hit the Tab key and type the 130 value in) |
|
|
|
 |
|
|
| [3] Once upon a time, Wings kinda forced you to UV map everything in one go.. if I remember it right anyways. In any case, that's not how it must be done now, and we're gonna do the side faces only at first, then do the top and bottom ones later. So, hit Space to clear the selection, then hit X or Z to view the cylinder from the side and drag a selection box over the central faces like so (left click on nothing and hold&drag to start a selection box) to select all the side faces.. |
|
|
 |
|
|
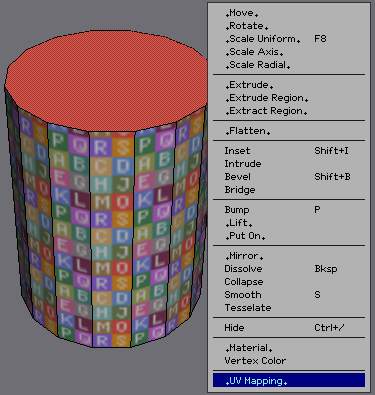
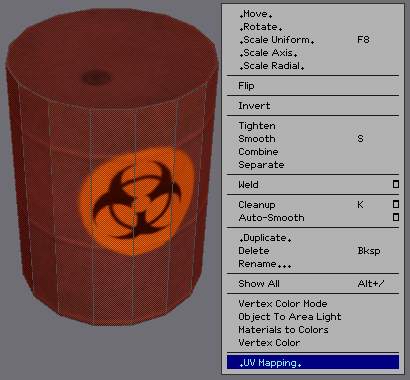
| [4] with all those selected, go ahead and Right Click > UV Mapping |
|
|
|
Let me pause for a sec here and explain the following a bit.. we have this cylinder shape now that we need to make flat, lay it all out nice for the texture. Let's use a soda can as an example, how would you make a soda-can flat? (just for the sides, hollow-tube like.. can ignore the top and bottom for now) You could lay it on it's side and stomp on it, but if you did that you'd still only see half the soda can (the other crushed side would be pointing down towards the ground). The only way to really see it all would be to Cut it, cut a line from the "top" of the soda can to the "bottom", then un-curl it out flat. And that's exactly what we're gonna do with the barrel right now.. |
|
|
 |
|
| [5] in some cases the edge you select will matter, in this one it really doesn't.. I'm gonna select the one facing towards the Z axis.. but any one of the vertical edges should do fine. So select one, and Right Click > Mark Edges for Cut. That's gonna be where the closed surface gets chopped so that it can be spread out flat. |
|
|
 |
|
|
| [6] Then just Right Click > Continue, and choose Unfolding |
|
|
 |
|
|
|
[7] Should see this now.. no need to worry about it just yet, so click the X in the upper right corner of the AUV window to close it, and let's go back to the main geometry one. |
|
|
 |
|
|
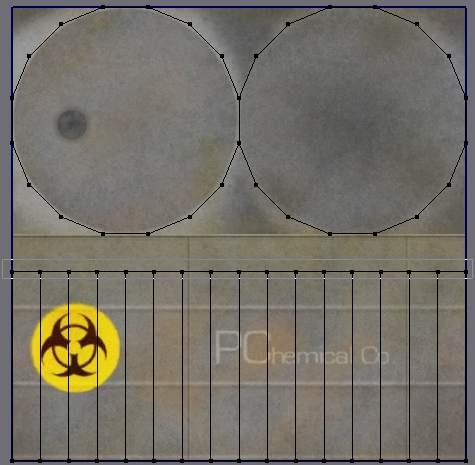
| [8] Gonna do the top & bottom now, so select both those circular faces, and once again Right Click > UV Mapping |
|
|
 |
|
|
| [9] Two simple flat faces, this is so basic that there really isn't anything to do here.. Just Right Click > Continue, and chose Projection Normal to get the faces on the UV layout. After that's done, close the AUV window and go back to the geometry one again. |
|
|
 |
|
|
| [10] Ready to do final adjustments now, so we'll need the texture.. Go to Top Menu >; File > Import Image and load in the UVdemoBarrel.jpg texture |
|
|
 |
|
|
| [11] Now open the Outliner (Top Menu > Window > Outliner) and you'll see the image there near the bottom.. Will also see the barrel's material there (little [M] icon next to it), should be labeled "Cylinder1_auv" by default. Click on the name of the image ("UVdemoBarrel", with the little checkerboard pattern icon next to it) and Drag & Drop it onto the name of the material (Cylinder1_auv). A little "Texture Type" window will pop-up, choose Diffuse. |
|
|
 |
|
|
|
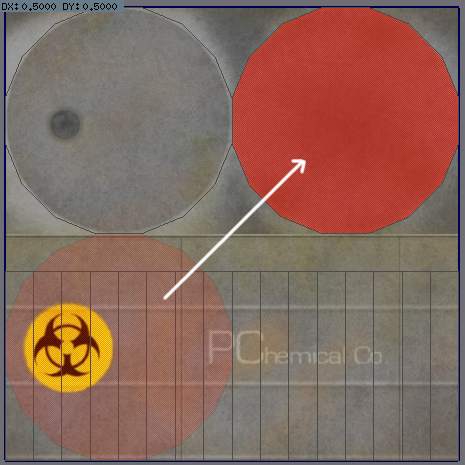
[12] As you can see the texture's been applied to the barrel already, but we still have to adjust it's layout some.. so select the whole object in Body mode and Right Click > UV Mapping |
|
|
 |
|
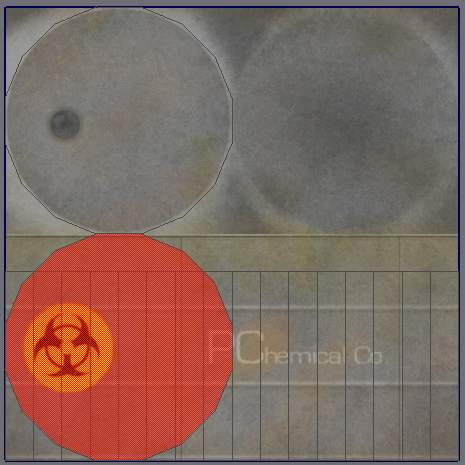
| [13] You'll notice the lucky coincidence that the top of the barrel is aligned just right, and there's no need to adjust it.. The bottom part however is way off.. Hit Space To clear the selection, then select that barrel-bottom UV chart in either Body or Face mode |
|
|
 |
|
|
[14] Then move it to the right place by dragging it 0.5 up & 0.5 right
(hold down the Ctrl key while dragging to make this easy) |
|
|
 |
|
| [15] Now the top/side rim.. switch to Vertex mode and drag a selection box over those vertices |
|
|
 |
|
|
|
And drag them up 0.08 (hold down both the Ctrl and Shift keys to make it easy) |
|
|
|
|
|
|
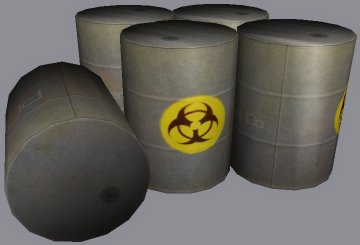
That's it. You are now the proud new owner of some.. toxic waste barrels..umm.. Yay! :} |
|
|
|
 |
|
|
|
If you find any mistakes etc in the tut, can E-mail Me and lemme know so I can fix it.
Hope that as basic as it was, some of you will find it helpfull. Cheers!
- Peter C July 01, 2005 |
|
|
|
<- Back to Main |
|
|
| Copyright � Peter Chovanec, 2005 |
|