Managing Technological Environments for Change
Don Wolf & Sonny Portacio
(use the back button on the browser)
--------------------------->
I had multiple reasons for learning Paint
Shop Pro. Since all our work is presented on line, I had to search
for a software program that could handle making graphics and re-sizing
pictures. In addition, I wanted to see if the difficulty level was suitable
for children in my classroom. I also could use what I learned to further
my "business" for Dr. Wiener as well as my husband's start up business.
Below is the fruit of my success...
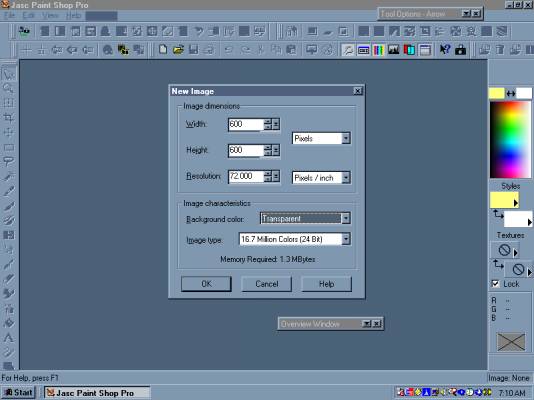
1. Open up paint shop pro and chose FILE
and then select NEW.
Then make the WIDTH 600 and the HEIGHT
600,
and the BACKGROUND color TRANSPARENT.
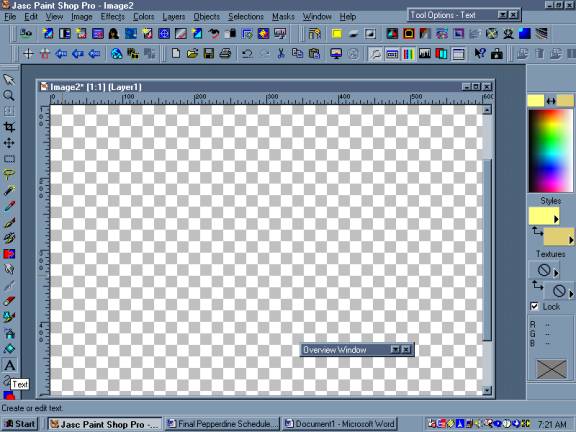
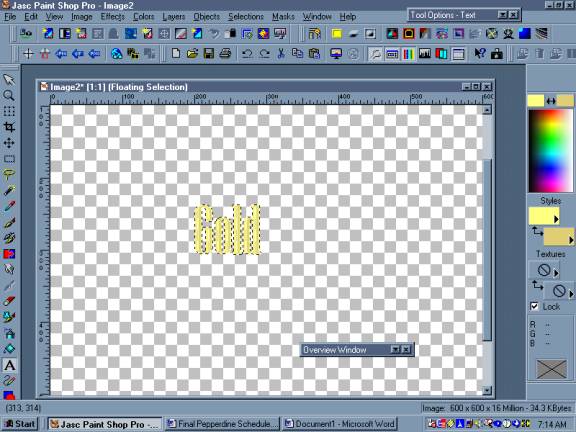
2. It should open up to this:
along the far left side, select
the TEXT BUTTON
which has the letter "A"
on it.
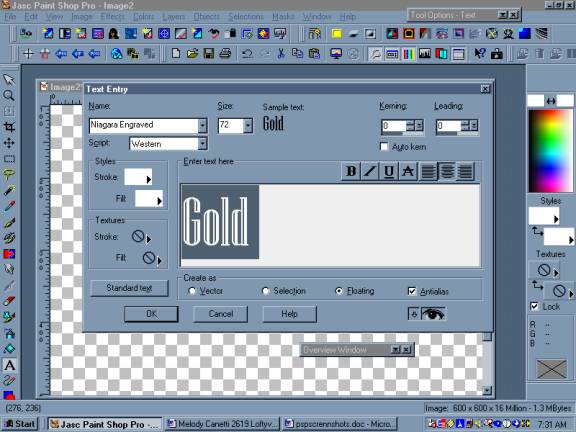
4) Select a FONT and SIZE
I typed the text GOLD.
I clicked on there box that id called
ALIAS.
Next I have to pick colors for the foreground
and background of the letter to
give
it that "gold appearance"
Click on the boxes in the area called
STYLE.
One is labeled STROKE and the other is
label FILL.
Up will pop a color box like the one in
the next step...
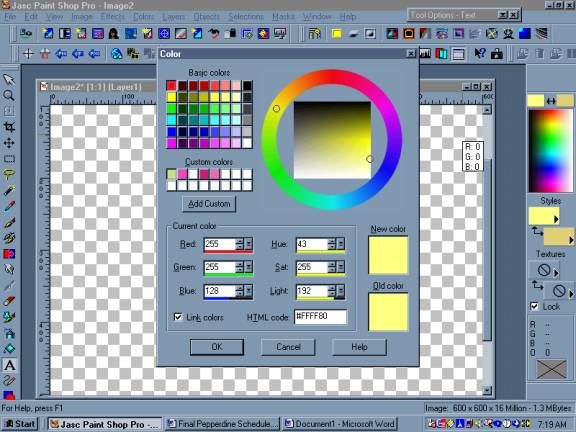
5) I clicked on the color that I wanted.
I chose a light yellow for the stroke
and a darker yellow for the fill...
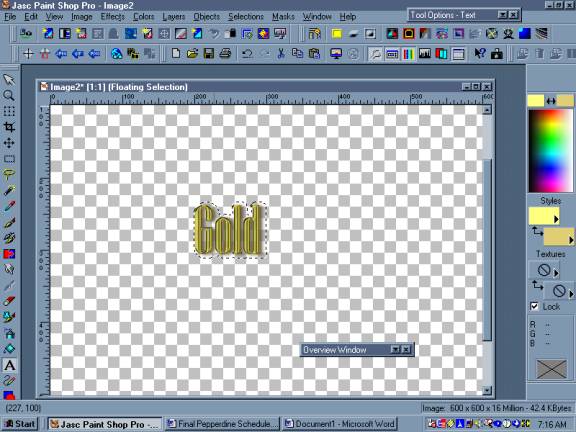
6) I clicked on "OKAY" and the text came
up like this....The dotted lines around
it mean that it still can be moved around
by grabbing on it. It has not been pasted yet.
Really what is happening is that the background
is a layer and the word is a second layer....
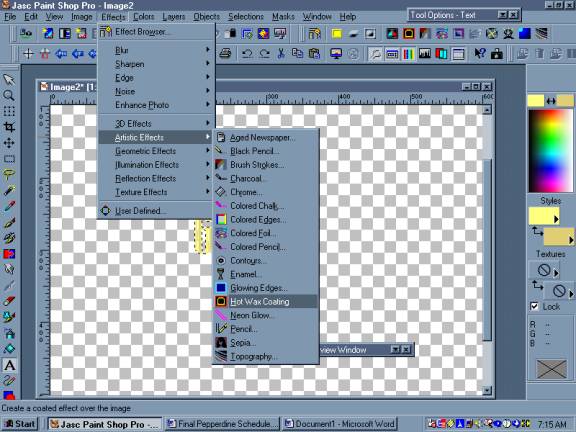
7) Now I want to add the effect (filter)
that will make the word look like a metallic gold.
Click on the EFFECTS, scroll down and
select ARTISTIC EFFECTS.
Another menu should pop up. Scroll down
it, and selected the effect HOT WAX COATING.
APPLY IT ONCE...
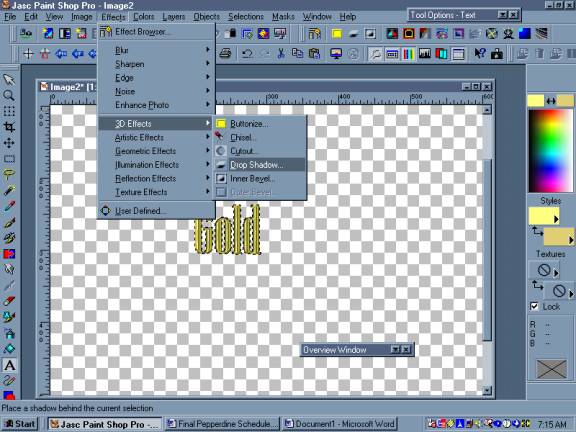
8) I wanted to add a 3D drop shadow behind
it. So I
clicked on the EFFECTS, scroll down
and select ed
3D EFFECTS. Then I chose DROP SHADOW
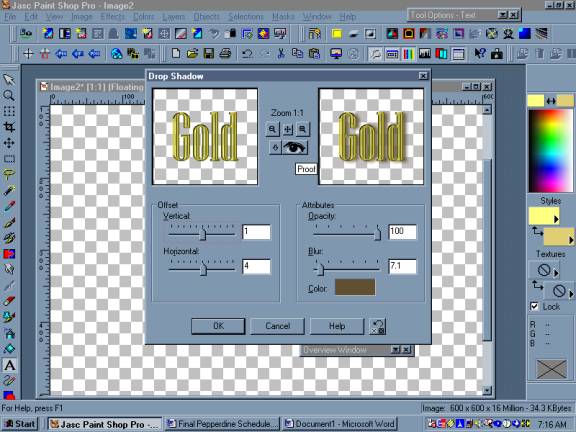
9) This screen popped up. The left side
shows you what your text looks like and the
right sid e shows you what the text looks
like after the affect was displayed. The bottom color box can be
clicked on and the color of the shadow can be changed. there are two slide
rulers that adjust the shadow under the text, left or right (HORIZONTAL)
and up and down (VERTICAL). The other two slides adjust the OPACITY
shadow and the SHARPNESS of the shadow. Click on the picture to see
my settings..
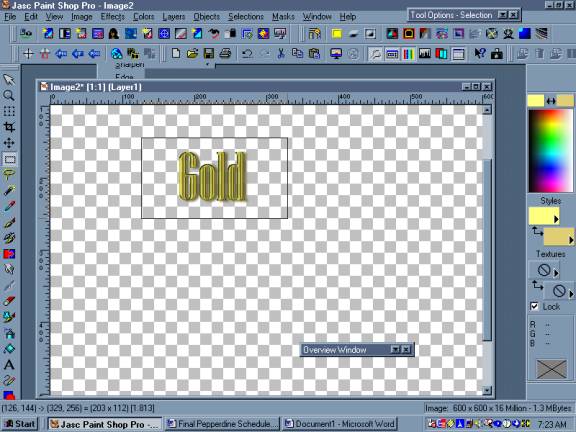
10) Once I made my selections I clicked
OKAY and it looked like this below. In order for
this to "paste" with the next layer and
rid yourself of those dotted lines around it you can
click on the TEXT button again and up
will pop up the text window.
Click OKAY and let it past another word
onto your image. Now you will have two. While the second one is still dotted
around it, HIT the DELETE KEY. Now there should be one word left, the one
that has the shadow under it and now the lines are gone.
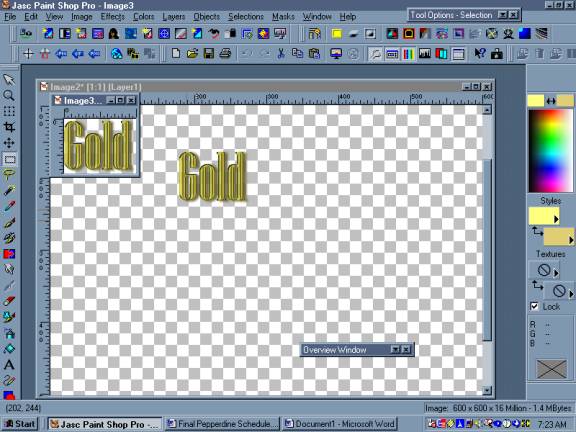
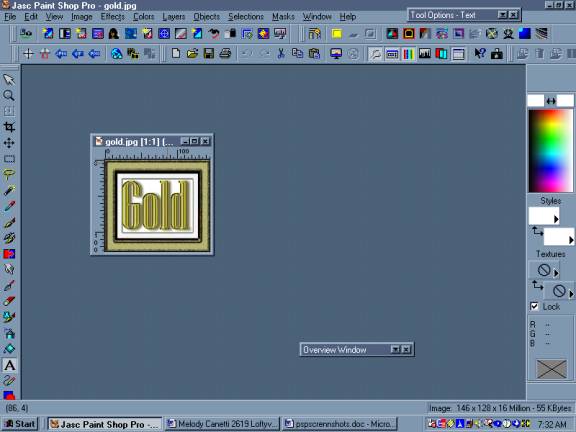
11) Now it is time to "CUT" the graphic out. Selected the dotted rectangular box from the left side and drag a rectangle around the graphic. Now hold down the CONTOL-KEY + C to COPY it and then hold down the CONTROL KEY + V to paste it as a new image.....
12) Now it should look like this....Keep
the small graphic image and close
the larger one, by clicking on the "X"
of the larger image box.
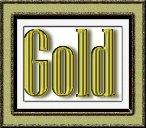
13) Now you should be left with just the smaller image. I wanted to frame it. So I selected IMAGE AND selected PICTURE FRAME.
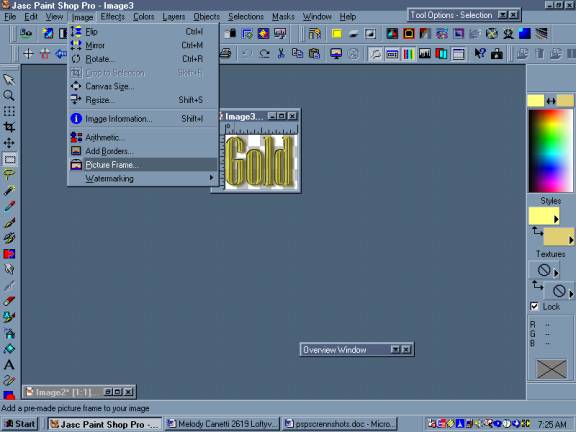
14.) I selected a GOLD BURLAP FRAME, and followed the wizard.
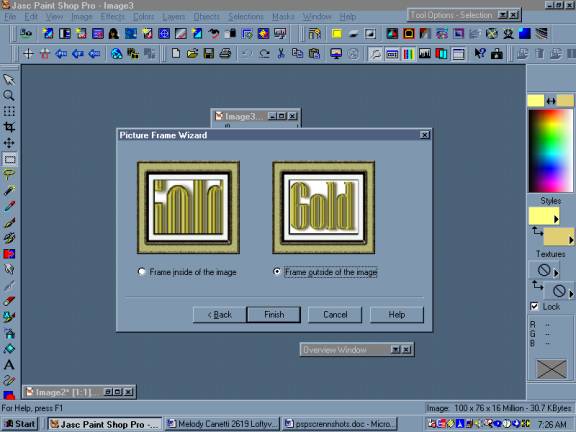
15) TUH DUH!!! You are now done!!!!! Save the graphic and it is ready for publishing.
Process and Journal....
 I
have always been interested in making graphics and better webpages. I went
out and purchased two books on Paint Shop Pro. One book was
a tutorial, while the other specifically dealt with graphic making. I looked
up various sites to see what they had to offer. So after studying the techniques
and much trial and error from confusing steps, I developed one myself that
I was pleased with. It was interesting that non of the websites I went
to actually had screen shots. I would have made things so much easier.
I
have always been interested in making graphics and better webpages. I went
out and purchased two books on Paint Shop Pro. One book was
a tutorial, while the other specifically dealt with graphic making. I looked
up various sites to see what they had to offer. So after studying the techniques
and much trial and error from confusing steps, I developed one myself that
I was pleased with. It was interesting that non of the websites I went
to actually had screen shots. I would have made things so much easier.
The books were great as they did have lots
of pictures. The hardest part was putting this page together. I started
on my PC desktop, and captured my screen shots, pasted them into a WORD
document. When I tried to paste them into Paint Shop Pro
they became unreadable. So that was out. I needed to figure out how to
get them into jpg's. So I went back top the WORD document and turned
it into an HTML page. It loaded the Screen shots up as jpgs. So I set the
project aside for the night. the next day my desktop crashed and my husband
had to take an entire day to try and recover the data on my heard drive.
In the meantime I had to learn how to build webpage using the IBOOK.
The IBOOK does not run Paint Shop
Pro, and the APPLEWORKS PROGRAM apparently does not
re-size the. I tried various solutions to figure out the problem.
What I had to do was to download the jps
in their large format, pull them onto this webpage, and constrain them.
I linked them to their larger counterparts out in cyberspace on my website.
I
hope at the time of this posting that they will work. Because I am not
using my PC environment, it has taken my MUCH LONGER than it would
have just to use my Desktop. Now I am FULLY CONVINCED I like PCs! the IBook
frustrated me because it has no serial port either. Oh well, at least
I learned more about the MAC enviroment and the good news is that I only
lost 3% of my hard drive rather than the whole thing!
Bibliography:
Clark, Michael. Teach Yourself Paint Shop Pro 7 in 24 Hours, Indianapolis, Indiana, Sams Publsihing. 2001.
Shafran, Andy and Lori J. Davis. Paint
Shop Pro Web Graphics. Third Edition. Cincinnati, Ohio, Muska and Lipman
Publishing.2000.
One
of many online tutorials....
-Heather Pozzi
CADRE 3B