Auxiliary Cruisers Raiding Tactics
[General]
[Aircraft] [Motor Launch]
[Joint Operations]
The various tactics employed by the raiders are as different as
their captains' personalities. Commanding an auxiliary cruiser
and raiding are often described as fighting behind enemy lines.
The lonely raiders were in action every minute they were at sea.
Each captain had to adopt and adjust his tactics to increase the
chance of survival and cause as much damage and confusion as
possible.
General Tactics
Atlantis's captain Bernhard Rogge used the classic, traditional
tactics of raiders. First he would signal the victim to stop. If the
victim did not comply, then warning shots would be fired across the
prey's bow. Usually the very lightly armed merchantmen would
surrender, but many decided to fight, radio, or at least, run. This
of course resulted in gunfire from the raider. The fight often
lasted less than several minutes. The optimal places to hit were
the victim's bridge, radio operating room and at the waterline; these
were the targets for the larger-caliber guns. Anything else that
moved on the deck would become targets for the 20mm and 37mm flak
guns. Sometimes torpedoes were launched also, but too often they
missed their targets. When the victim started lowering lifeboats
and lit the white lantern, the German captain would order cease
fire and start picking up survivors. These were standard procedures
and used by many captains besides Rogge.
Widder's Hellmuth von Ruckteschell preferred attacking at
night. This was rather risky for a raider, for it exposed the raider
to close range return gunfire. It also required excellent lookouts,
accurate navigational plotting and a lot of nerve. However, night
attack enabled the raider to suppress a ship in the shortest time
with the least ammunition while giving the smallest opportunity for
the victim to fight or radio. He would sight a vessel during daytime,
shadow and track all day, and emerge from darkness at extremely close
ranges to deliver an overwhelming amount of gunfire. The only losers
were the merchantman, which was fired upon whether it resisted or
not, and the survivors, who were difficult to locate in dark water.
Later Ruckteschell refined his tactics when he commanded the raider
Michel. He would still attack at night, but now he would
approach from the darkest part of the horizon, and if possible,
run right into the victim to further prevent its escape. At about
2,000 yards from the prey,
Michel would fire a star shell to
illuminate the scene and let loose all guns to silence any and all
potential resistance. The new technique was so effective that some
vessels surrendered immediately without anyone getting hurt.
On the other hand,
Kormoran's Theodor Detmers preferred
warning shots during the day. This gave the merchantman a chance to
stop without getting hurt. If the victim chose to stop this would
save ammunition; if not, the warning shots would find the victim's
range, serving a practical purpose.
Using the Seaplane
The ship-borne aircraft allowed a little more variety in tactics.
Of course the aircraft greatly increased the spotting range of the
raider. A typical aerial search involved the pilot flying a
parallelogram search pattern. The seaplanes were sometimes disguised
as British, but on at least one occasion the Nazi swastika was
carelessly left on the tail. When a ship was sighted, the pilot
would fly directly back to the raider, while trying to avoid being
seen himself. Rogge's pilot introduced a new trick when he used
a trailing hook to tear off a freighter's aerials, preventing it
from radioing. If this was not enough, a couple bombs and machine-gun
shells would usually convince the merchant captain to give up. This
certainly saved many lives and greatly reduced the risk of the raider,
which could remain unseen throughout the process.
Pinguin's
pilot had once played British and dropped a weighted message onto
a freighter, informing the captain that a raider was near by and
he should steer eastward, that is, straight toward the raider. Despite
the obvious advantages of equipping ships with aircraft, only one
raider (KMS
Hansa) had a catapult, and it never had a chance
to enter combat.
| Click on one of the thumbnails below to view the full picture. |
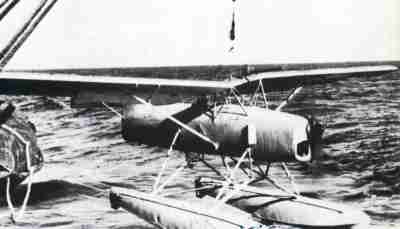 |
The
Ar 231 was not excellent but decent enough to serve the raiders in the early days. |
Using the Motor Launch
Some of the raiders were also equipped with motor launches, but none
was used better than
Michel's Esau. It was frequently
sent to stalk and shadow the prey, and if conditions were right, to
torpedo it. On one occasion,
Michel was able to attack two ships
in one night by sending Esau to slow one of them. On another,
Esau's men tried to play British and convince a merchantman to
stop, but their white uniform betrayed them -- wearing white on motor
launches was not a standard Royal Naval practice. The versatile little
boat could also silently torpedo merchantmen at night, making it
look like a U-boat attack and causing the victim to send erroneous
messages. Esau could also be armed with depth charges and act
as an escort against submarines, which was done when
Michel was racing towards Japan for the first time.
| Click on one of the thumbnails below to view the full picture. |
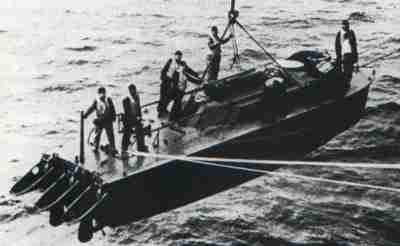 |
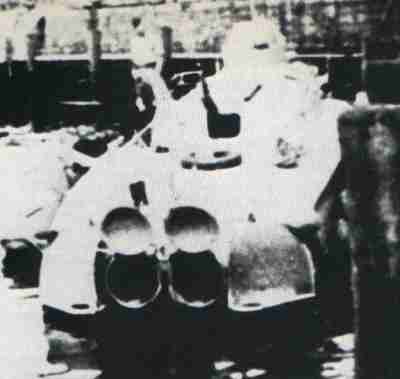
Hoisting out the fast motor launch LS 2, christened Meteorit, from the
Komet. |
 |
Fast motor launch LS 4, christened Esau, before being put aboard the
auxiliary cruiser Michel. This was the only one of the three LS boats carried by
auxiliary cruisers which actually went into action. |
Joing Operations amongst Raiders
For security and practical reasons, raiders rarely worked with each
other. Two merchantmen sailing together would look awefully suspicious
to Allied aircraft and warships. If they were caught, Germany would
lost two or more precious raider at once -- too heavy a price for
whatever advantages joint operations could bring. In reality, however,
the raiders had frequently rendezvoused with each other and even fought
jointly on two occasions. Usually they just sailed to predesignated
meeting points to exchange supplies, prisoners, intelligence and
a hip-hip-hurrah. In the first joint operation,
Komet and
Orion sank several ships together. In the second,
Michel
and
Stier tried but caught nothing. The general tactics for
joint operations called for the raiders to sandwich the victim
and close in from both sides. The risks were great, for if the victim
radioed, then two raiders would be exposed to danger, but the chance
of sinking a merchantman was not much better than a lonely raider's.
Thus joint operations were carried out only in low-risk waters for
short periods of time.
| Click on one of the thumbnails below to view the full picture. |
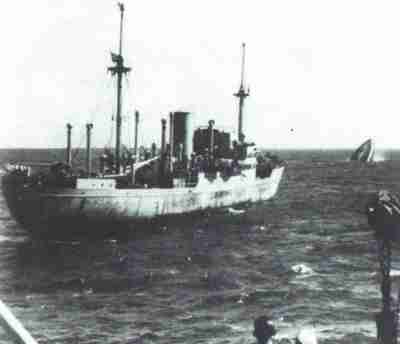 |
Michel looked on after Stier sank her last victim (picture taken from Michel). |
Back to KMS Orion Page
Back to KMS Atlantis Page
Back to KMS Widder Page
Back to KMS Thor Page
Back to KMS Pinguin Page
Back to KMS Stier Page
Back to KMS Komet Page
Back to KMS Kormoran Page
Back to KMS Michel Page
Back to KMS Coronel Page
Back to KMS Hansa Page
Back to German Tactics Page