 |
|
|
|
|
|
|
|
|
|
|
|
|
|
|
|
|
|
|
|
|
|
|
|
|
|
|
|
TUNNEL REPAIR |
|
|
|
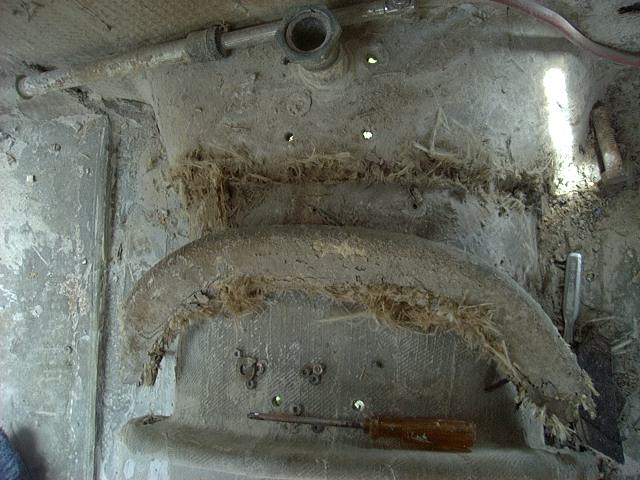
While removing the stringers that run the length of the boat, I found damage to the two braces/ribs that cross over the tunnel and connect to the engine stringers. These braces support the and secure the tunnel which has significant stress from the torque of the engine and where the propeller shaft is attached. Some of the damage to the tunnel was significant. I decied to remove the rear brace and I think we will ultimately remove the forward brace also. The rear brace was horrible. The damage to it, according to a local expert, appeared to be caused by a combination of resin depletion and impact damage. The brace was put in place at the factory and then covered with fiberglass and resin. The factory apparently failed to properly "wet" the brace with resin before laying the fiberglass over it. What happens here is the wood absorbs the resin from the fiberglass that was layed on top of it thereby taking the resin out of the fiberglass where it is needed for strength. Over the years, the entire structure weakened and became useless. I was able to remove the brace with only a few tugs. I also found significant damage to the wood inside the tunnel As I ground down glass I found several areas where the same resin depleation occured. The fiberglass looked and felt like wool. This is not how it is supposed to be. The only solution is to cut or grind it out and start over. I removed what glass I could and scraped out the bad wood. I used resin putty to fill the void of the wood. This would later be covered by new fiberglass and EPOXY. The result will be MUCH stronger and waterproof. Here are a few pics..... |
|
|
|
 |
|
|
|
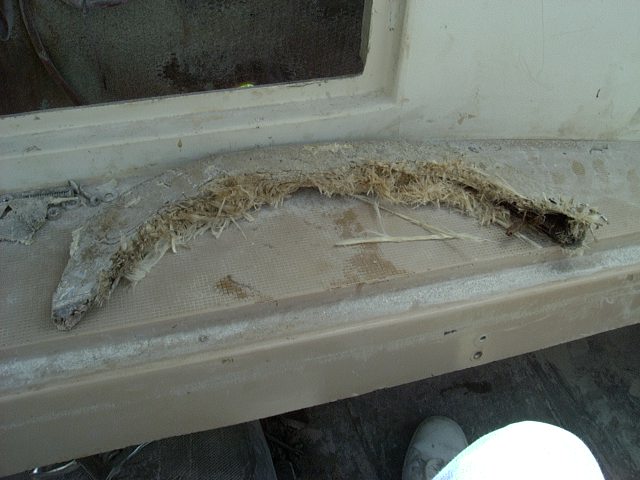
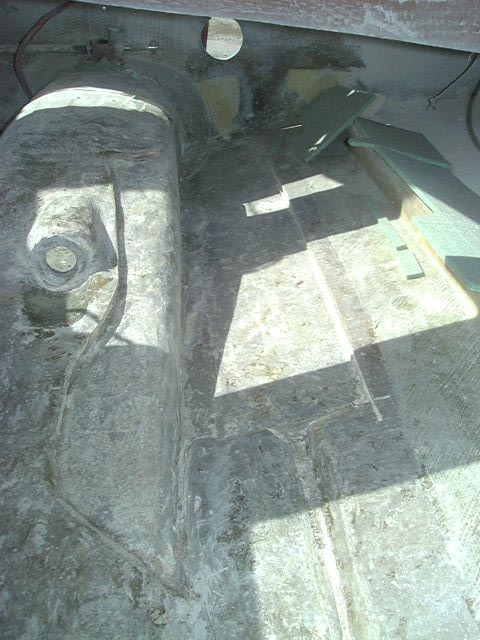
Here is the rear brace removed. You can see the frayed fiberglass that has a wool like appeareance. The place where it was on the tunnel is very apparent and this entire area was ground down to prepare for the repair. Also in this picture, you can see the forward brace and also where the starboard engine stringer was located. |
|
|
|
|
|
 |
|
|
|
Here is another picture of the brace with the horrible failure of the fiberglass laminate. The new brace will be MUCH stronger and it will be done with epoxy and biaxial fiberglass. |
|
|
|
|
|
 |
|
|
|
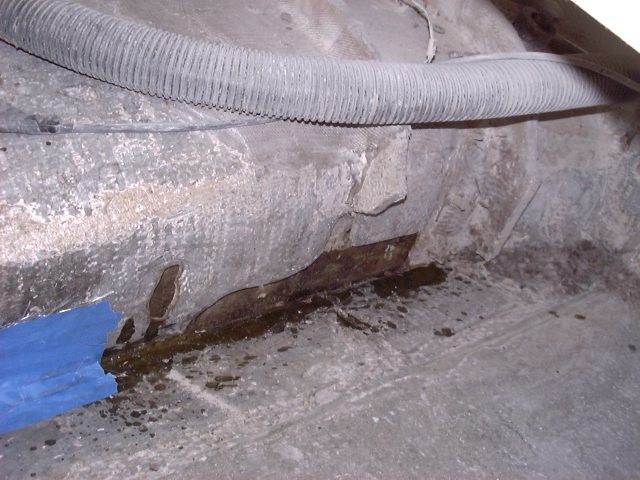
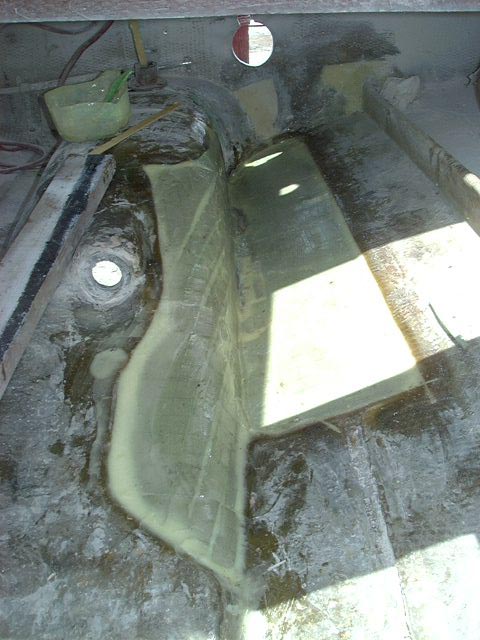
Here is a section of the port side of the tunnel. This shot shows a 15" section I have cut out. The wet wood has been removed and I have wet the area out with resin. The blue stuff is some tape I have used to keep some resin in on a section I fixed earlier. |
|
|
|
|
|
 |
|
 |
|
|
|
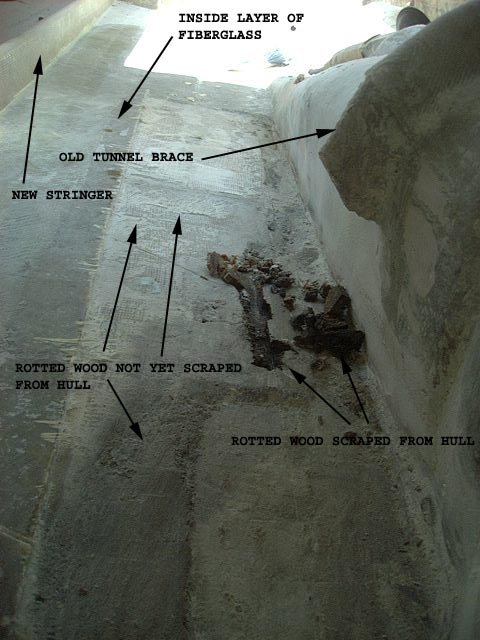
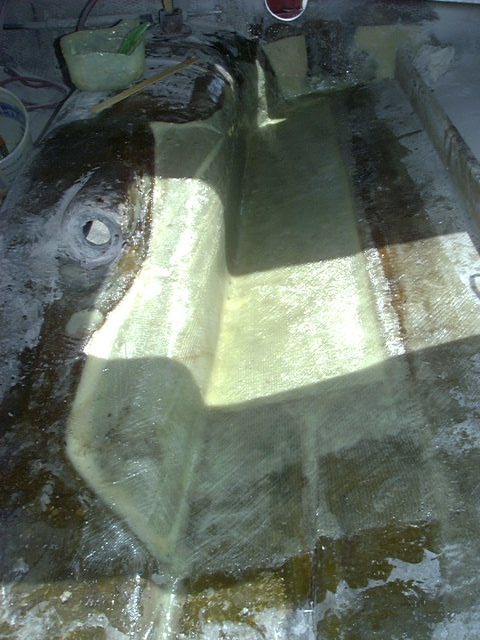
Here are some pics of more tunnel repairs. The balsa laminate was saturated in this section and I cut out the old fiberglass and scraped out the old blasa. Some of it came out with just my fingers but some required a chisel. The pic to the left shows the inside of the bilge area with the inside skin layer of glass cut out. The old wood is still there and I have started to carve out the old wood. The pic to the right shows the same area from a different angle with ALL the wood removed. You can see I went up and over the top of the tunnel all the way back to the transom. This was a major repair. The lower left picture shows the same area after I filled the area where the wood was with Divinycell Foam. This foam was scored so it could be used over curves. I used West System Epoxy thickened with Cabosil as a putty/glue to attach the foam to the outer hull skin. I also used the putty to fill in the gaps in the foam and to make a filet so the Biaxal cloth could attach easily. The lower right image shows the area after two layers of glass were applied. I have two more pieces of glass to attach but for now, this repair is about 15X stronger than the original skin. Let me know what you think. |
|
|
|
|
|
|
|
|
 |
|
|
|
|
|
 |
|
|
|
|
|
More to come....... |
|