I call my A4 Frank which is short
for Frankenstein
The rebuild of my existing engine and a couple
of boxes of A4 parts purchased a couple of years ago produced an engine
that may look a little different.
- Late model block (hot tanked, new rings,
and a valve job) with an early model head (hot tanked);
- Pick-N-Pull wire set from a car that came
to a stop far quicker than it was designed for;
- Early transmission guts installed in a
rebuilt late model housing with a total oil recovery access port added
and;
- Of course I had to use the early model
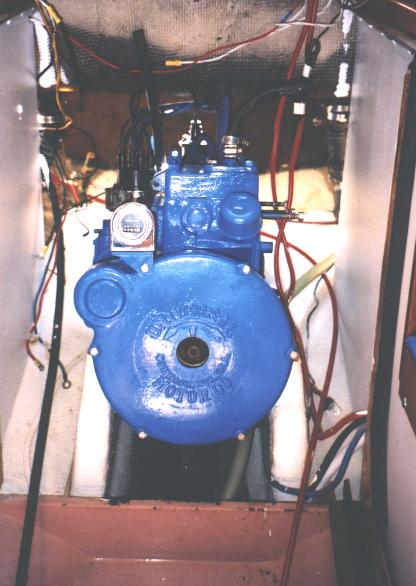
flywheel cover with "UNIVERSAL MOTOR CO." casted on the front.
- Electronic fuel pump;
- A home built PCV System (the admiral cant
stand the smell of A4 blow-by) and:
- A modified automobile electronic ignition
(about 50 years younger than the engine and $250 cheaper than the after
market conversions currently available ;-)
Im hoping that the hotter ignition will
allow me to use hotter platinum plugs (already installed) that should require
less maintenance. Of course, tune up time will require a rotor but that
should not happen as often as the old distributor required care and feeding.
As an added touch to keep my bilge oil free
(for a couple of weeks anyway) I replaced every gasket and seal (a couple
were even replaced several times.)
I ran the engine on a stand for
a little over 5 hours without any problems. Installation into the boat
took about 6 hours (1 Hour from dock to mounts and about 5 hours to replace
the heavy parts removed for installation, figure out where all those wires
went and build a new exhaust system.) A wire bundle with plug and socket
and a more flexible exhaust system would have been nice (maybe next winter
;-)
I also corrected the alignment problem that
prompted me to start this project in the first place. While the engine
was torn down I took the pan with just the rear bearing, seal and bushing
installed and placed it on the mounts (very easy to work with without 350
pounds of metal and a block and head in your way.) I aligned the pan in
place with shims and attached the bushings finger tight when they were
perfectly flush with each other. After determining where the mounts should
be, I enlarged the holes that held the original motor mount bolts then
filled the holes with slotted oak dowels and thickened epoxy. The mounts
were built back up to the required level with thickened epoxy and 1/16
oak shims. Sounds like a lot of work however, by using the pan as I did
the entire procedure only took about 2 hours from start to finish which
gave me time to go fishing ;-)
|
|
|
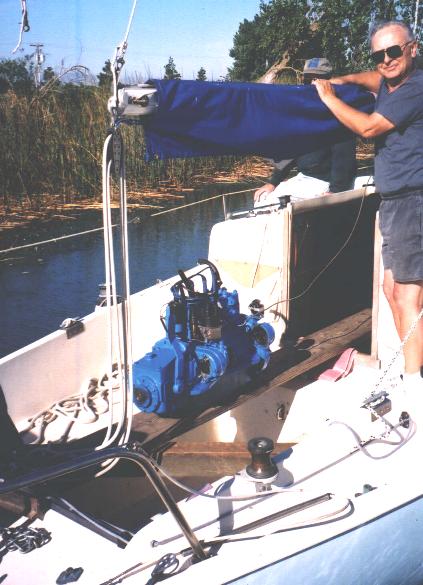
Step 1 - Swing by boom from dock to
boat
|
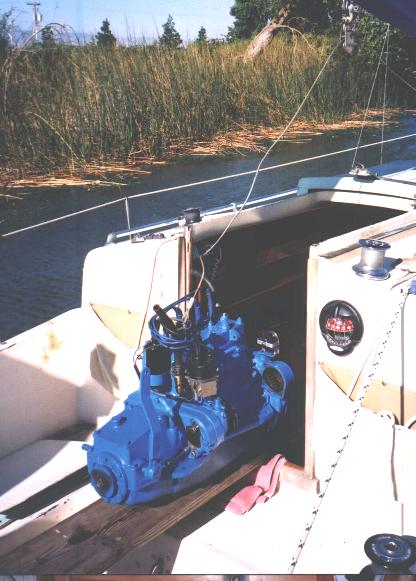
Step 2 - Slide to cabin
|
|
|
|
|
|
Step 3 - Lower to mounts
|
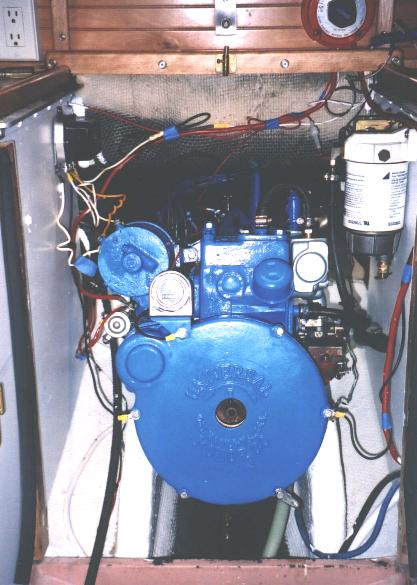
Step 4 - Connect HW & Electrical
|