| From 2007 |
 |
From 2007 |
 |
| Below are a couple examples of our goal. |
 |
| From 2004 |
 |
| Start by opening a new image 100X100 you can always resize later.
Using your paintbrush with these settings: |
 |
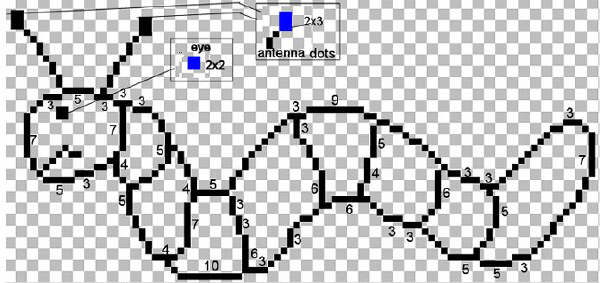
| Zoom in several times. I like 7 or 8, sometimes more.
Draw this image: |
 |
| This is the old way I used to shade: Using your magic wand click inside different areas of Inchie and flood fill with a color of your choice. Keep selected and go to effects> 3D effects> choose cutout and use these settings: |
 |
| Make sure to use a darker color and a lighter color that cordinate. Also make sure that fill with interior is checked.
Continue to flood fill each area and repeat cutout setting until you are done. |
| The new way I shade: After I get my inchie filled in with the colors I like. I keep the areas selected and grab my retouch tool (the one with the hand) I put the settings on Lighten RBG, size 2, opacity 20, hardness 25, step 25 and density 100. I then go over and shade the areas I would like to lighten. Give it a try and do it your own way to see how you would like it. |
| I hope you enjoyed this tutorial. Any suggestions or corrections please feel free to email me at the address below. This tutorial was written by me �Peach on Jan 15th 2004, and similarities to any other image or tutorial are simply coincidental. I added on to this tutorial on Jan. 22, 2007 Please email me at [email protected] if you have a question or suggestion. |
| Or if you are lazy you can take the outline and fill it in yourself... LOL |
| Right click and save to your own computer please! |