INITIAL AND ANNUAL SHOTS
The first year or two of a childs life is one shot after another. At some point they grow up and only need a booster now and then. This also is true for puppies and young hounds. The vaccinations that they take between the age of 6 weeks and 4 months are designed to extend their immunity against a number of life threatening viruses. If the mother is in good health and current on her shots, then she should be able to pass her immunity on to her pups. The first milk (first 24 hours after birth) is not milk but colostrum. Colostrum is packed full of antibodies against the many viruses that could make the pup sick. The protection received at birth will last for up to 7 weeks. By eight weeks this immunity has almost disappeared.
To continue this immunity, the
pup needs to be vaccinated at about the time the mothers immunity begins
to fade. I do not know the exact science of all this, but have been
led to believe that if the mothers antibodies are still in full force,
they will fight off the virus introduced with the injection. This
is the reason several shots are give at space intervals. The goal
is to introduce the vaccine as soon as possible after immunity has lapsed.
I have always followed the standard scheduled recommended in nearly every pet supply catalog that carries vaccines. I do make one small deviation, giving the forth shot at 16 weeks not the standard 15 weeks.
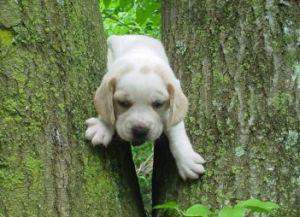
Tonys Pup
There is no getting around it
Vaccines are a good thing and if we want to insure the health of our hunting
buddies then we will just have to drag them out of that tree and give them
the shots they need.
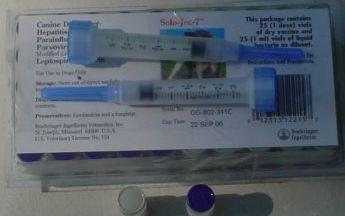
When you receive your cooler packed vaccines they may not be cold, but should be cool. Put them in the refrigerator until you are ready to administer shots.
*For each shot you will have two vials. One will have a white powder, which is the freeze-dried portion of the vaccine. The second vial will have a clear liquid.*About a half hour before shot time, you need to remove the number of vials needed from refrigeration. Do not set them in direct sunlight, but do set them out so they can warm up to about room temperature. You do not want to give the pup a cold injection. If you do he may remember and bite you are at least pee on you when he grows up.
*The vials will have colored caps that will help you know which are the powder and which are the liquid. (All the powder may have gray caps and all the liquid may have blue caps.) You will be mixing the liquid with the powder to form the vaccine. I like to do this for all the shots to be given so things will go a little faster when I get started vaccinating the pups. Once mixed the vaccine should be administered within one hour.
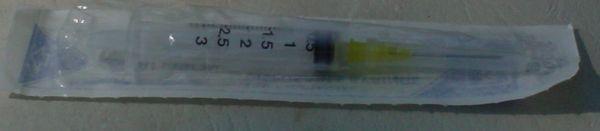
1. Make sure to tighten the needle on the syringe. You do not want it to pop off and lose the vaccine. This is one of the ways that you can waste a shot and will be glad you have a few extra.Normally, I will perform steps 1 4 above for each of the shots to be given, prior to giving the first pup a shot. I may or may not do step 5 in advance. You are now ready to give that first shot. You have the vaccine mixed and in the syringe and you have someone to help hold the pups.2. Draw up about a half of a syringe of air. Remove the colored cap from the vial and insert the needle into the liquid vial. Inject the air. Next withdraw all the liquid out of the vial and into the syringe. (Note: I have found that if you do not inject some air into the vial, it is hard to draw the liquid into the syringe.)
3. Next, remove the colored cap from one of the vials containing powder. Inject the liquid into the vial that contains the freeze-dried or powder portion of the vaccine.
4. Remove the needle from the vial and shake for a few seconds to mix well. At this point, I like to check to make sure the chill is off the vaccine. If it is still cool to the touch, I will roll it in my hot little hands for a while to warm it up.
5. Draw up some air in the syringe and insert the needle back into the vial containing the vaccine. Inject the air and then withdraw the entire mixed contents.
1. You are NOT going to inject into a vain, but I still like to get the air out of the vaccine. Hold the syringe with the needle pointing up. Firmly holding the syringe with one hand, use your index finger of the other hand to thump the syringe. This will cause any bubbles in the vaccine to come to the top near the needle. With all the air up near the top, trying to escape, slowly push the plunger up until all the air is out and a small amount of the vaccines move up and out the needle.2. Puppies all have lots of loose skin so you will not have any problem finding a place to administer the shot. With your assistant holding the pup, select a shot location near the right or left shoulder. Lift the skin up into a triangle and inject into the middle of the triangle. Care must be taken to insure the end of the needle is in and under the skin before you inject the vaccine. The ¾ inch needle helps to keep you from going in one side and out the other. More than once I have gone in one side, out the other and wasted the vaccine on the ground. Here is another reason for having a few to many shots.
3. Your pup may not like being held down and they may wine a little. The skin that you are penetrating will have very few nerve ending and little if any pain will be experienced by your pup.
4. Repeat this process for all your pups.
5. You may find that you do not need any assistance when giving annual boosters to your older hounds.
If you have never vaccinated
your pups before, I wish the best of luck on your first time. It
can only get easier with practice and experience. Your local vet
will be glad to take care of all this for you. However, if you have
a large number of hounds, it is far more practical to take maters into
your own hands. You can keep some of that money you would be spending at
the vet office to purchase a new beagle for your wife.