 |
| Replacing the Radio/cassette in a Mk2 Cherokee |
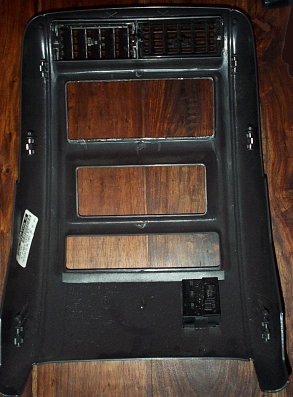
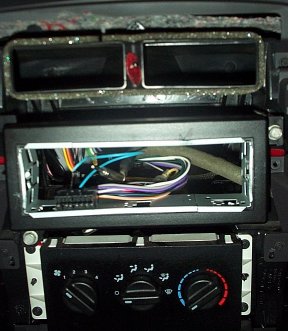
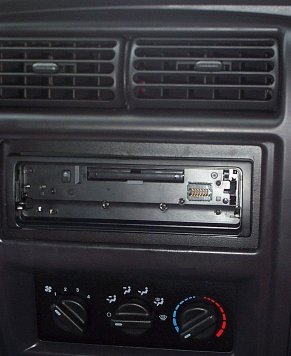
| Replacing the Euro-style "DIN and a half" sized radio-cassette player is a very simple operation. The steps below describe how it is done. Items Needed: Fascia plate - available from Halfords Cost �14.99 ISO plug adapter - available from Halfords Cost �10.99 Hex socket **" First of all, remove the centre shroud by pulling the bottom corners towards you, it is easier to pull the right corner first, followed by the left. The shroud is held in place by six locating lugs, which clip onto the dashboard. When the shroud has been un-clipped from the dash, locate the Headlight beam control switch on the bottom-left hand side, and detach the cable by pressing the plastic lug. The next step is to remove the Radio Cassette. To do this, remove the two hex-head screws from the corners of the radio which can be clearly seen in the diagram below: It should now slide out (a little force may be required to free it) Unclip the two cable blocks, the earthing strip and the Ariel plug. Attach the ISO connector plugs to the existing blocks. (Make sure the pins are lined up inside the connector, otherwise it can be quite difficult to attach.) Locate the fascia onto the existing holes, and replace the hex-head screws to secure it. Pass all cables through the fascia cut-out and insert Stereo cage into fascia passing cables through again Connect new stereo. (The earthing connector should be fastened to the chassis of the stereo using an existing screw.) Slide the stereo into place ensuring the cables don't get caught. Replace Shroud, ensuring the Headlight beam switch is re-connected (Locate the top lugs first, then press the middle and bottom into place.) |
|
 |
 |