<------------------------------------------------------------------------------>
<------------------------------------------------------------------------------>
Here's what you need:
Approximate time: 1.5 hours
1. Locate the two phillips screws holding the outside gauge cover to the dash, they are on the top. Remove them with a medium size phillip screwdriver. Wiggle the cover until it comes off. You might need to lower your steering wheel to get it out. Put aside. Also make sure you put the screws together in a safe place.
2. Remove the four screws on each corner of the inside assembly.
3. Pull out instrument cluster until the wires are visible. Disconnect the five ports (three on top (2 blue/1 green) and two on bottom (1 yellow/1 green) on the '96-'98).
4. Take entire instrument cluster out from behind the steering wheel.
5. Take off clear plastic cover by pushing the release buttons around the casing (there were 7 on mine) and popping it off.
6. Take off black cluster cover by unscrewing the two mini light bulbs on the top, then pushing release buttons to pop it off.
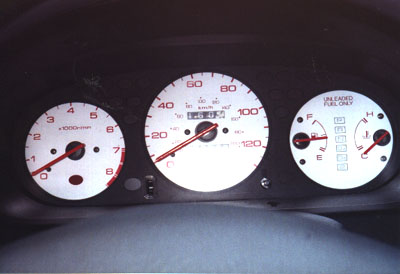
7. There are three gauge faces. Take a mini phillips screwdriver and remove the screws that hold down the stock gauge faces.
8. Take a red permanent marker and color stock needles very carefully (they're really not as sensitive as everyone thinks, but just be careful anyway). Let dry.
9. Carefully slip aftermarket covers over the needle and replace screws.
10. Work backwards putting everything back and you're done!
Good luck!