1. remove CD case top cover from case, this will become your screen protector.
2. place the cover over your XDA and using trace the outline of the ridge, just outside of the screen (approx. 1/4 inch bigger than the screen).
3. use the straight-edge to straighten out your lines, this is where you will cut the jewel case.
4. using the cutting mechansim of your choice, cut along your marks. (I tried a hack saw with less than optimal results. I found the glass cutter -- score and snap) worked better. How does one normally cut this stuff anyway?).
5. Use a single strip of the electrical tape around the outside edge of the cut-out piece. Be sure to cut and fold the corners for the best look. (This softens the sharp edges and is much quicer than getting out a polisher!)
6. Use three strips of tape arranged in an "----H----" and lay over the rubber band. Affix this to the top-side, top-edge of your cover.
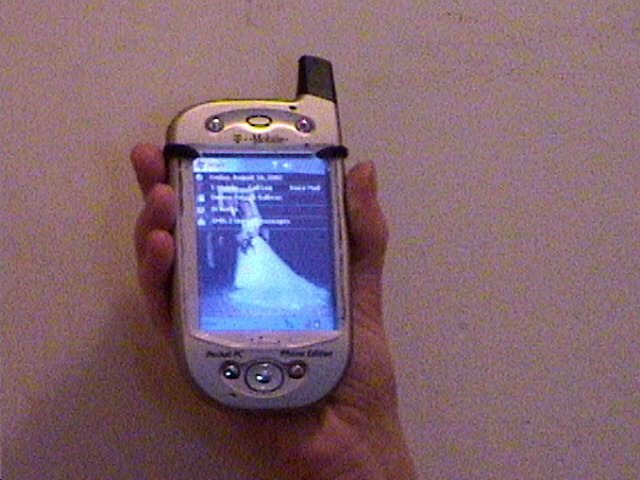
7. slip the rubber band and cover over the top of the XDA so the band crosses just below the contacts button and just abive the volume control.
8. Enjoy!
Pros: The rubber band keeps the cover snapped closed or open. The rubber band also makes the XDA less slippery (for us clumsy users). It doesn't get in the way of the sync crade. It works with the external battery attached. You can see the caller ID and answer the phone with the cover closed. It protects the screen when closed. It protects the screen while you are talking. It prevents data loss and accidental calls that occur when the phone or pda turns on in your pocket (incoming call or reminder) and the screen gets bumped. It's practically free! And depending on your level of skill, it looks cool. (I'll post a picture when I'm less lazy -- and when my skill level improves <grin!>).
First Update
Well, I just finished version 2 of my CD case screen cover. You'll be thrilled to know this version uses NO electrical tape (Some were concerned, heh!). But I have to admit, I'm still not a skilled craftsman -- so I may hold off on the pictures until somebody who knows a hammer from a nail perfects my idea <grin!>.
For version 2 I used a high speed roto-tool with a cutting disc to cut the CD case; it's like cutting butter! The corners were rounded and the edges smoothed with the sanding disc. I used a drill to punch a hole in each top corner (two holes total) through which a blue rubber-band is strung (I ran out of black).
This one has the same benefits of the first, but it blends in with the XDA better. I just wish I didn't use a Sharpie to mark my cut lines
For version 3, I won't use permanent marker (duh!) so I can wash it clean. And I will try the Dremel's polishing pad. And maybe even drag out the pop-rivet gun. Who knew one could have this much fun on a week night?!
Final Update
Okay, I iterated again. I call this version 2.1 (same 2.0 cover with permanent ink marks , better finish). And I have pictures!
What's changed?
1. Still trying to be cheap, rather than buy a black rubber band, I used that same Sharpie to color a brown rubber band black. Hey, gotta go with what's available!
2. Earlier I had threatened to use a rivet gun, but that seemed to high tech for this project. I had used electrical tape, rubber-bands, but I was missing another fundamental tool of the do it yourselfer, STAPLES! So the 2.1 design uses 2 staples to hold the rubber band to each end of the cover. It lends a nice, unubstructed feel to the cover to not have the rubber band cutting across it -- I think.
3. I resorted to an old fashioned hand file to really straighten and smooth out the edges. Harder work than the dremel but it eliminates the problem of the plastic melting!
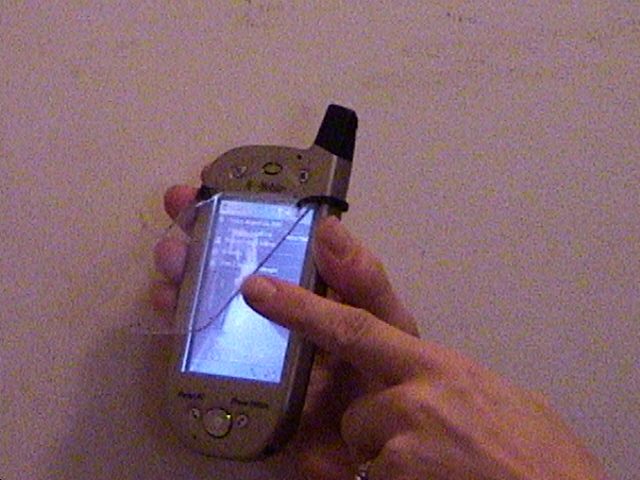
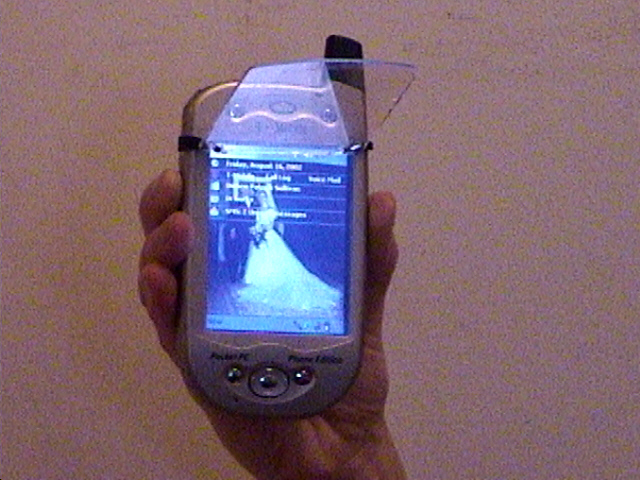
Gravity test Opening the cover Cover open and out of the way