Balloon & Crepe Decorating We have EVERY color of balloons & crepe you can think of! CLICK HERE |
|
|
Supplies: �3 balloons for each cluster Directions: 1. Blow up two balloons and tie together. 2. Blow up a third balloon and tie to the first pair. Fig. 1 Now you have a cluster of three that can be used in many different ways. Hang them from your chandelier, on the swags of your table cloth, from your drapes, or just space them on the walls around your room. Add to the cluster with Crepe and Curling Ribbon. |
| Balloon Clusters |
| Fig. 1 |
Supplies: �Several Balloon Clusters (instructions above) �3 Rolls of Crepe Ribbon Directions: 1. Place the ends of all crepe rolls together. Slip about 20'' of crepe down between Balloon Clusters. Fig. 2 (Do not cut) 2. Hang cluster from a chandelier, or pin to curtain, etc. 3. If you want to drape crepe from one cluster to another, follow Balloon Clusters instructions above to make as many clusters as you need and hang them around the room. 4. Holding the crepe rolls in your hand begin twisting crepe as you walk toward the second cluster. Bring crepe up to the cluster, measure another 20'' and cut. 5. Slip tail down between balloons. If you want a single cluster, cut the second half of crepe (measuring from cluster) 20'' long and slide down through balloons. 6. Add Curling Ribbon Clusters (directions below). |
| Balloon with Crepe Clusters |
 |
| Fig. 2 |
Supplies: �3 Eggs of Curling Ribbon in 3 different colors Directions: 1. Place the ends of the three different colors of curling ribbon together. 2. Measure 1 1/2 yards. 3. Cut and tie strands in the middle. 4. Curl ribbon with scissors. Fig. 3 5. Slide strands down through a Balloon Cluster so that they hang out from the middle of cluster. Fig. 4 |
| Balloon with Ribbon & Crepe Clusters |
Supplies: �3 Rolls of Crepe Paper �Small Amount of Matching Curling Ribbon Directions: 1. Use all three rolls of crepe. Cut ends on a slant, and place together, one on top of the other. 2. Measure 22" and hold mark with your fingers. Measure another 4" and fold crepe back onto itself. 3. Keep crepe flat and line up the edges of the 4" length evenly with the edges of the 22" length. Fig. 5 4. Fold crepe back on itself again. 5. Continue to fold 4" lengths back and forth until you have six layers of 4" loops. Fig. 5 *********************************** 6. Cut ends the same length as the first three tails of crepe. Tie a piece of curling ribbon tightly around all layers of crepe 3 1/4" from top of loops, catching the bottoms of all 4" lengths. Fig. 6 7. Separate loops by placing your forefinger inside at the top of each loop, use your thumb and second finger to pinch loop at the bottom and give it a 1/4 twist. Twisting will keep each loop from sliding back into the one next to it. *********************************** 8. Continue separating each group of loops, alternating the colors. Fig. 7 9. Insert two or three fingers inside each loop and spread apart all the way down to the base to fluff and smooth each loop. Fig. 7 10. Pin rosettes to the corner of your table cloth, on your curtains or place in the middle of a balloon cluster. Drape one or two of the tails around balloons and let the rest hang below rosette. |
| Crepe Rosettes |
 |
 |
 |
 |
 |
| Fig. 7 |
| Fig. 5 |
| Fig. 6 |
 |
| Fig. 4 |
 |
| Fig. 3 |
| Home | Party Tips | Biz Op | Tell A Friend | Contact Us | GabbyGoodies | Mega-EMart MakeParties | Texas Party Links | Link Directory | Support A Mom |
 |
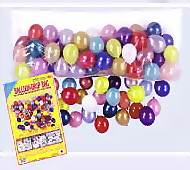 |
| For Larger Balloon Decorating: Try a Balloon Drop Kit! Each balloon bag comes with (100) 6" colorful balloons. Follow the directions and pull the cord to add excitement to your party. Click Here to order. |