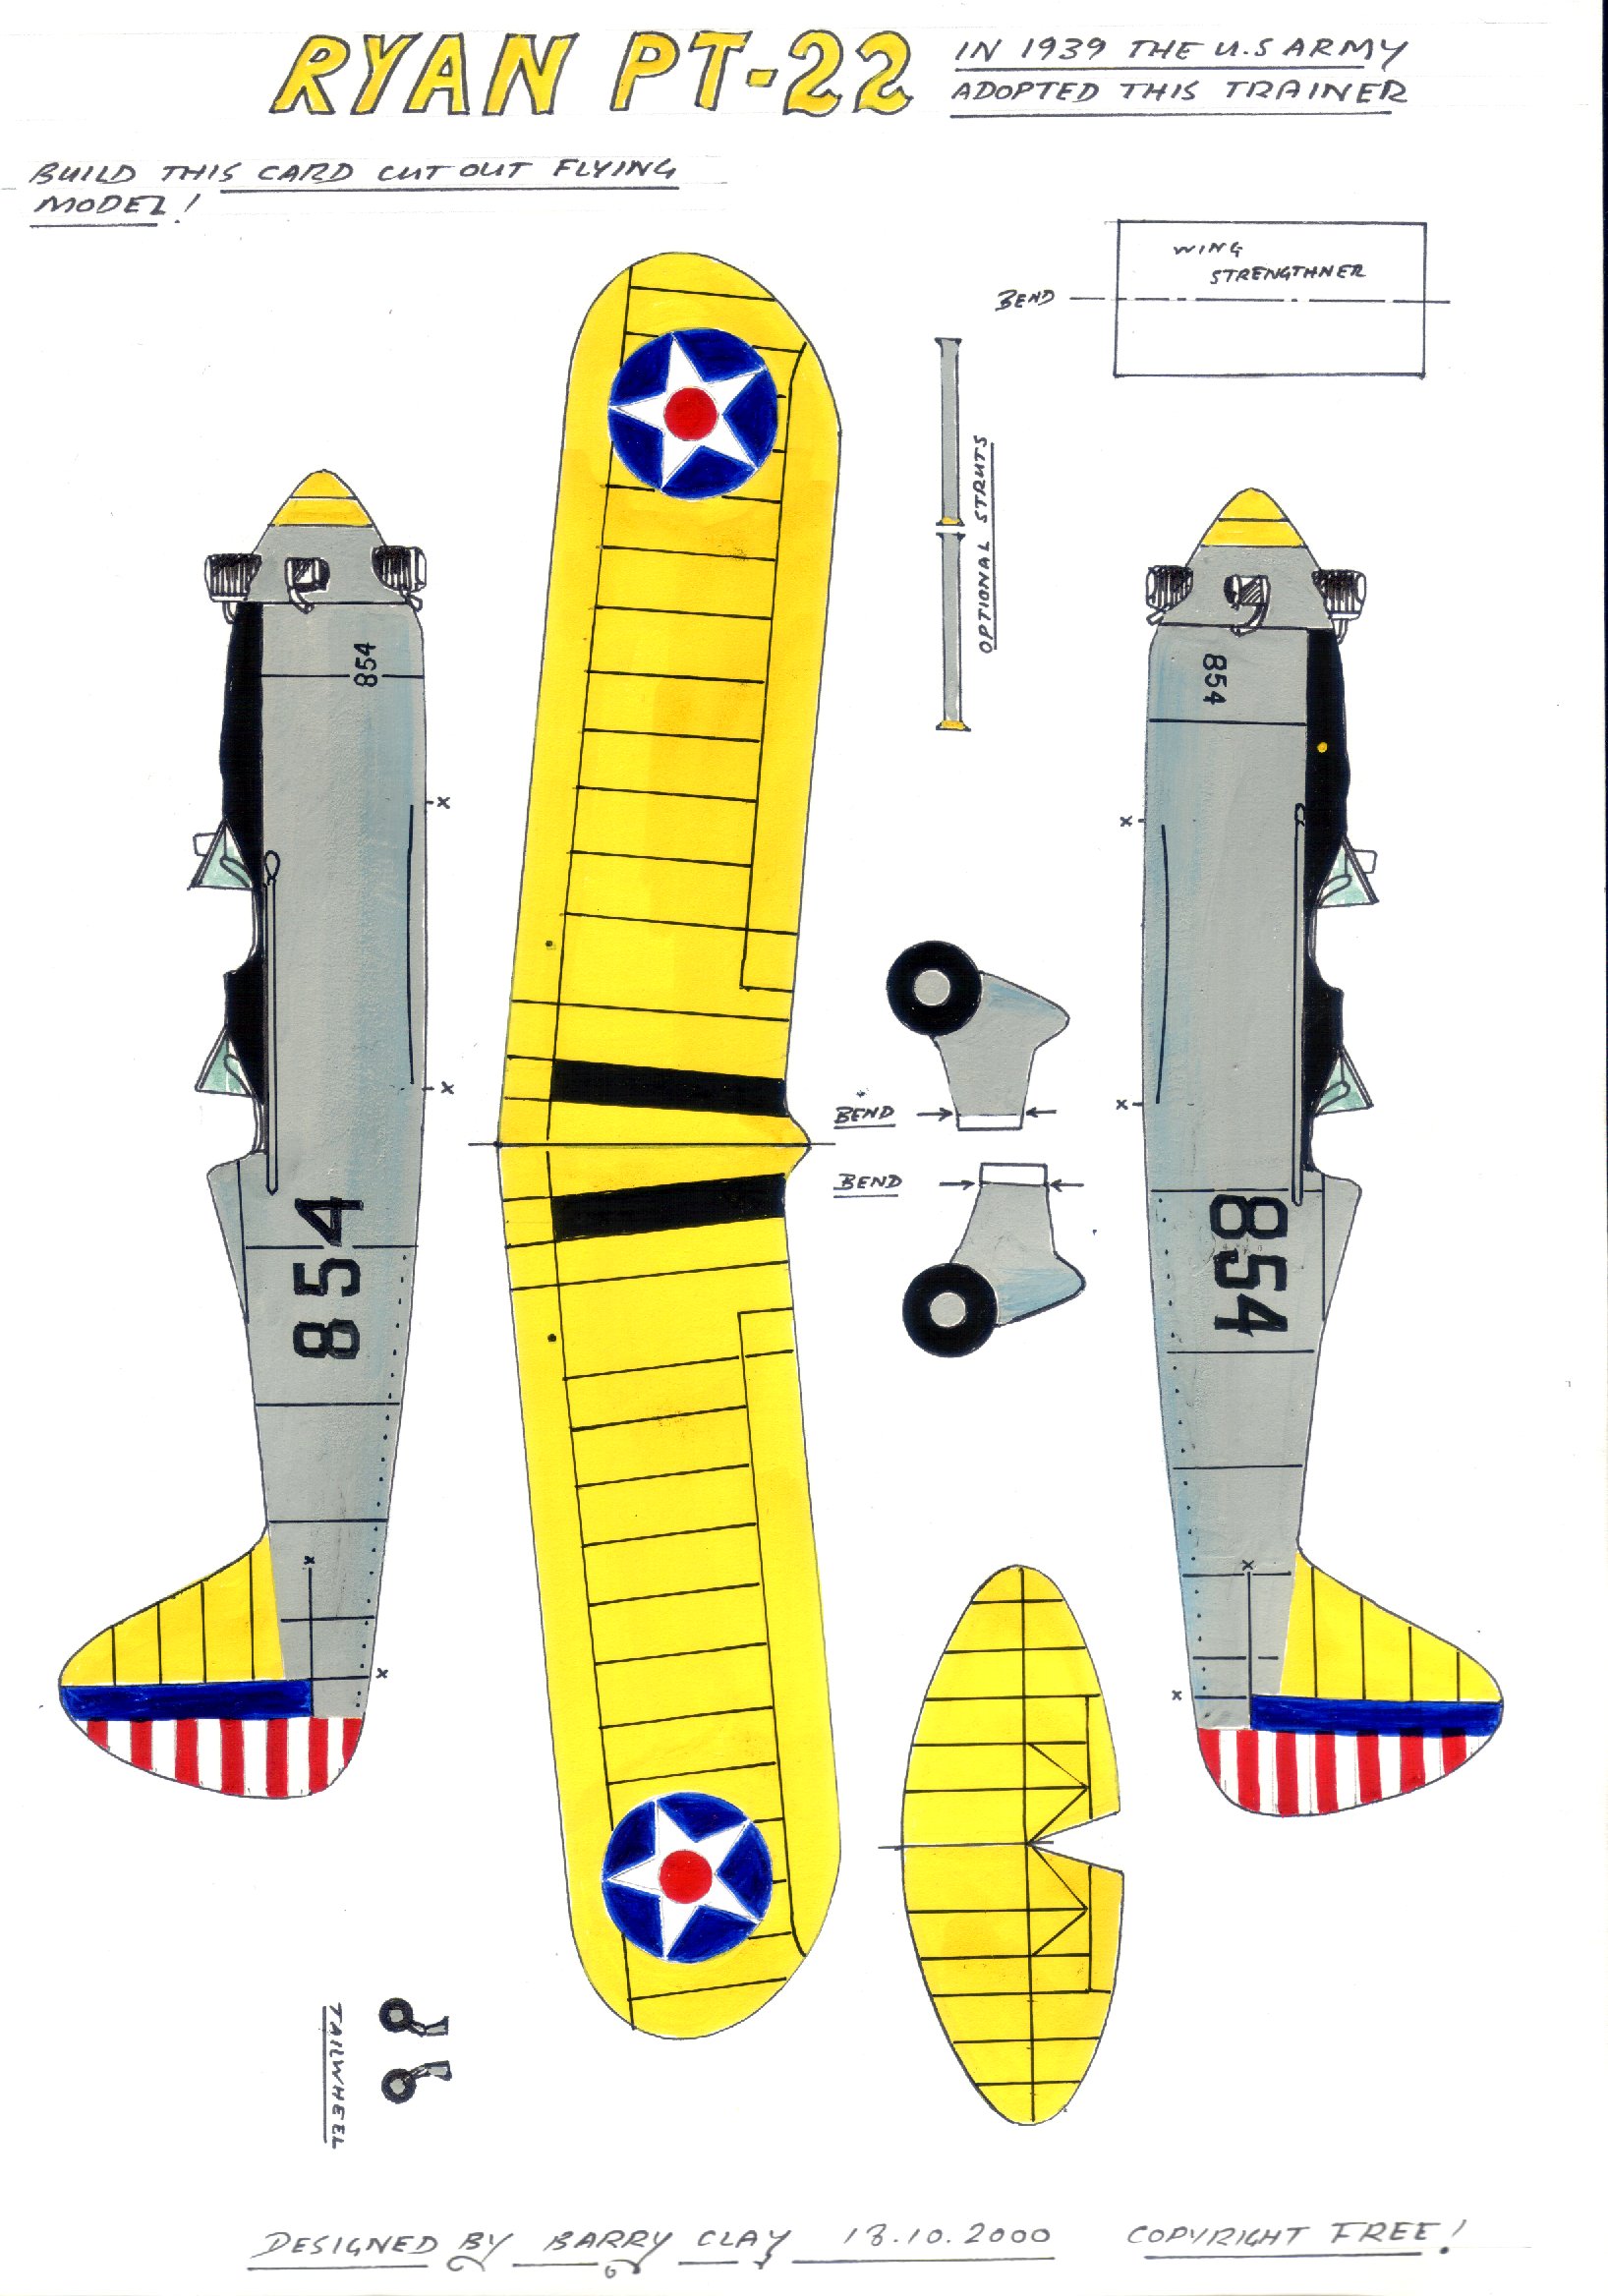
also reflex the trailing deges of the wingtips upwards slightly to prevent tip stalling,bend the tabs for the undercarriage at right angles and glue underneath the wings,the tailwheel can be made by carefully glueing together the two pieces provided and fixing either side of the fuselage.If desired the tiny struts can be mounted either side of the fuselage terminating at the wing,better still use cocktail sticks thinned down by sanding into aerofoil section and glueing into position these will help to lock the dihedral angle (quarter of an inch under each wingtip) into place.
FLYING YOUR MODEL-Balance on the point in line with the first line aft of the leading edge,place small paperclips or modelling clay onto the nose to add the necessary nose ballast,check for glide by gently launching across room or on a calm day outside,aim for a fairly flat glide by adjusting the elevators up or down in small increments,any turns can be corrected by either using the rudder or in extreme cases adjusting the aileron either up or down to create a banking effect,in all cases use small adjustments at a time noteing the effect on the model,you will quickly learn about how an aeroplane flies with these little models and they are cheap to construct,if you need any help or advice please contact me at- [email protected] happy landings! |