JCreator (brief user guide) |
|
|
|
|
I was told that :
even though JAVAC can spot any compilation error and report their LINE NUMBER; students find it hard to locate the exact line number from a lengthy source.
Since it is hard to identify a suitable Editor which provides LINE Numbers, therefore, JCreator is suggested. The purpose is to introduce a simple tools to locate the correct line number.
Personally, JCreator isn't my favorite development tools. (Perhaps, you've already noted that I frequently mis-type JBuilder for JCreator.) It can be a helpful tools for you master your debugging technique. So at THIS stage of learning, it isn't worthy to buy its PROfessional version.
Anyway, after using JCreator to locate those lines, please continue using
NotePad for correction & go back to DOS Prompt to test your codes. Because most
exercises are more easily tested under DOS prompt for various
parameters.
For example,
| 1 | install Java JDK no matter it's provided by OUHK or download from
Sun.
|
||||
| 2 | install JCreator will all default value UNTIL .....
|
||||
| 3 | after installation, please start JCreator immediately | ||||
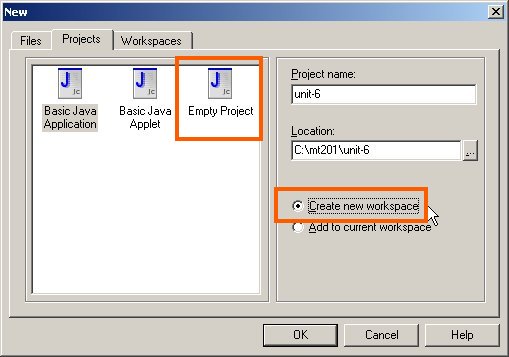
| 4 | create a new PROJECT, click [File]->[New]->[Project]
|
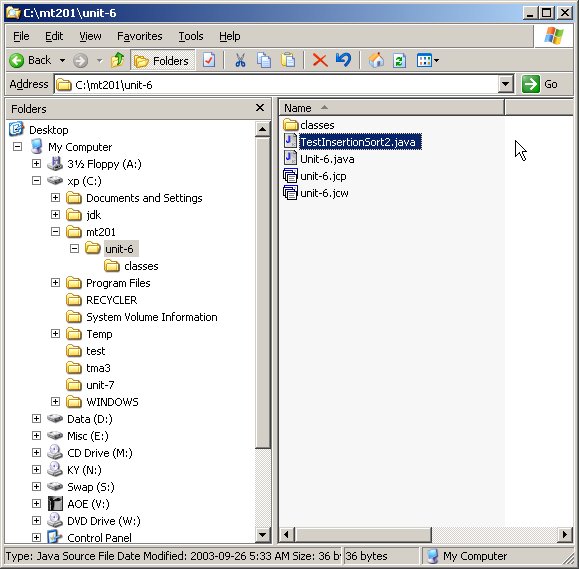
| 1 | Now, you can test file editing by clicking [File] ->[New]
->[Basic Java Application] Entering a file name, such as screen 02.jpg. Now, a [ .java ] file will be created by JCreator, you can easily access them from the DOS prompt please also refer to my screen 03.jpg, 04.jpg and
|
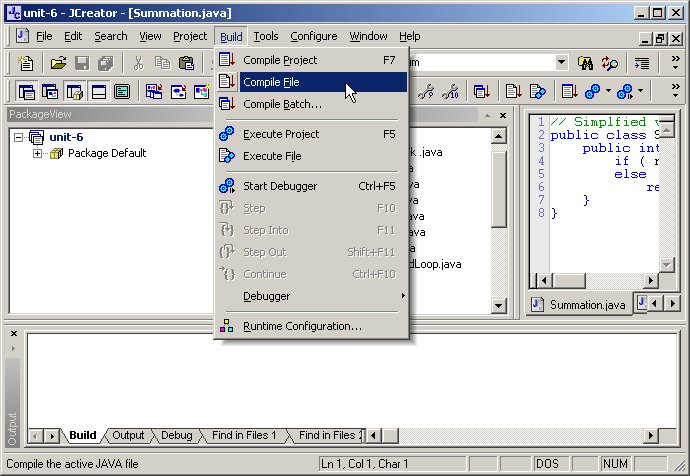
| 2 | to compile your Java codes, click [Build] ->[Compile file] 05.jpg |
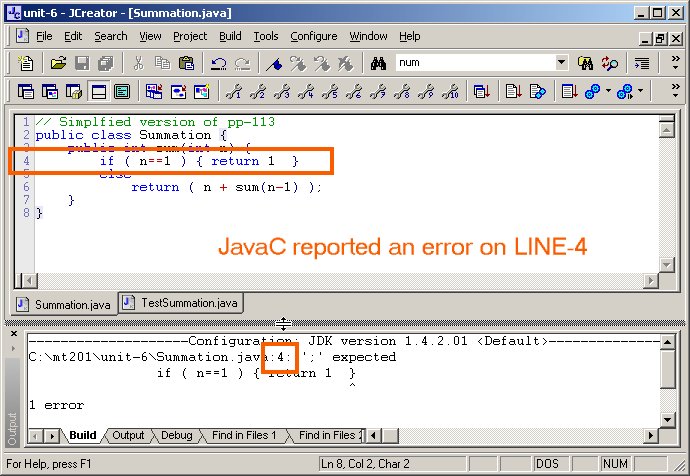
| 3 | compilation error will be displayed on a debug window 06.jpg |
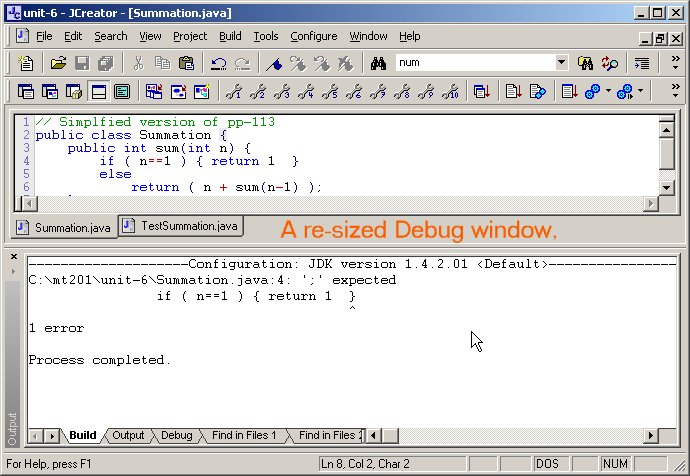
| 4 | you can also resize the debug window for a better view of the error messages 07.jpg 08.jpg |
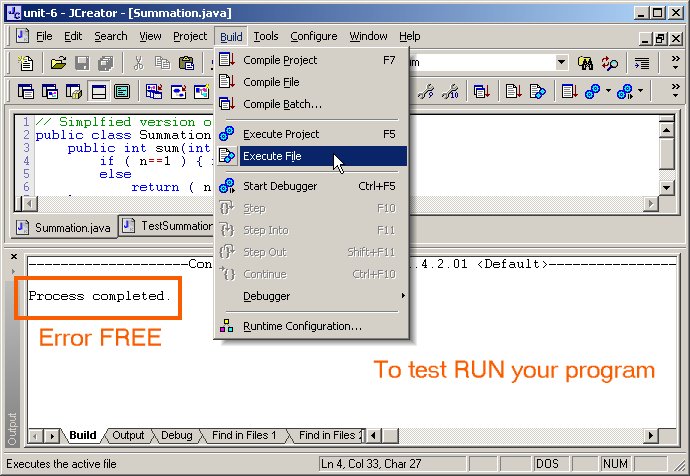
| 5 | to run your error free program, click [Build]->[Execute file] 09.jpg |
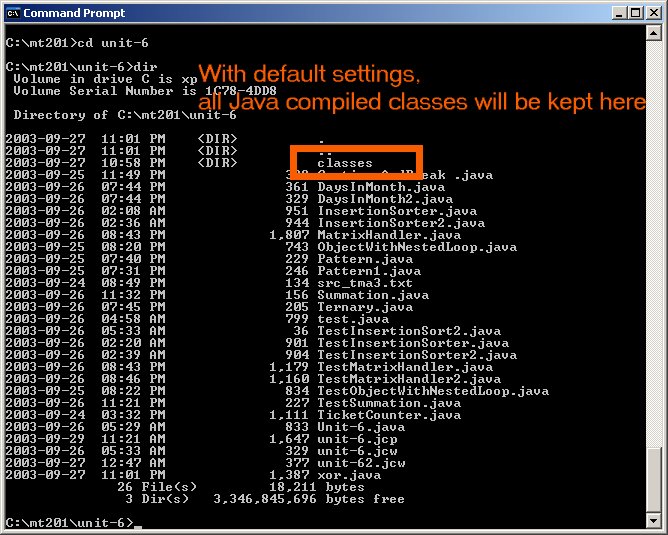
| 6 | if your java program requires additional parameters, please run it
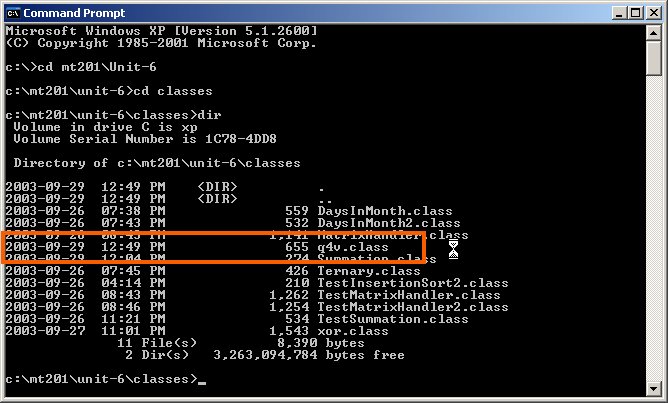
under DOS Prompt. Under DOS prompt, please change directory to [classes], where, all compiled Java classes will be kept there by JCreator's system default 10.jpg |
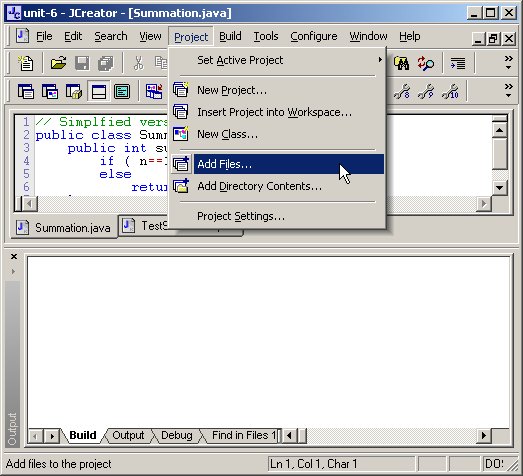
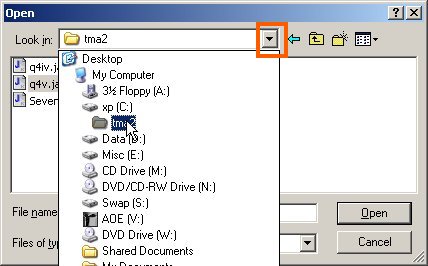
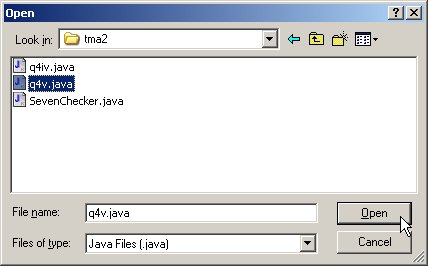
| 1 | While working on your project namely "Unit-6", suppose you like to
review your codes for TMA-02 where there are kept under [c:\tma2] then
you can import it as follows
Note : the source file q4v.java remains in [c:\tma2], but the ".class" file will be kept under [c:\mt201\Unit-6\classes] 16.jpg |
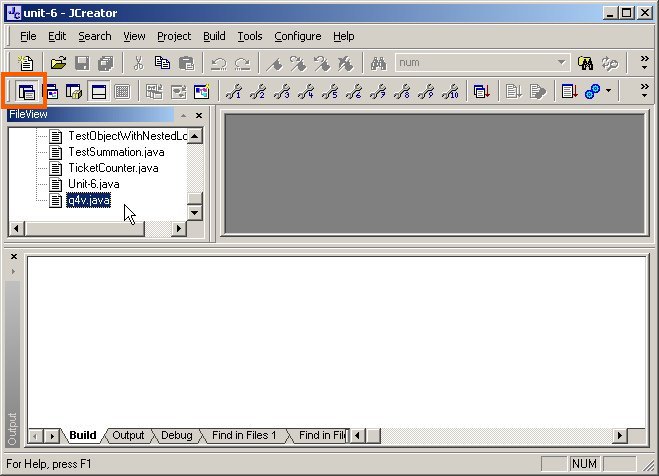
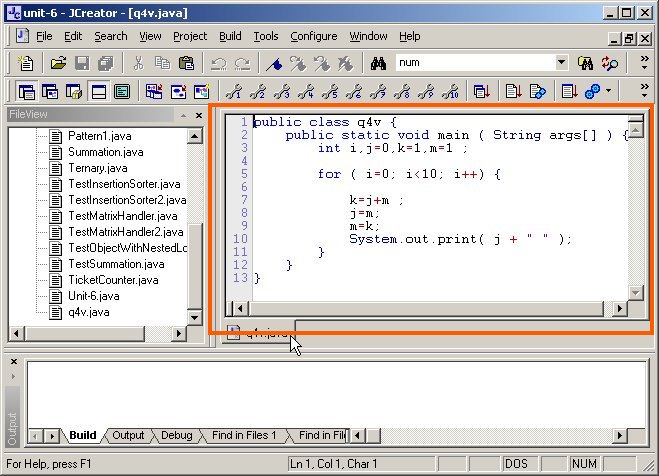
| 2 | If you like to access all source codes of tma2, you can also import
them using similar procedure as shown in step-1 by
|
| 3 | If you find it confusing in operating files in 2 different source directories ( as stated in step-1), you may consider closing your current "Unit-6" project and open the original "tma2" project again |
You can download this free version via this link http://www.jcreator.net/download/jcrea250.zip
You can download it for evaluation for 30 days from these links
For further info, please visit its official home page http://www.jcreator.com
| Updated on Friday, 19 March, 2004 |
|
|
|
|