8 6x1/2" grade 8 bolts
8 1/2" grade 8 lock nuts
8 body lift blocks

| Osprey's Tracker Mods | |||||||||||||||||||||||||||||
| 3" Body Lift | |||||||||||||||||||||||||||||
|
|||||||||||||||||||||||||||||
| Materials needed: 8 6x1/2" grade 8 bolts 8 1/2" grade 8 lock nuts 8 body lift blocks |
|||||||||||||||||||||||||||||
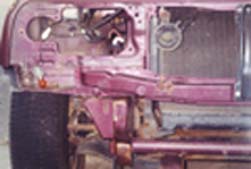
| Instead of buying a kit, or just using box tubing, I decided to go with 3" body lift blocks. First remove the front and rear bumpers. Then remove the body studs. Some reason they feel that they must locate them in most difficult places. I did this by using a hole saw and a 1/2" drill bit. The easiest two are the front, since you just have to remove the front bolts and using bore out holes with the 1/2" bit, then drop in a 6x1/2" grade 8 bolt. To access these you have to remove the the head light assemblies. The next 6 are not so easy. The rear 2 are located under the tailgate lip, 1st remove the rear bumper to access the rear two. To do the two under driver and passenger floorboards, I ended up cutting a 1/2" bit down in order fo be able to fit the drill under the dash, If you have access to a right angle drill or a cutting torch this job would be alot easier. To access the next two you will have to cut into the fender well, in the corner where the fenderwell meets the rear floorboard. After completing the body lift I patched these holes with sheet metal and body filler. (Bed liner will cover everything up later) After inserting a 6x1/2" bolt into each of the drilled out holes, it's time to prep for the actual lifting. You will have to disconnect the brakeline from the strut on the driver's side ( you can later drill a hole and move the fitting in the fenderwell) also there's a metal vacuum line on the firewall that need to be reversed. Disconnect the hoses on each end , remove it from the firewall and then reinstall it flipped upside down, I waited to the lift was down to reconnect the hoses. Also you will have to remove the two bolts that hold the brake lines on the passenger side of the frame. After lifting you can reattach using the bottom hole in the bracket to the top hole in the frame. You will also have to disconnect the air intake plumbing. Then you are going to have to remove the center console and tranny and transfer levers. A 3" extension will have to be installed on the transfer lever. Also don't forget to disconnect the cables along the tranny. You are now ready to start the lifting process. Start on one side and insert the body lift blocks. IMPORTANT: Jack up the body slowly and keep a eye and ear open to anything that may be still attached or may hang up. Repeat the process on the other side, tighten everything down, and reconnect everything. On mine, instead of reattaching the airbox, I installed a K&N universal cone filter. I made a steel brace and mounted between the fenderwell and the mounting hole where it originally attached to the airbox. I also installed the resister mod in the AIT connector and zip-tied out of the way. You may also want to fabricate removeable covers to cover the strut mount holes to prevent water and mud from flying up from the wheelwells. | |||||||||||||||||||||||||||||
| Front Before |
|||||||||||||||||||||||||||||
|
|||||||||||||||||||||||||||||
| Front After | |||||||||||||||||||||||||||||
|
|||||||||||||||||||||||||||||
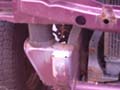
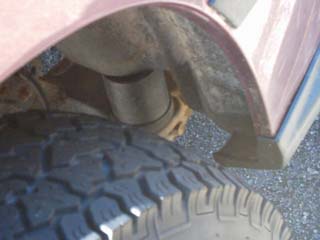
| Rear Passenger Side Mount | |||||||||||||||||||||||||||||
|
|||||||||||||||||||||||||||||
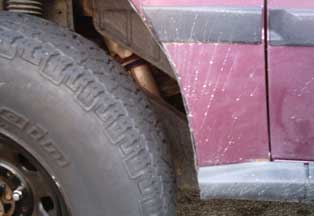
| Driver's Side Front Fender Trim | |||||||||||||||||||||||||||||
|
|||||||||||||||||||||||||||||
| Tranny tunnel slightly to allow rear movement of shifter. | |||||||||||||||||||||||||||||
|
|||||||||||||||||||||||||||||
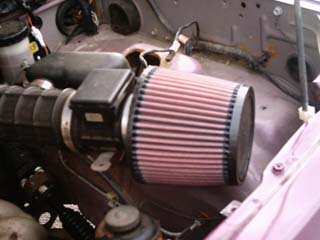
| K&N Filter Installed | |||||||||||||||||||||||||||||