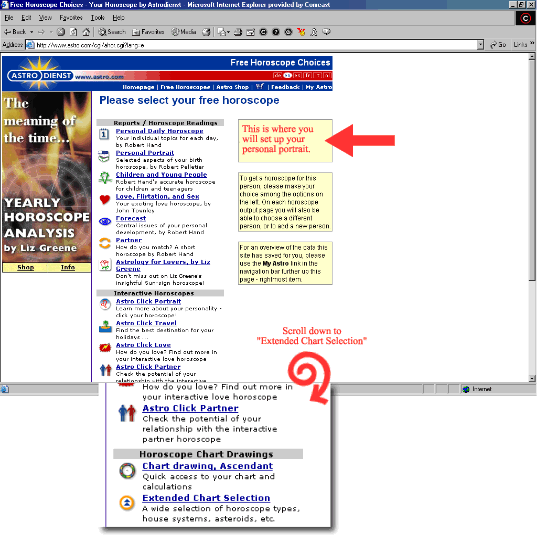
Step 1: Go to http://www.astro.com/cgi/ahor.cgi?lang=e and set up your personal portrait. Once this is completed, go to the extended chart selection. Screen shot follows.
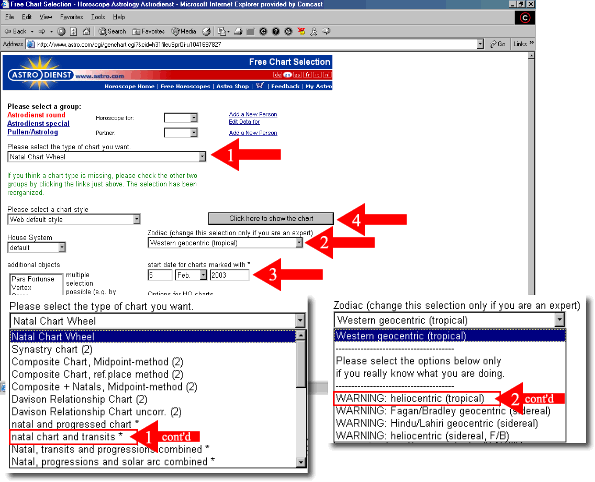
Step 2: In the extended chart selection, first you want to set the chart to "natal chart and transits*" (arrow 1). Next, change the chart style to "WARNING: heliocentric (tropical)" (arrow 2). Then change the date (arrow 3) to the day 14 days prior to ovulation. You will return to this screen several times to print out the info for the 14 days.
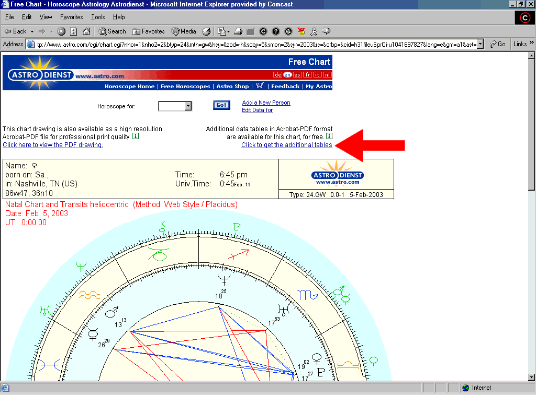
Step 3: Once the chart is displayed, click on the link "Click to get the additional tables" as shown by the arrow in the following screenshot. This opens a .pdf.
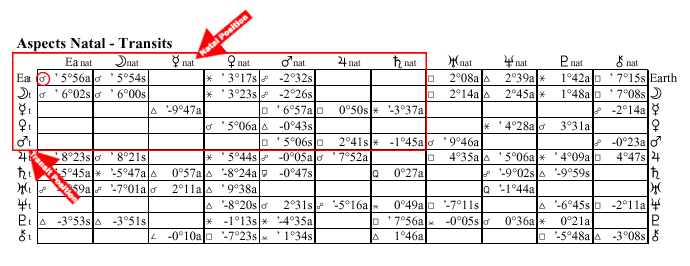
Step 4: In the .pdf file, move to the second page and scroll down. You will see a table similar to the one shown below. Save this info to your computer.
Inside the red box in the picture are the transits you will be recording. You do not need to include the moon. The transits go across the screen, you don't need to mind the numbers just mark that there was a transit line there in your chart. Some transits need to be specially recorded, such as Earth opposition. This is NOT the symbol shown inside the circle, the circle is marking where you will see the proper symbol. The symbols are located in a key on the printable page of charts at the bottom of the page.
Step 5: Return to step 2 and change the date to 13 days before ovulation. Continue until you have all 14 days and fill them into your chart.