MAC Cosplay 2002
-------------------------------------
Venue: Suntec International Convention & Exhibition Centre
Rooms 325 & 326
Date: 21 December 2001
Time: 11am - 7.30 p.m.
Entrance Fees: S$10 per Visitor/ Cosplayer
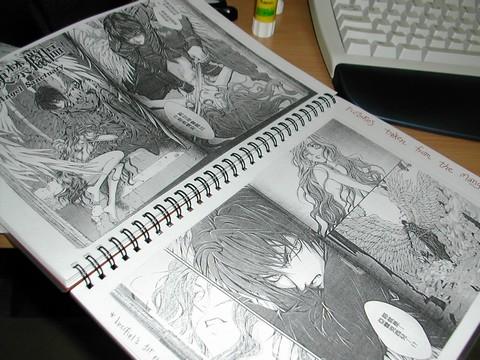
This was the second cosplay I've ever attended so far. And despite it being only my second (my first was the one held at The Hereen Shops somewhere in the middle of 2002), I decided to cosplay a character! These are the details of what I did in the process of making my cosplay character!

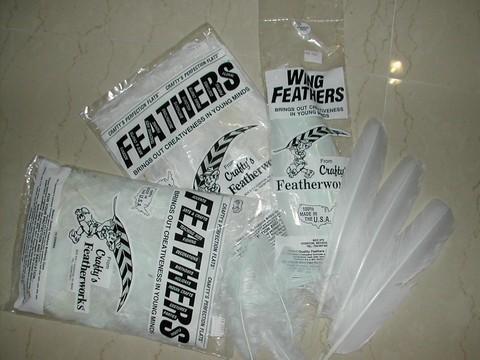
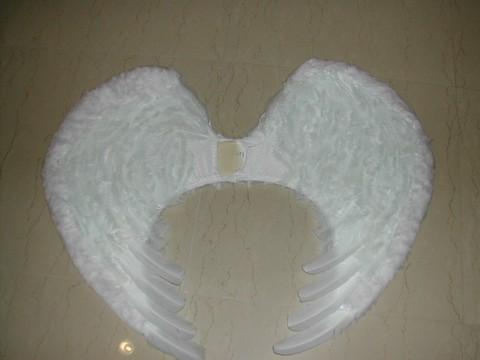
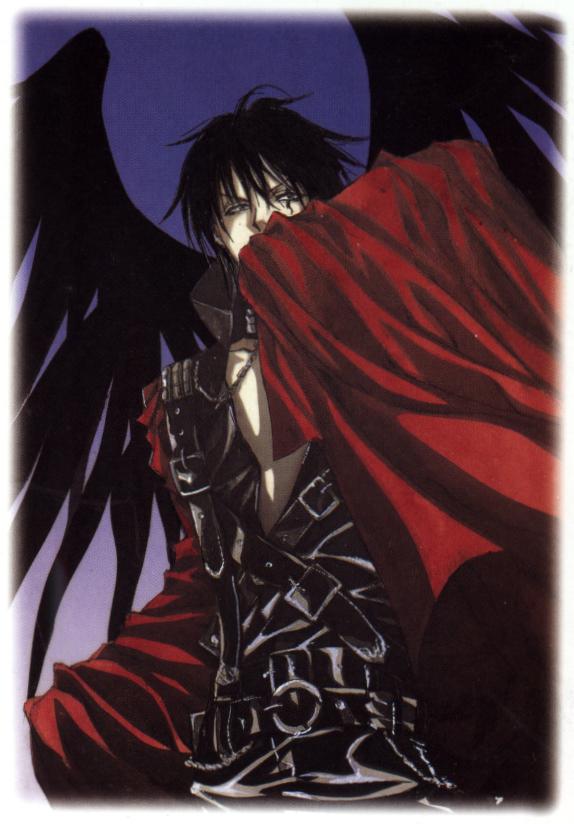
Making the actual 4 wings weren't exactly considered a pain at all. It was hard, yes, but I really enjoyed myself doing them! I started on the most simple basis of a paper model with the wings stuck on a barbie doll. With the shape and proportion satisfied, I moved on to make a life size newspaper shape of the wings and held them to my back while facing the mirror. Then I placed the wing shaped newspaper pieces on thin plastic boards bought from Art Friend, and cut out the shapes. For the smaller wings, I crumpled newspaper into a thin roll and stuck them onto the arcs of the wing shaped plastic with scotch-tape. For the Larger pair, I drew out crescent shapes in a 3cm thick styrofoam board and cut them out. Securing those crescent shaped styrofoam pieces to the plastic boards was a nightmare. Because of the plastic board being double layered, even a hard and fat sewing needle could not last to poke holes through it, and I resorted to using an extremely small screwdriver.. those that you used to screw the spectacle screws on. That made things turn out much faster and in no time, I was sewing the styrofoam to the plastic board wings using nylon string and a normal needle to weave my way through the holes made by the screwdriver. Next came the tedious part of using some cheap white towel fabric to cover all 4 wing parts. I had to hand-stitch all of these for more than 8 hours. The easiest and best part was feather sticking. Using UHU super glue, i had to apply glue to each and every feather before sticking them to the wings. Because I do know how to draw wings well, I positioned the larger quill feathers to the bottom end of each wing, and then stuck the feathers from bottom to up, just as a normal bird's wing would look. It turned out awesome ;) Since the larger pair and the Smaller pair of wings were made separately (you can see the smaller pair in the picture above), I had to get my dad to hammer the 2 pairs of wings' bases to a small wooden board. (measuring about 30cm x 10cm) An old schoolbag was sacrificed for its straps too, and that was nailed on as well. The overall effect was that although the straps were quite visible, they served their purpose in reducing the pressure of the weight of the 4 wings in my shoulders and the wooden board was really sturdy in keeping the wings from dropping off, no matter how fast i moved or which direction i suddenly turned. The wings were... a stunning success. The coat however, was pretty easy. I bought some shiny gold thin ribbon material from Spotlight and just stitched them onto a long black trenchcoat borrowed from my mom. The Pilot's badge was borrowed from a really nice friend I knew online, Donna. The black boots were actually ankle boots added on with extra shiny black cloth around the shin, connected with velcro. Another prop was the sword. It was made entirely of leftover plastic board covering one of those long thin metal strips that I took out from one of our curtain binds LOL Moggy was the weapon maker. Creative in making the sword and painting it as well as varnishing, she made it look really fake but it felt good to hold, because it didn't bend or break.

![]() back
to main
back
to main