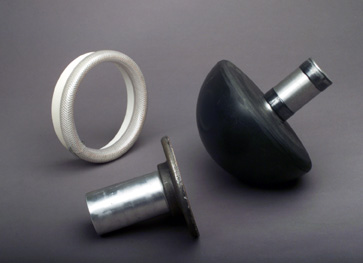
For the upper part, I used a 2"x4" piece of threaded pipe screwed into a 2" floor flange. These two pieces completed the upper, rotating part of the tool. I then glued a round piece of thin plywood to the floor flange, to which I secure with carpet tape my flat silver objects for engraving. This upper part was a little loose on the steel bar, so I made three wraps of electrical tape on the bar, which not only made it fit better, but also made it turn smoother.
Later, I made a second, upper, rotating piece using a peg clamp on top, instead of a floor flange.
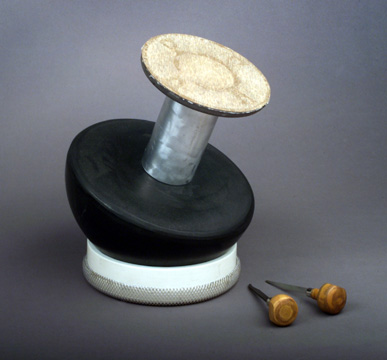
You can set the ball on a sandbag, or a ring, such as this 1-1/2" nipple of 6" PVC pipe with a slit hose on the bottom to prevent sliding. The ball rotates in the ring flawlessly.
The only piece that I had to buy was the floor flange, which cost about $6.60. The other pieces came from scrap piles. But, even if you had to buy all of the parts, or scrounge them from who-knows-where, or buy a used bowling ball at a garage sale, this is an economical way to get started in engraving.
It's not as good as a commercial ball, but I'm amazed at how well this simple tool works. Now, with this ball, three or four shaped and sharpened gravers, some instruction, and a lot of practice, you can be a freehand engraver without spending a fortune. Contact me if you have any questions.

Click on a photo to enlarge.