 |
|
|
|
|
|
|
|
|
|
|
|
|
|
|
 |
|
|
|
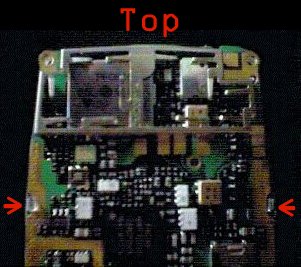
Observe the circut board, On the upside (LCD up) the is a silver metal plate and a clear plastic plate.Do not attempt to remove the metal plate, at least not for this job. What you need to remove is the clear plastic plate, turn the circut board upsidedown (LCD down) and you will notice the 2 plastic clips holding in the clear plate, use a flathead screwdriver (or your fingernails) or prise them open, be carful not to break them. |
|
|
|
|
|
 |
|
|
|
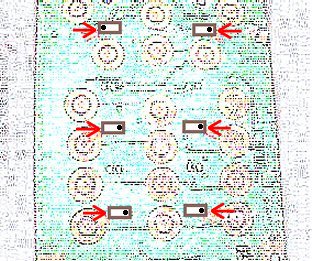
After the front plate has been removed, you now have access to the Keypad LEDS all you need to do is desolder the old LEDS the resolder the new LEDS, the negative side goes where the dots are on this diagram of the LED orientation. |
|
|
|
|
|
 |
|
|
|
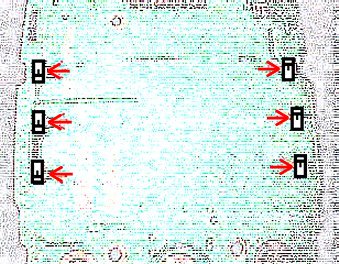
Now for the Screen LEDS it is the same process as the the keypad LEDS desolder the old and resolder the new the symbol on this diagram of the leds represents Positive (+) Re-assembly of the phone is the reverse of the disassembly, bofore screwing everything back into place turn the phone on and make sure all the lights light up, if not turn it off immediately then check your connection. I or huggable.org will not be responsible for any damage caused to your phone. |
|
|
|