|
|
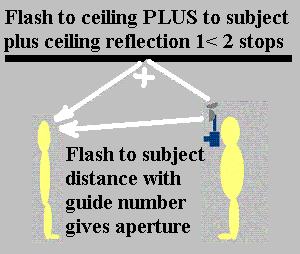
Guide Numbers These are numbers which when divided by the flash to subject distance give you the basic aperture to use. They are expressed in metric and imperial. The most common range between 56 to 110 in imperial and 17 to 51 in metric. Imperial distance is in feet Metric distance is in metres |
They can be adjusted according to the film speed or sensitivity of the digital sensor. So 56 with 100 ISO becomes 80 with 200 ISO and 110 with 400 ISO. If you think of f/ in front of the GN the change becomes logical. Double the film speed so you close the aperture down a stop f/5.6 to f/8. |
||
|
|
The flash can be directed at the subject from the camera or from any direction. The modern digital and compact camera usually has it's built in flash close to the lens and gives a good even exposure to the subject. But as intimated from the Guide Number the power of the light falls off and backgrounds become dark very quickly. |
So just as a full stop more aperture is needed at say 7'6" than at 5ft, so the background at 7'6"behind a person at five feet will receive only half the light. The flat lighting and the rapid fall off is why using the built-in camera flash is frowned upon for situations where it is not expedient such as snap shots or 'media' work. |
||
|
Bounce flash as above can be used to soften the light which is very hard when coming from the actual flash tube but is fraught with problems as to measuring the distance the flash is travelling via the reflector and the reflective value of the reflector. This is overcome with the modern through the lens metering systems. |
Flashguns with built-in meters may not read the exposure correctly in the bounce situation.
|
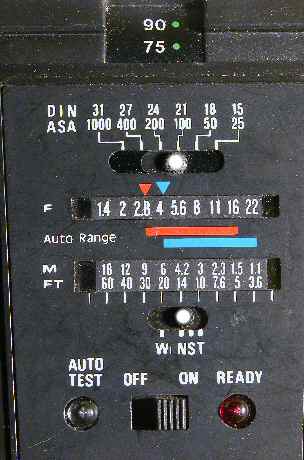
Below are the control dials of two flashguns. On the right an old Achiever with an adjustable head set for bounce flash at 75 degrees. Set for 100ASA [ISO] with it's adjustable beam at normal |
||
|
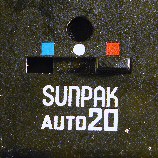
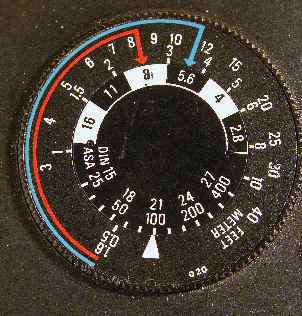
Flash guns usually have an exposure calculator with their range of operation marked. The Sunpack has a three position switch on the front to be selected first. In the white position no light gets to the sensor so the gun gives full power. This is a waste of power so red and blue give two other options to conserve the battery and make shooting simple. The gun has a basic guide number of 56 so the red arrow points to f/8 and the line extends from about 8ft round to 1'6". This means the flash will give correct exposure for 100ASA film if the aperture is set to f/8 and photos taken between 8ft and closer. Open up the aperture to f/5.6 and use the blue setting and one can work between 10ft and closer. |
The Achiever is more powerful and using red and f/2.8 will adjust the light for shots from 30ft to 5ft.It's Guide Number is 80. It also has variable beam adjustment to confuse the issue, The adjustment just above the off-on switch.
|
|
||
|
|
|
|
||
|
The W,N,S,T refer to the setting of the units telescopic head. Auto Test enables you to fire the unit manually while the Ready bulb lights up when the flash is fully charged. At least in theory but it is often a good idea to wait a few more seconds. |
Implications of controls At the top is the angle of the flashhead. One trap is to have it at an angle of around 60<75 degrees with a 'bounce card' and with the camera pointed downwards direct light from the flash can give you an area of over-exposure across the top part of the shot. For ASA read the modern ISO .... same numbers different title. If you want to cut back the strength of the flash tell it you are using high speed film/sensor setting, it doesn't know any better and will cut it's output. Not sure how modern flash connect to today's cameras so that may not work. Working in the 'auto' red or blue modes conserves battery power since you only use enough light for the subject when it is closer than the maximum distance. |
The red arrowheads indicate that working with the auto switch set to red or blue you can set your aperture to f/2.8 [red] or f/4 [blue] and if the subject is anywhere between 30ft and 5ft for red the flash unit will adjust it's output accordingly. With these 'helps' it is desirable to do some test shots since subjects close to the flash may well have surroundings reflecting spill light onto them so requiring less exposure. Whereas exterior subjects simply have the direct flash light ... or in large halls. Spill light ... the light escaping from the flash unit not in the exact direction of the camera's field of view. |
||
|
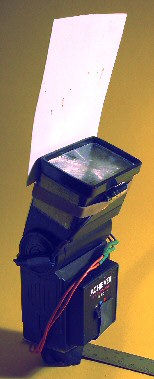
A simple idea used for many years by a member of the Parliamentary Press Gallery
|
is to point the flash upwards and have a white card behind the flash secured by a thick rubber band. This looses about two stops of power but gives a softer light on the subject. The drawing suggests a more efficient set-up. A commercial gadget lets about 15% of the light go directly towards the subject while the rest goes upwards to be bounced back. |
A problem with bounce light is that it is reaching the subject from up high and with the inverse square law of light the dark trousers of males are even darker. |
||
|
My version which hardly gets used because I rarely use flash since starting with digital. |
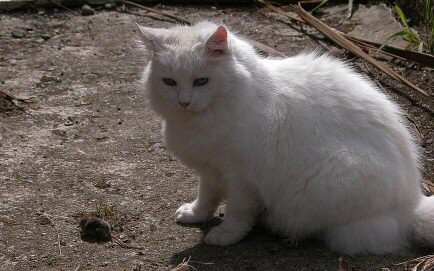
Syncro Sunlight
"RUN! I'm not looking" says my cat to a mouse she caught. In this situation the use of flash can help to lift the shadows. Called Syncro-sunlight it can be over done on close-ups, but that is a personal choice. The point and shoot and pro-sumer cameras are pretty good in doing syncro-sunlight within the limitations of their weak flash power. The flash is very close to the lens and their lighting is almost shadow-less. |
The thing to remember is with manual control that the flash is controlled by the aperture and the ambient light by the shutter. In 'f/8 lighting' the exposure for the subject could be f/8 at 1/250. Say the flash has a Guide Number of 80, so if the subject is 10ft from the subject the flash will equal the sunlight exposure ... suitable for backlit subjects. Coming in for a closer shot at 5ft the required aperture is f/16 so the shutter speed is changed to 1/60 |
||
|
If f/16 is not available, pro-sumer camera with f/8 or f/11 as its minimum aperture, then one can tell the flash unit you are using a faster film speed/ ISO .. so at 5ft and set to 400ISO you use f/8 and the shutter remains at 1/250. |
Alternatively one could use the plastic card bouncer and setting the flash's film speed higher one could obtain a larger aperture for reduction of depth of field. Say f/2.8 maybe. Except DSLRs have a limitation to their fastest 'sync' shutter speed. |
The DSLRs sync speed limitation is overcome to a degree with the modern pulsing flash unit which permits a 1/500 shutter speed instead of just 1/250 .... and many SLR/ DSLRs only sync up to less than that. Whereas the pro-sumer and compur shutter syncs at most if not all it's shutter speeds. |
||
|
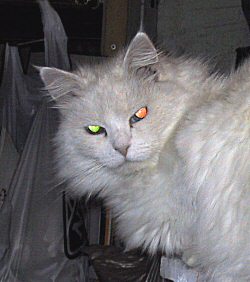
RED EYE Is a vexing subject to some which arrived with color. Here Smudge displays both red and green due to the pigmentation in her eyes. It comes from the flash being directly in line with the eyes looking at the camera. Some cameras can give a pre-flash which closes down the iris to reduce the effect. Another way is to have the flash unit on an extension arm as right pix. Else you can get rid of it in editing. |
|
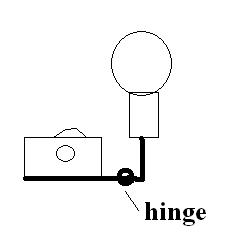
The hinge, or flexible arm, permits you to place the light in an arc around the camera position for best lighting of the subject. Can be done by simply holding flash. you need a long sync cable. |
||
|
|
Photography is a compromise between numerous parameters, which is one reason why it is so interesting and so complicated to pass on. |
|
||