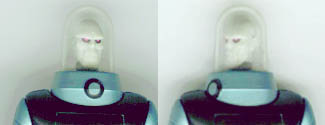
When I got Mr. Freeze, I thought it was one of best (if not the best) animated figure Hasbro has done. However, I was a little bother by the lack of a rotating head. I kept thinking about that scene in "Cold Comfort" where Batman was trying to sneak up on Mr. Freeze, and Freeze rotates his head around to greet the Dark Knight ... I had to have this feature!!! Below is a description of how it can be acomplished. It's pretty easy but you do need some experience with a dremel.
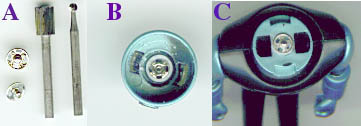
Here's what you need: 2 snaps, a flat drill bit 4-5mm in diameter and a smaller drill tip (A). The snaps can be found at Walmart or any fabric/craft stores in a package of 6 for about $1. Get the metal snaps as they have tighter joints and last longer.
First, remove Mr Freeze head and drill a flat hole 2mm deep into the white plastic piece. Do this step slowly and cautiously. Don't go to far as this is the piece that hold his head unto his helmet. When the white plastic starts to get thin, stop immediately. Next change to the smaller drill bit and boar a small circular hole into the center of the white plastic. You can't see it from this picture but the snap has this little knob that protrudes outward. The center hole will accommodate this knob and help to achieve a snug fit. Insert the bigger piece of the snap into the hole and glue it in place with either a plastic glue gun, epoxy or superglue (B). If you decide to use superglue, I recommend Ross brand. This is probably the strongest superglue in the market and will bind to metal. You might also want to scruff up the metal surface with sandpaper to help give the glue somethign to bite unto. Next, cut off the 2 black plastic pieces. This is the piece that's used to lock the head onto the body. Finally glue the second part of the snap unto the torso (C). Don't forget to glue another one to that spider body (not pictured). Allow 30 minutes for the glue to set and voila, you now have a rotating head Mr. Freeze.