|
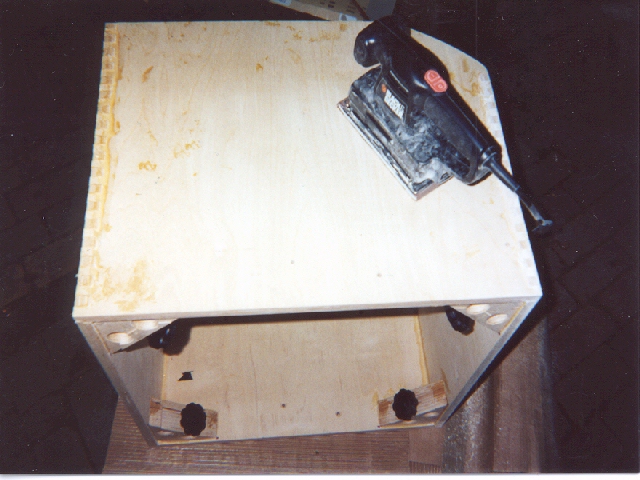
This is the mirror box, out of its clamps after two days curing time for the epoxy. The finger joints are visible here; Astrosystems suggests using a router to carve down the finger joints & excess glue, and this is probably a good idea. However, I decided to put the money into a new eyepiece rather than a new power tool, and I used a finish sander to clean up the joints. The end result was satisfactory, but I think if I had it to do again I'd go with the router. Epoxy clogs up the sandpaper something awful, and it's easy to screw up the veneer with a sander.This was a lot of work. Notice the truss pole clamps with knobs (at bottom of photo) , and the cutaway front-bottom edge which helps the scope keep a low profile (at top of photo). |
|
|
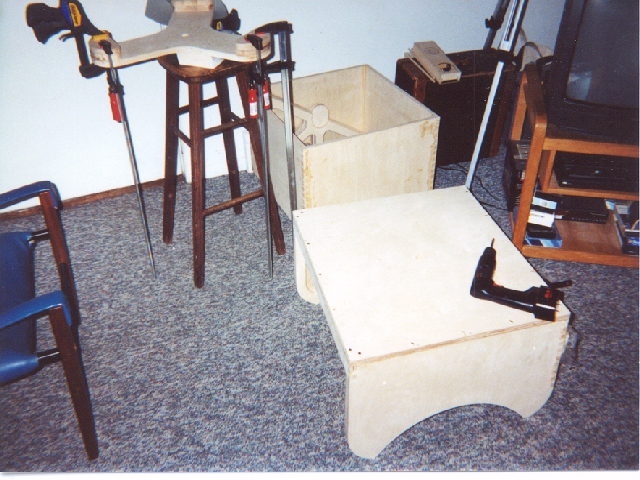
Here, clockwise, are the ground board, mirror box and rocker box in my living room. The ground board is a single propeller-shaped piece of 3/4 baltic birch plywood with triple-thickness feet. There are two sets of roller bearings and one teflon pad mounted on the ground board for azimuth bearings. One of the distinctive Telekit alt bearings can be seen inside the mirror box. The rocker box is upside down after having the bottom attached with epoxy and a whole bunch of screws -- the only place on the scope where screws are used. The filter slide for the secondary cage can be seen resting on the accordion case (don't ask) over by the tripod legs in the corner. If it looks as though you could build this in your living room, using sophisticated tools like chairs & books & a portable drill, you're getting the idea. |
|