3. Installation
Installation of all the parts
is more or less in reverse order of removal, unless the plastic cover is
being removed for access to the brushes and electrical parts, and possibly
fit a new voltage regulator and brush assembly into the original alternator.
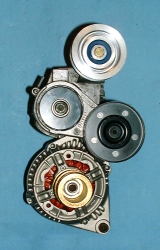
Regulator
and Brush Inspection |
  |
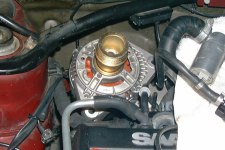 |
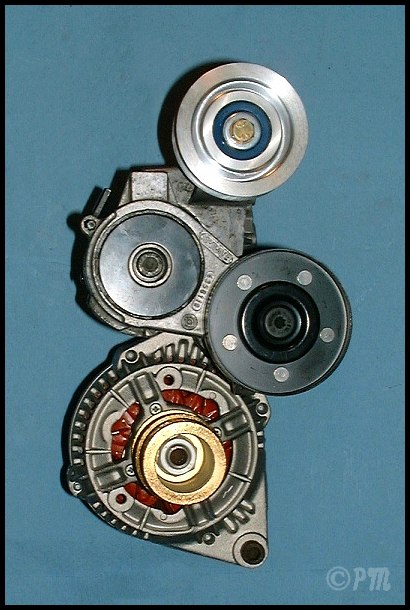
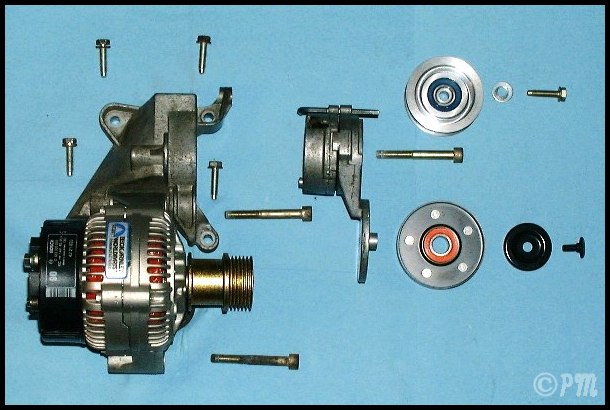
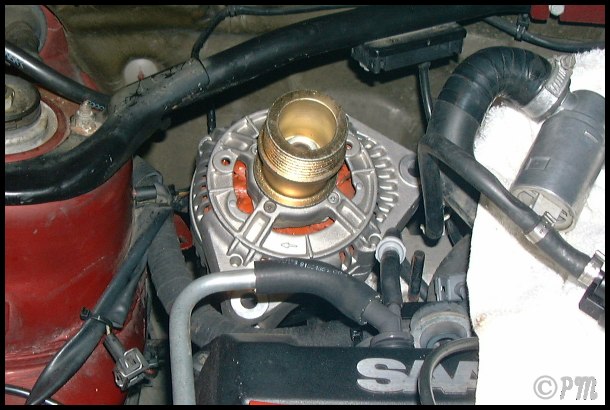
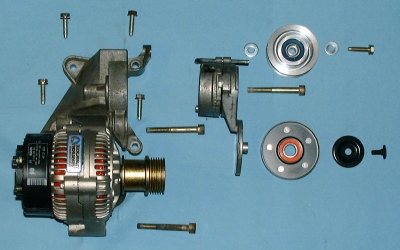
3.1 Alternator
Lower alternator into the engine compartment
Insert but do not tighten the lower mounting bolt
Install upper mounting bracket
Pivot alternator up into upper bracket
Install upper mounting bolt
Now tighten lower mounting bolt
Connect battery cable and small wire
Re-connect battery |
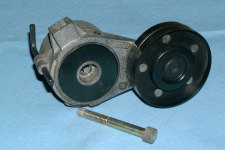 |
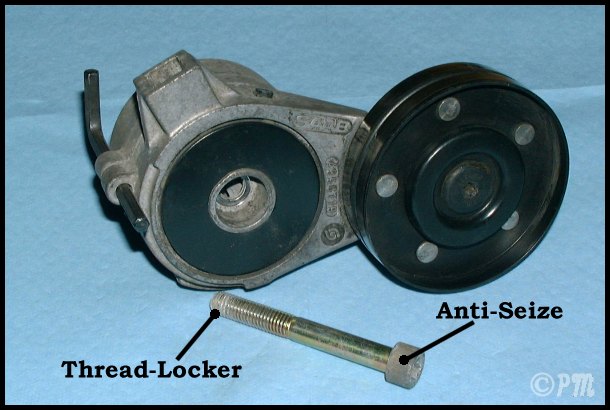
3.2 Tensionner Pulley
The tensioner can be installed with the new pulley in place and the
5-mm hex key still holding the spring in locked position. |
|
3.3 Remaining Parts
Valves and hoses disconnected for access are installed next, then the
idler pulley and serpentine belt, and finally the crankshaft pulley cover
and the right wheel. |
References:
Haynes 5A-3, Alternator
Haynes 5A-4, Brushes + Reg.
EPC 2-0270 Belt Tensioner
EPC 3A-0180 Bosch 90A Gen. |
3.4 Tools Used
3/8 & thumbwheel ratchet, 3", 6", 20" extensions
1/4 flat ratchet
8, 10, 13 mm sockets
13 mm box-end wrench (idler pulley)
8-mm bits and hex keys
T40 torx bit (tensioner pulley)
Flat file (alternator lugs)
Wire brushes (alternator bolts)
Blue threadlocker (pulley and alternator bolts)
Anti-Seize (bushings, alternator lugs)
|
|