|
Infantry Squad Movement
Techniques
There are three
movement techniques used
by
the infantry squad.
These are not to be
confused
with formations.
The techniques are:
Overwatch
Traveling
Overwatch
Bounding
Overwatch
Referencing Army
Field Manual FM 100-5
and Army Infantry
Squad Operations
training
documentation IN 0201:

Since MOH/SH is
designed for contact
expected
I plan to only
discuss Bounding
Overwatch.
Bounding Overwatch
is a controlled movement by
teams
during contact or
expected contact with the
enemy.
Basically one team
moves into a position to place
fire
on possible
location that could fire upon the other team
as
they move foreward.
Once the second team is in
position
they prepare to
place fire on possible enemy positions that
fire on the first
team when they move up.
The teams place
suppressing fire when necessary to
prevent
the enemy from
firing on the team they are
overwatching.
Suppression fire
does not mean taking careful aim. It
means
firing as quickly
as possible into windows etc to
make
the enemy keep
their head down.
With protective
fire, smoke, cover and concealment the
teams
leap frog from
position to position advancing toward
an
AP (attack point)
from which an assault can be made. Note that
this form of
maneuver can be used to retreat, but not as
effectively.
The following will
be a series of diagrams showing
two
teams using
Bounding Overwatch.
Teams circle and
square start at one end of a map and are
to
follow a road to a
building known or expected to be
occupied.
They do not know if
there are any other enemy forces
lurking
about.
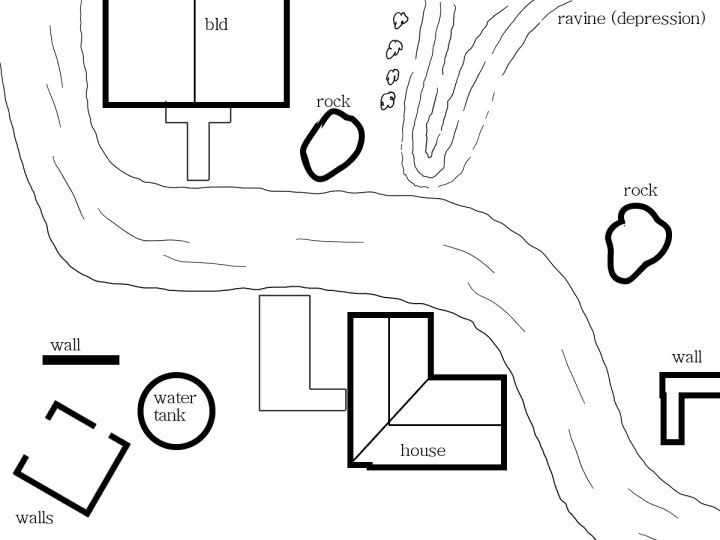
diagram 1 layout of
area
Below:
Team C (circle) and
Team S (square) are to move from the lower
right
corner to the bld
in the upper left corner and secure
it.
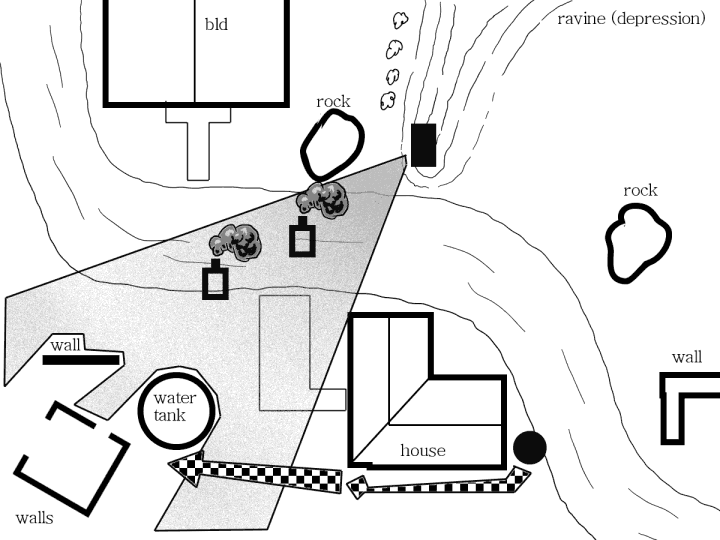
Team S Watches the
area in grey (field of fire) as Team C moves
from
the wall and into
the house. If C is fired upon or enemy presence is
determined,
S will fire on the
windows and doors until C is in position.
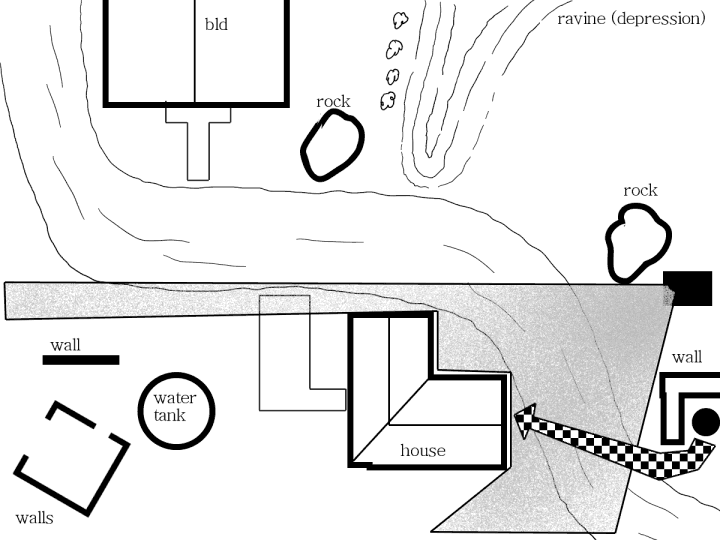
diagram
2
Next:
C occupies the
house and sets up fields of fire to cover S as they move to
occupy positions in
the ravine.
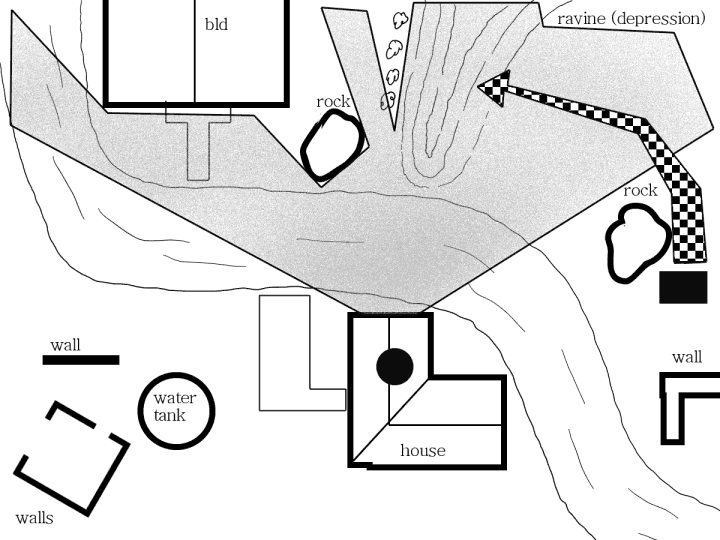
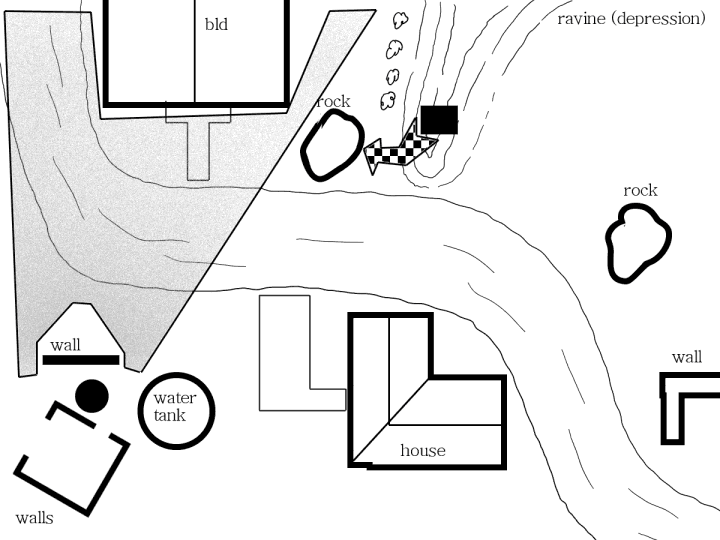
diagram
3
Next:
S sets up fields of
fire to overwatch as C makes 2 moves. 1st they move
around
to the back of the
house. Note here that they do NOT have overwatch from
S.
There are times you
will be out of the protective eye of the other team.
2nd move for C
is to cross the
open area between the water tank and the house, in direct view
of the bld
AND from the walls.
S now has an overwatch position to watch the walls and
water
tank, but not the
bld. S and C both smoke the road close to the house so S field
of fire
is not obstructed
too much, waiting for good smoke coverage C now runs to Water
tank
and clears the
walls area being careful not to expose themselves to fire
from bld.
diagram
4
Next:
C is in position to
cover the front of the bld while S moves into final position
behind
the rock. These
will be the APs attack positions for C and
S.
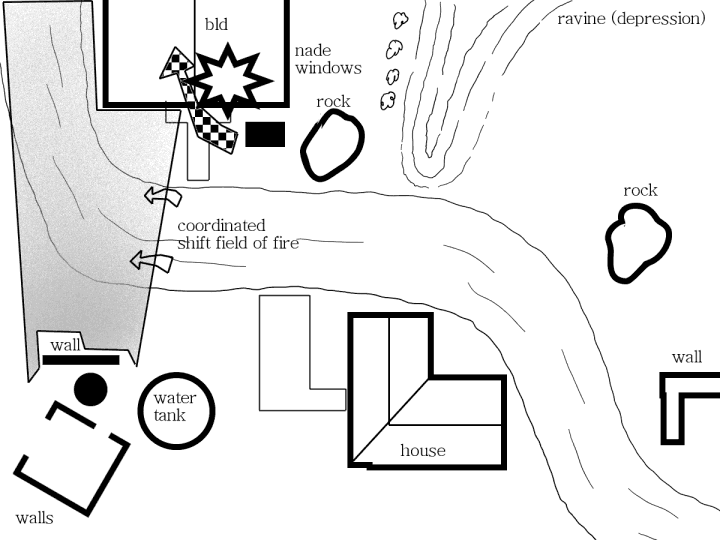
diagram
5
Next:
This is the
critical phase, requires GOOD communication. When S is ready
for the attack,
they signal C to
put suppressive fire on the bld (C should have the mg if
possible)
When the firing
begins S throws grenades into the bld windows and rushes the
door,
S will signal C
again to say they are rushing and C will shift their fires
away from where
S is going to
prevent TK.
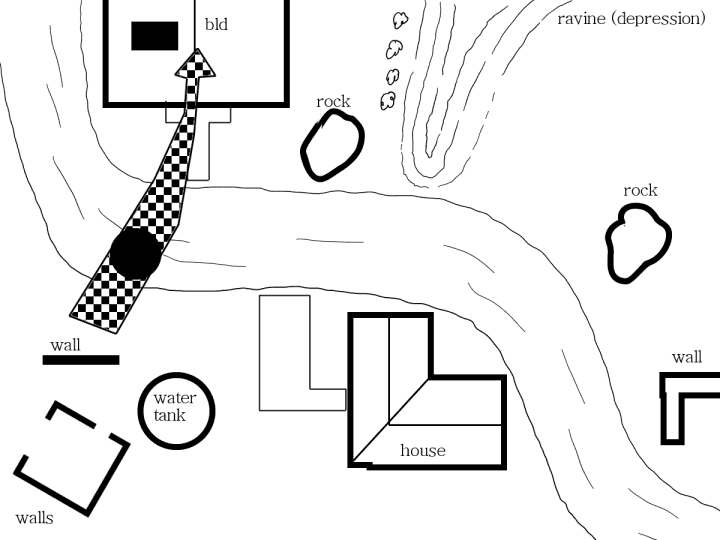
diagram
6
Last:
As soon as S enters
the building C ceases fire and rushes the building and sets up
a hasty
defense, or helps S
clear the bld.
diagram
7
Once the bld is
secured S and C set up defensive
positions and radio
HQ Area Secured, Awaiting Orders.
Out.
| 