![]()
![]()
![]()
![]()
![]()
![]()
![]()
![]()
![]()
![]()
![]()
|
|
|
|
Samurai Snorkel
Due to my "no fear" attitude, I have found my vehicles getting into water just a little too deep. For Samurai owners, this is easy to remedy. The following parts are necessary to install your own high rise snorkel:
Sears Craftsman Shop-Vac hose
tube of silicon sealer
straps for securing the hose to the windshield frame, or zip-ties
Samurai heater duct elbow (optional)
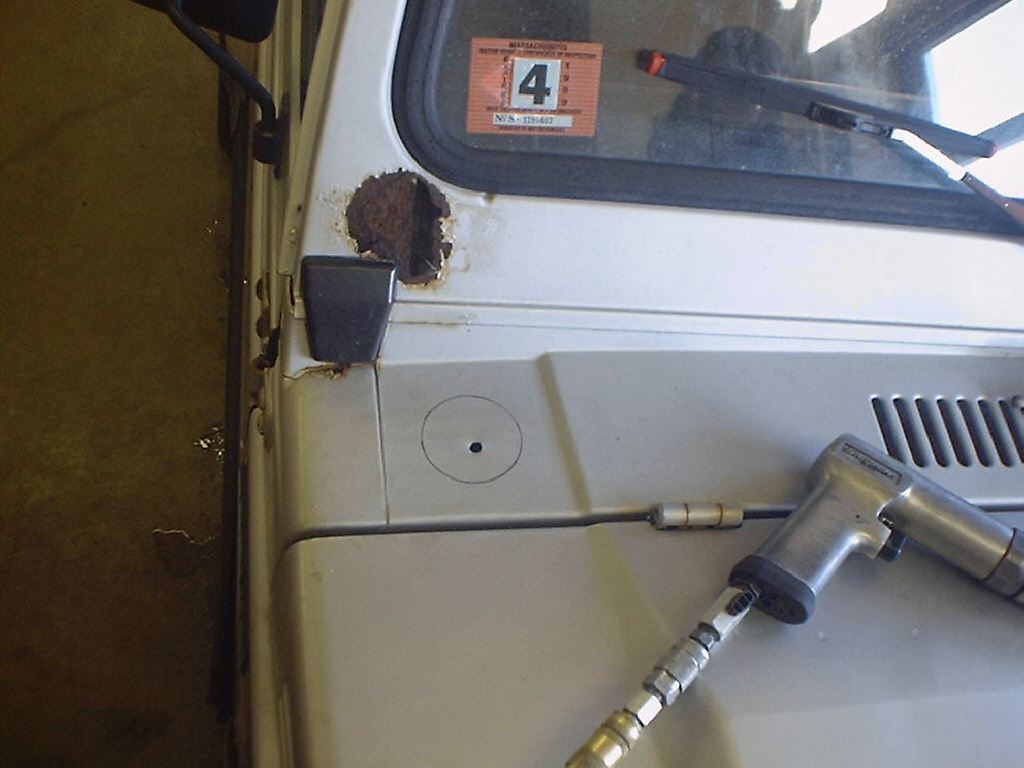
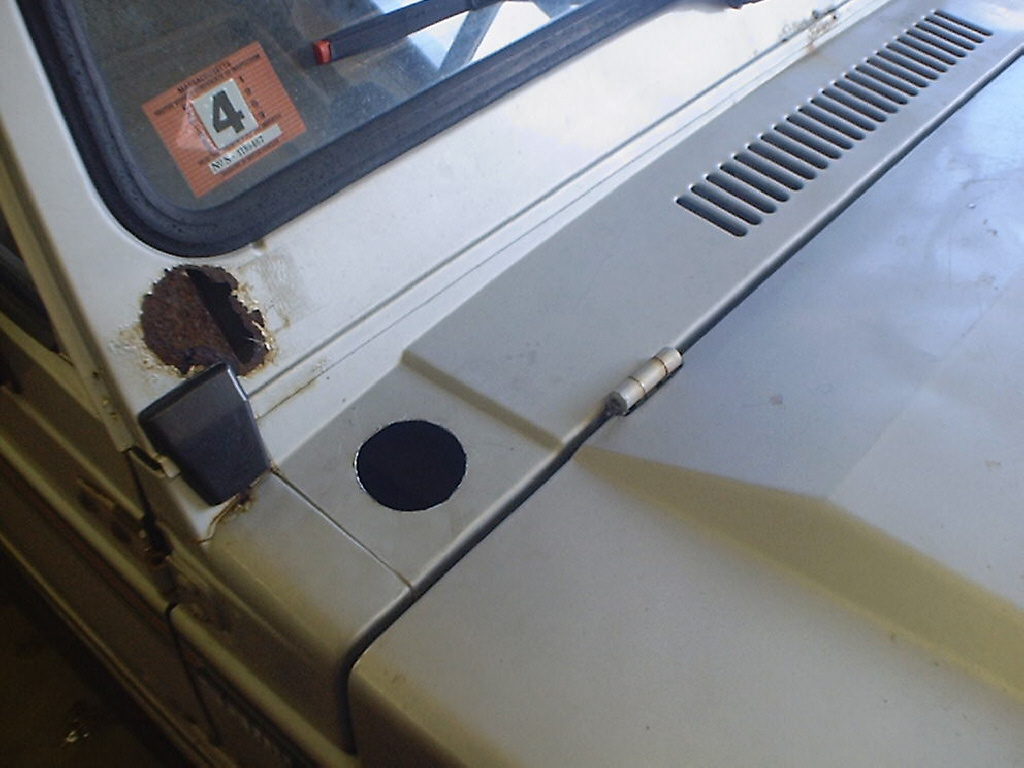
Start by marking the spot where the hose will come through the cowl. There is no set measurement for where this has to be; just make sure there is nothing behind the dash that will interfere with the hose routing. The exact size of the hole depends on whether you want to use rubber to trim the hole with. The snorkel I helped a friend install was trimmed with a piece of door gasket cut to size and attached to the sheetmetal of the cowl. You could also use a piece of rubber hose slit down one side. I chose not to trim mine with anything. The hole can be cut with a metal cutting hole saw, a cut-off wheel, a jigsaw, or any other method you choose. After cutting the hole, smooth the cut and attach the trim. Make sure the snorkel tubing is a snug fit in the hole; if not, remove the trim and open the hole a little more.
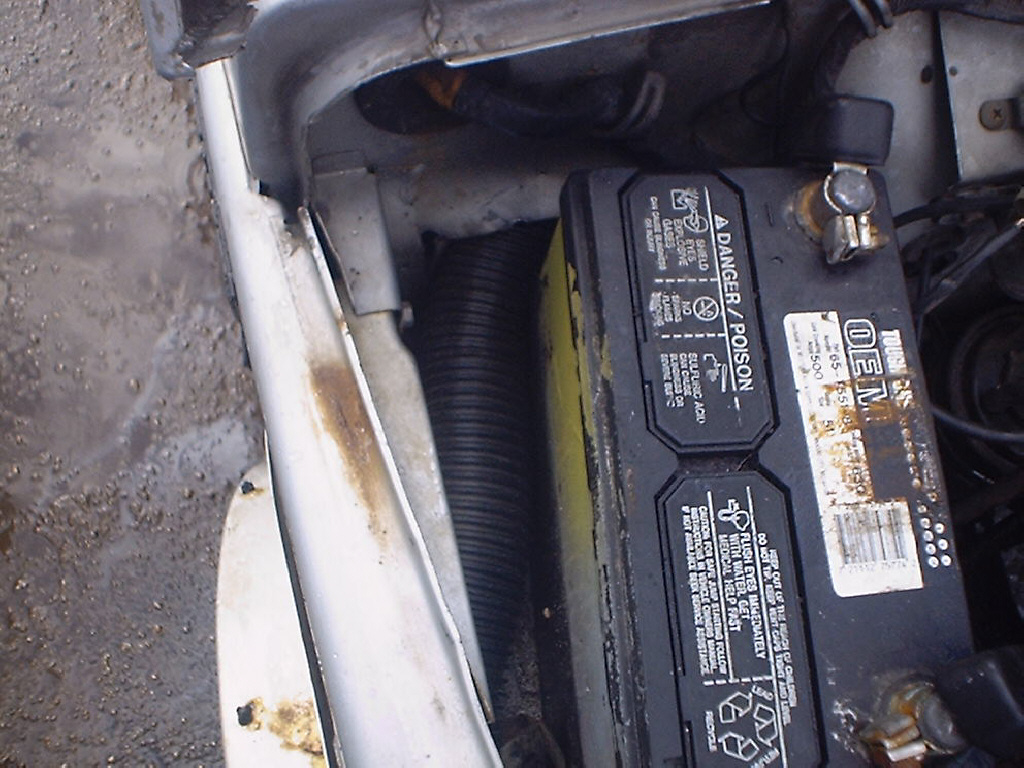
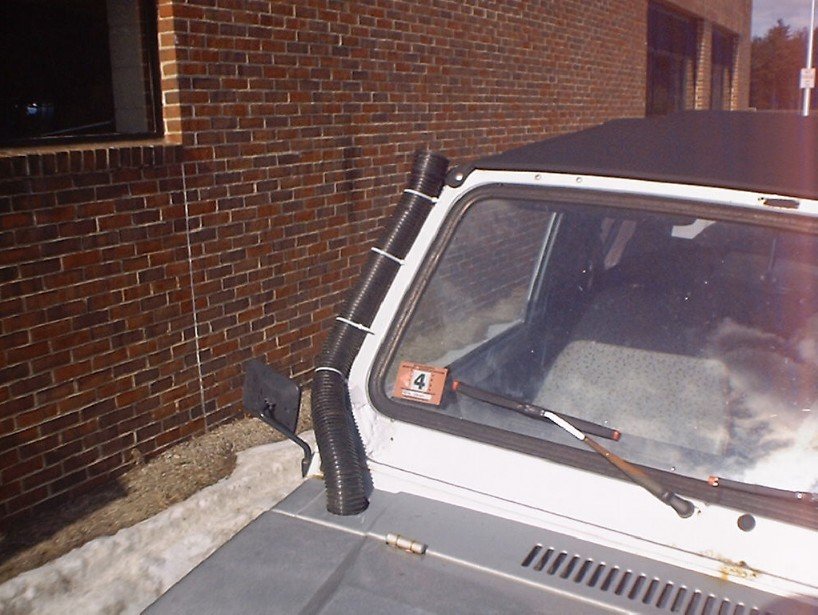
Next, you will need to remove the battery and cut a hole in the firewall for the tubing to pass through. In the following picture, you can just see where I located this hole. (I still had the battery in at this time, but it should be removed.) Trim this hole with rubber to keep the sharp metal from cutting the snorkel. You should also trim some of the inner fender bracing to give the hose more room to tuck out of the way of the battery.
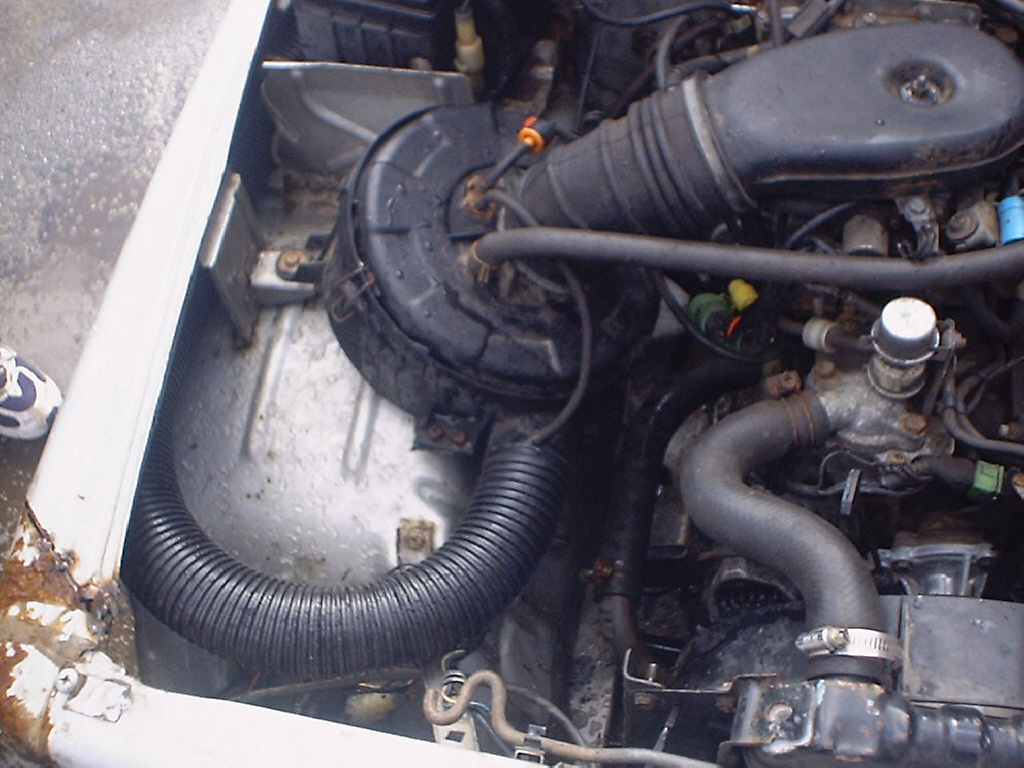
Now you can run the tubing down through the cowl, then out the hole in the firewall. Follow along the area you trimmed out of the inner fender, around the battery tray, and up to the air cleaner. Remove the warm air valve from the air cleaner. You may have to put this back in for the winter in some areas, but even here in New England I didn't have any problem driving without it in the winter. The nice thing about this snorkel setup is that the tubing can be unplugged from the air cleaner without modifying anything, so the warm air valve can be reinstalled for the winter. After removing the warm air valve, bend the hose around and plug it into the air cleaner. I chose to seal the hose with a little silicone, but the hose is a nice, tight fit, so it isn't really necessary.
Now you can trim the windshield end of the hose to length and attach it to the drip rail of the windshield frame. I just used long zip-ties to attach mine, and even driving through dense brush, I never had a problem. You may choose to attach the hose with metal strapping or clamps instead. You can now seal the drain in the bottom of the air cleaner housing with silicone, as well as the air cleaner lid. This makes it a little more of a pain to check or change the air filter, but it insures that NO water gets in. I also used silicone to seal between the tubing and the cowl, and between the tubing and the firewall.
Now you need to insure that water doesn't get into the snorkel if it rains. We found that one of the plastic elbows from a Samurai heater duct works well for this. Its a plastic, 90 degree elbow located at the door end of the defroster duct behind the dash. This elbow plugs right into the end of the tubing and makes a 90 degree bend. We plugged it in and didn't attach it with anything, and we haven't lost it yet. By not securing the elbow, it can be turned backwards for wet weather driving, or turned forward for dry weather, creating a slight ram air effect.
By: James Alton