
This page reflects the items that I have added and modified on my VFR. The objective is to provide my opinion* of the product to you for reference. Of course, I welcome your views on the items featured here as well. Just email your comments or feedbacks to me. Please state in your email the item the subject of your comments.
* This page expresses my personal opinions on products featured above and may not entirely reflect the actual capability and quality intended by the manufacturer. Product prices quoted in this page are also based on author's experience and may not stand accurate due to constantly changing market prices. Please use the information provided only as a reference and at your own risk.
Mods
| Item | Make | Model | Remarks |
| Light Shield |
Ventura |
||
| Chain Lubrication System | ScotOiler | Mark 7 | |
| Headlights | Wagner Lighting | Xenon - Brite White |
|
| Wind Shield - Double Bubble | Motoplastic | Doble Burbuja - 0034 | |
| Cruise Control | Throttle Rocker | Throttle Rocker | |
| Rear Wheel Hugger | Pyramid Plastics | VFR800 Rear Hugger | |
| Indicator lights | O.E.M. | Front Running Iindicator Lights | |
| Air Filter | K & N | HA-8098 | |
| Tyre | Bridgestone | Battlax BT020 (Front / Rear) | |
| Throttle Lock | NEP | NEP for dual cable throttle | |
| Engine Management | Power Commander | PC II and oxygen sensor eliminators | |
| Exhaust | Micron | Micron Titanium Delta Plus Street Legal | |
| Brake | Stainless Steel Brake Cable | Goodridge VFR Brake Line Kit | |
| Protection | Motovation | Motovation Crash Slider - VFR800 '00 kit |
My Wardrobe
| Item | Make | Model | Remarks |
| Touring Jacket | Clover |
Hyper 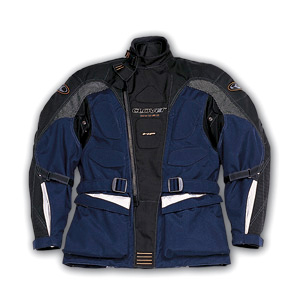 |
|
| Touring Pants | Dainese |
Lynz, Goretex |
|
| Touring Boot | Alpine Star | STAGE
GORE-TEX® BOOT 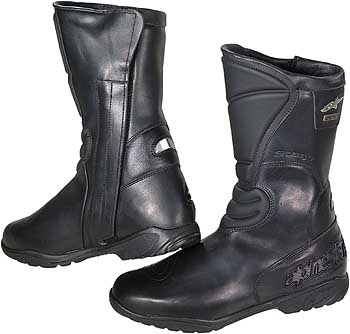 |
|
|
Track Boot |
Alpine Star |
SMX - Plus
|
|
|
Gloves |
Field Sheer |
Sonic Glove
|
|
|
Leather Suit |
Clover |
RC100
|
Future Mods
| Item | Make | |
|
Comments, praises or bad experiences with the items stated here? Drop me an email and tell me about it...... |
||
| Saddle | Sargeant World Sport Seat | |
| Suspension | Ohlins / Fox / Penske ??? |
* This page expresses my personal opinions on products featured above and may not entirely reflect the actual capability and quality intended by the manufacturer. Product prices are quoted based on author's experience and may not stand accurate due to constantly changing market prices. Please use the information provided only as a reference and at your own risk.
I bought my in April 2001 at Chiap Lee Co. in Serangoon Road. I was told that this jacket is currently top of the clover touring range of jackets. The jacket was of very good quality and finish with a reasonable price. At approx. $550/-, it includes full water proofing and venting features. Take a look at Dainese "Dryline" range of jackets, its retailing prices and you will know what I mean when I say this product is value for money.
The jacket consist of a removable thermal lining (a must in the local context, the removable part I mean), a removable "DRYTEX" waterproof yet breathable lining, and the exterior lined with tough Cordura fabric. It includes one zip-able air vents along each sleeve, and another two vents at the back which actually works! In my opinion, the back vents are a must for effective ventilation. It makes sense, for air to flow, it has to go in somewhere and flow out from somewhere. For usage in scorching regions like S.E.A. I feel that this is a very essential. The design is also excellent. Zippers are made of plastic material so it will not rust in time to come. Critical areas like the shoulder and elbow regions are reinforced with Dupoint kevlar to help curb serious abrasions. Body armour located in areas like the elbow, lower arms and shoulder are CE approved types and removable. There is a piece of "cushion" that is supplied with the jacket and is located at the pocket meant for a back protector. Don't ask me what that is for, but it sure will not prevent breaking your back in a serious fall. So it is advisable to invest in a CE approved back protector that is sold separately.
One feature that I like on this jacket is the way the front zip is sewn onto the jacket. The zipper starts from the bottom of the jacket at the front as of any jacket and skews towards the side instead of straight up. Just imagine the leather jacket that the "Rocketeer" from the movie is wearing and you will know what I mean. It adds a bit of character in the jacket, but most importantly, it feels more comfortable, especially when you have to lean slightly forward when riding. As of most common jackets where zipper ends just at the Adam's apple region, the zipper tends to push up against your throat as you lean into your riding position. I for one do not experience this at all with this particular jacket. Maybe it is with the sizes of the jacket, but what the heck. I feel comfortable in this one, that is what really matters.
I had recently went on a long trip on with this jacket. Being in this part of the world, rain is a almost an everyday kind of affair. And I am not only talking about punny little drizzles. When it rains, believe me it pours. When we arrive at the destination, I was not a tit bit wet from the rain. I have no doubt about the water proofing abilities since then. In summary, the Clover Hyper is of a very good build with plenty of essential and effective features at an affordable price....and oh yah, thumbs up in the comfort department too. Oh yah, did I mention that the pockets are water proofed also? I knew that because my passport was still crisp dry....
Alpinestar Stage Gortex Touring Boots
Bought the pair of boots the same day I bought the jacket. (April 2001 at Hodaka Motoworld Pte Ltd a.k.a Motorworld at Kaki Bukit) Retail price was for approx. $300/- a pair. For touring purposes, I targeted at water proofing as an important criteria. Nothing dampens the mood more than walking around with a soggy feet. Generally, this is a pair of boots with a very basic design, be it for aesthetics or sports. It only includes soft pads at the toe area for gear shifting and at the sheen area. Two reflectors at the back provides some level of safety in the dark. I guess as with all leather goods, some "breaking in" is required before it gets truly comfortable. Before that, be prepared to do the RoboCop walk. Call it unlucky, but I do not yet have any real wet rides to test out the water repelling ability. So it is back to the bathroom test again. Yup, once again the shower head takes on another contender. Boots versus shower head, results.....two for the contenders, nil for the shower head.
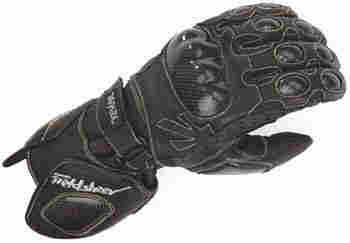
I got this pair of gloves from a bike shop in Katong Shopping Center, Max Equipment. Bryan's the boss (one of them at least) running the joint. Tried on (see next review) other pairs of gloves also from Fieldsheer (Max Equipment's the local agent you see). In the end, perhaps due to previous "pocket burning" procurements, I thought it was time to save a couple of bucks, and so eventually settled with this economically viable pair.
It was very fitting (I got a size small). Cuttings of the gloves were very precise. It almost felt like the glove was made to fit me. It felt safe too, having the generous cladding of leather exterior and kevlar protectors. However, with most thick leather gloves, "feel" tends to be compromised. Especially since the glove was brand new, the leather required time to "break in". My wrist suffered the most on the ride home from Katong (East) to Jurong (West). By the time I reached home, my wrist and palm, especially the right side, was aching terribly. It was a nightmare.
In terms of heat comfort, I did not experience much heat stress in my hands during rides. Anyway, only managed to truly use it for the one long ride to Malacca. Unfortunately, it was in the beginning of the ride (still remember it was at Gelang Patah Esso Kiosk) that I realised that there was a hole caused by broken stitches in the wrist joint area. The following day, I went back to Bryan about this problem. After some examination, he offered to sew it back for me if it was possible. Otherwise he would exchange a new pair for me. Well, I appreciated the offer, but I got a better idea. Read onto the next review to find out ...
Before I got the tech pro gloves, a compatriot introduced to me another Fieldsheer model. It was very soft and allows a lot of "feel" in the fingers. Anyway, I was too imprinted by the price of the glove than the model. However, after the incident with the previous pair, it almost seems like the Omni Potent One is giving me an opportunity for a second go at the gloves. I took the chance and upgraded from the Tech Pro model to the Sonic gloves from Fieldsheer.
Feel was excellent. I am confident there will not be another glove which can provide so much feel at the fingertips. You see, the palm side of the glove is made out of Kangaroo hide. The leather was significantly thinner than cow hide and thus allowing such sensational feelings to the nerve endings in your fingertips. Kevlar claddings were similarly generous as of the previous Tech Pro range with an additional Kevlar protection on the thumbs as well. However, I feel that this Kevlar protection on the thumb does hinder grip on the throttle slightly.
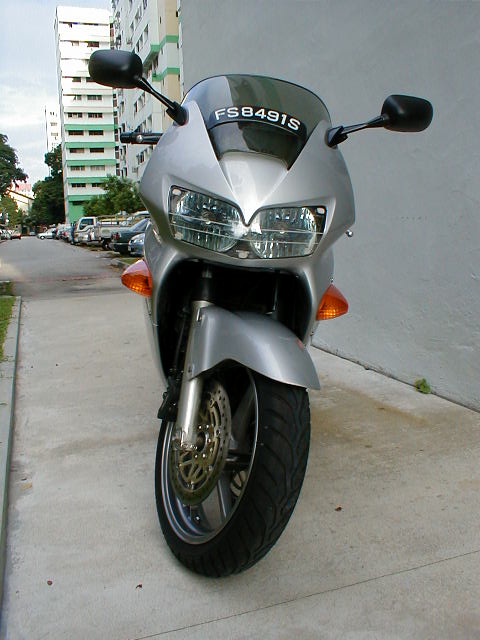
The light shield is a worthwhile investment to make considering the high cost and long lead-time required should the unfortunate occur. "Prevention being better than cure", is a general policy that should not be solely applied by condom advertisements. The light shield for the VFR800 is available in bike shops like Looi's Motor and Hodaka Motoworld Pte Ltd a.k.a Motorworld. Coincidentally, both are located at Kaki Bukit area.
Installation for my light shield was very simple as I used only 5 pcs of Velcro to attach the plastic directly onto the headlights. The Velcro pieces from 3M are supplied with the kit and has self adhesive stickers on the back. Clean and dry the surfaces that the Velcro will be placed, namely at the 4 corners of the plastic light shield and one piece at the bottom center of the light shield. Stick the woolly counterpart of the Velcro at those locations of the plastic shield. Then stick "buddy/hard brushed" Velcro counterpart onto the woolly Velcro on the plastic shield. Tear off the adhesive protective layer on the "hard brushed" Velcro and carefully aligned the shield to your headlights. Some tips, prevent "parallax error" when you stick the shield to your headlamps. Squat down to the level of your headlights when you are sticking the plastic. Also, try not to remove the Velcro from its position once the adhesive is applied. Otherwise, you find that the adhesive is not effective anymore.
What can I say .....simple yet brilliant idea.
Great for people with lazy fingers like me. 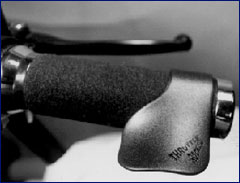
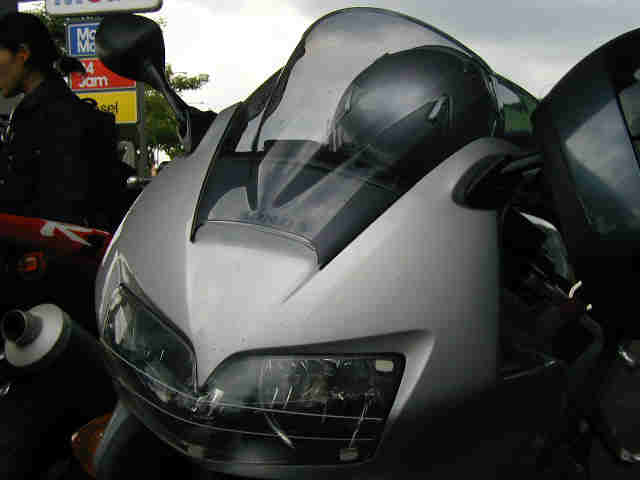
Motoplastic Double Bubble Screen
This screen scores big time in the looks department. This I know from the many comments given by passer-bys and people asking me where I got it. It has got this sexy curvature that seems to flow with the lines of the front cowl. Compared to the stock, it has a raised height in the center of approximately 3". Quality of the screen is definitely good since the plastic is quite similar to the OEM with a mild tone of gray. The material is only negligibly thinner than stock but is still sturdy and firm in construction. A nice and simple touch with this kit is that it comes together with a rubber lining for the edges accentuating even further the high quality look of the product. The screen was not difficult to install as it fits with no problems. In terms of wind protection, it certainly improved by providing a higher cover. However, I could still make nice use with an extra inch or two of protection. Measuring 170cm in height, I do have to lower my neck slightly in order to enjoy 100% of the protection it offers. But this is only necessary during high speed highway cruising ( > 160kph).
Generally, it works great when you are riding solo. During two up riding, (maybe due to the disturbance in air flow due to the pillion) I still experience wind buffeting at speeds above 140kph, and this is very irritating for long journeys. Well, I guess if one insist on 100% full protection, one might consider getting a car instead.
Any biker whom goes touring I feel should be using this kit. I have only experience with the Scottoiler Automatic chain oiler, but I am sure there are other makes which works maybe just as good. The point is I can't imagine what I will have to do with chain oiling when I go for long tours if I do not have this kit. Installation takes approximately 1-2 hours for me. (See installation.) All necessary fittings required are included in the kit, so there is no need to worry. In fact, they have provided so many choice of fitting the reservoir that I was initially at a lost as to where I am to install it. Running the oiling pipes and air tubes to the air box was a breeze since I have two experienced gurus at my side when I was installing the kit. But comprehensive instructions are also available if you do not have life instructors around. However, after installation, there will be a short period that you will have to be bothered about adjustments at the reservoir which controls the rate at which the oil is being dispensed. Too much, and you will be wasting good lubricant and making a mess with the residue where ever you park. Too little and you risk shortening the lifespan of the wheel chain. So the amount has to be just right and this comes with a bit of time. As a guide, I will see one small tiny trickle of oil from the outlet every minute during engine idle. Happy touring.......
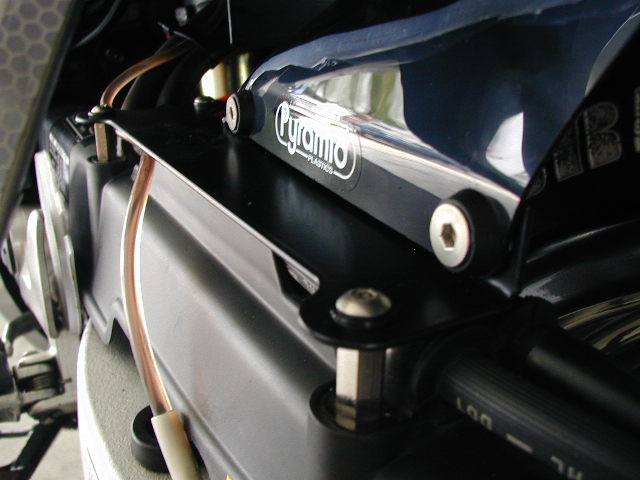
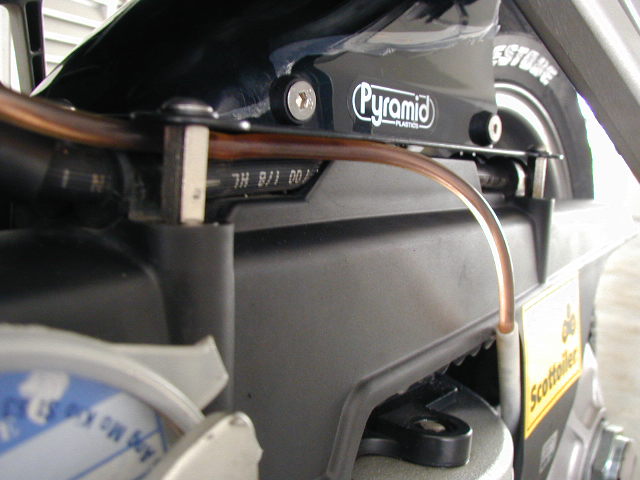
Pyramid Plastic Rear Wheel Hugger
My initial purchase was a PowerBronze Carbon Look Hugger. It came with a steel bracket which unfortunately did not fit. The bracket after installation, was offset from the center of the wheel and rendered it impossible for the hugger to be installed at all. I had it returned immediately to the nice people whom did an exchange for me. And I am pretty pleased with what I have now.. I changed it for the Pyramid plastic hugger, the very people whom invented the rear wheel hugger concept. The black finishing on my hugger was nothing less than beautiful. Quality of both the plastic hugger and steel bracket was definitely A1 compared to the Power Bronze. Best of all, the bracket on this hugger was so light and simple in design. Installation was a breeze, provided you follow closely the instructions that was included. I took 1.5 hours to install the hugger, but I have to admit I skipped a few lines from the instructions and caused a major delay. I suppose if all went well, 1 hour would be more than sufficient. I did a test ride after the installation and found that the right side of the hugger did not clear very well off the edge of the tyre and caused some abrasion on the rubber. Upon some self initiative, I added another cable tie which held the hugger further towards the right, thus solving the problem. Overall, I am still glad I chose this product. The other product which works on the same mounting concept would be the hugger from NWS, however, that would be slightly more costly.
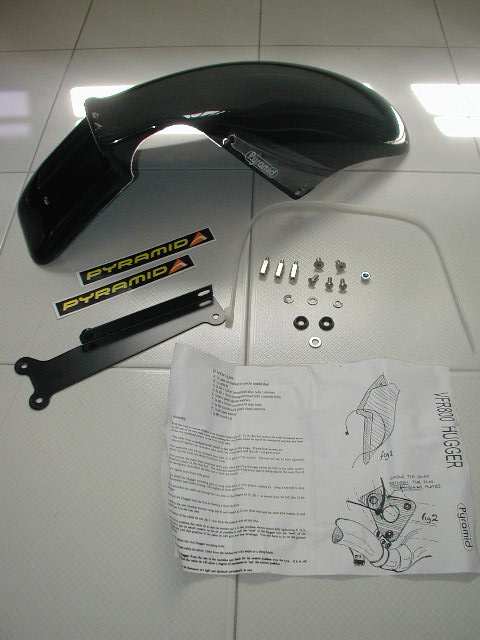
Click on thumbnails to enlarge pics.
NEP Vista Cruise Control
Very similar to the Vista Cruise but fits
a little different and takes less room. Needs very little grip space for
installation. May require moving the grip outward 1/8" on some bikes.
Usually very easy to do.
More personal preference than real difference in performance and fit.
For use on 7/8" handlebars only. Will not fit the cruisers or other
bikes with 1' handlebars.
 Dynojet Part
Number 106-111
Dynojet Part
Number 106-111
I ordered the above kit from AZ motorsports and was hand delivered to Singapore via a friend of mine. Since he was a non-biker, he couldn't really check the kit for the appropriate parts when delivered to him. So as the kit was handed to me when he returned, I found that the uplink cable was not the right one. As the port on the PC was a serial type, the cable was a USB. Furthermore, I also found a PCIII USB (9v) Power Programming Module which was obviously a mistake (but a this mistake I didn't mind). Fortunately, another friend whom has the right serial cable saved the day and I was able to use the PC nevertheless. The kit also came with a CD where the software Power Commander Control Center and all maps currently available for the VFR can be found. The software was necessary to upload the map onto the PC on the bike. This was a way cool toy !!
Installation was a breeze and the instructions that comes with the kit was comprehensive with adequate diagrams to hint the obvious. To put it simply, the PC unit has to come in between the existing ECU and the connectors coming from the various sensors on the bike. In just 15mins, I was ready to upload the map from the laptop into this plug-and-play device.
Stock VFR: Upon downloading the map M106-001 [Stage 1 for completely stock bike], I took it for a spin. Immediately, you could feel the contrast in terms of smoothness at low revs as I was pulling out of the carpark. The bike felt like it was more ready to pull away at the turn of the throttle, especially at 4,000rpm mark where the flat spot for this bike was quite noticeable originally.
With Micron Exhaust: Since I have just fitted the exhaust, I have not uploaded the PC with the right map yet. However, I doubt the micron map provided would be the right map anyway since my exhaust is a street legal version. So please check back soon, because.... CUSTOM MAP, HERE I COME.....
 Dynojet Part Number 76423005
The system is designed to read the
Oxygen sensor under certain conditions and temporarily change the air/fuel
ratio. The closed loop circuit has a very limited operating range, which is only
in effect while holding a steady speed at certain rpm's and throttle positions.
In this limited area, the stock system (with or without the Power Commander)
will gradually and temporarily lean out the air fuel ratio in an attempt to
achieve an air/fuel ratio of 14.7:1 (stochiometric). The Oxygen sensors can be
disconnected but this will trip the F.I. dash warning light.
MICRON Titanium Delta Plus Street Legal
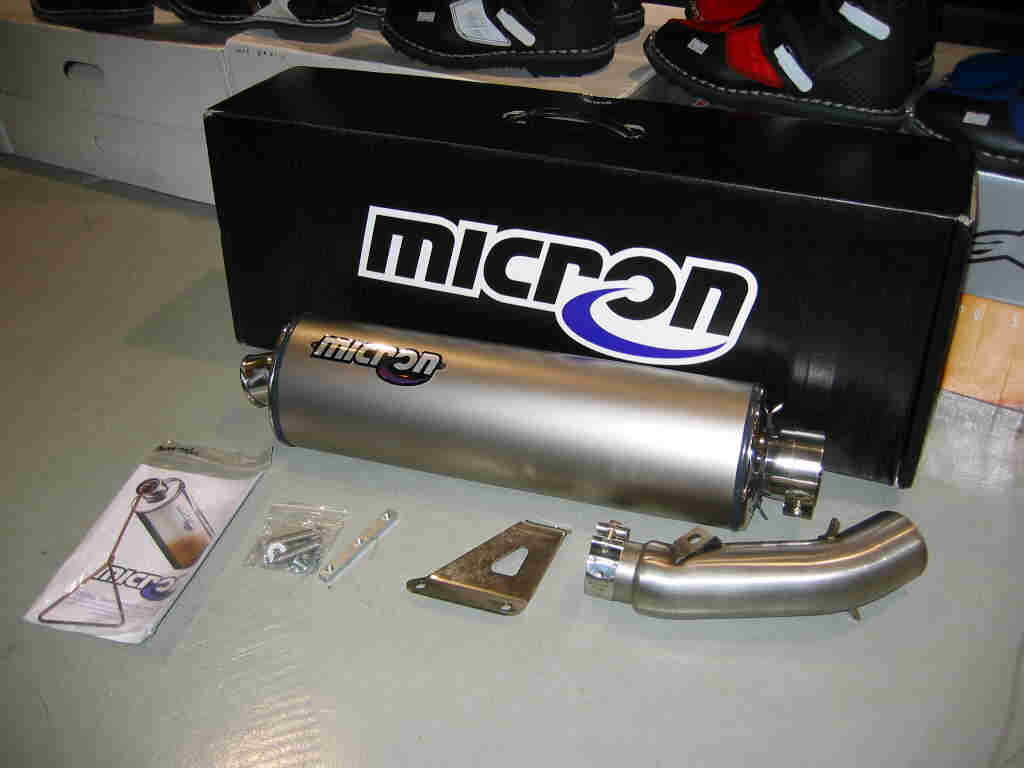
There is nothing on this planet that could sound as ________ [add your own positive remark] as the sound wave propagated from this pipe. Other than the already magnificent whine from the gear cams, the viffer just rumbles away in a low tone at idle, amplifying its soulful and muscular V4 engine, as if a cat ready to pounce on the prey and every second challenging you to twist that throttle. It is plain ecstasy. And the best thing yet, it is STREET LEGAL !!! For years, this country has got the strictest (read conservative) road regulations that has deprived every auto-sport enthusiast the one mod that would differentiate between guru and goondo. Remember the feeling during Christmas when you were a 6 year old, and you got that train set which you have always been eyeing on since you were 4? Well, this is every bikers dream in Singapore to be able to ride with an aftermarket exhaust that sounds this great, and do not have to feel your heart popping out whenever you see a traffic cop. After a couple of months of riding it, I felt an increase in torque present beginning from the 4K rev range. Power is definitely up especially at the higher ranges. This I felt during my last trip at the Sepang F1 Race Circuit in Kuala Lumpur. Shame to say that I did not realize the dramatic improvement initially when I just installed it. Maybe I was just too overwhelmed by the built quality of the Titanium can and the soulful thump of the V4. That focus shifted when I came upon the chance to ride on another totally stock VFR. Thereafter, did I realize the mass difference. The bike felt as if it just came out from a relaxing spa treatment and the engine is now refreshed like a new animal. A suitable engine map is also critical and I am currently using the downloaded map from the power commander website. A custom map will come in the near future when the hole in the pocket is once again mended.
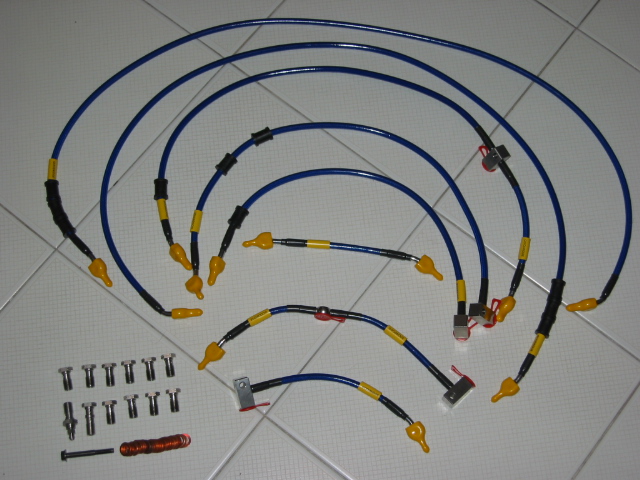
A firm feel when you grip that brake lever is what this kit offers. Gone is the spongy feel and the air-in-brakeline uncertainty. Mine comes with stainless steel banjo bolts, all 10 lines worth of stainless steel cables with a plastic (PVC or something) coating, bolts and a set of copper washers required for the installation. However, my kit was missing one bolt when it came and I had to reuse the OEM bolt at the rear caliper. Installation was quite straightforward where you exchange one OEM line for the stainless steel one. Differentiating which line replaces which OEM isn't too much of a brain wrecker either. All the lines are different in length and joints, so identifying them isn't too difficult. I had the additional fortune of another VFR with the same set of already installed Goodridge lines as reference so achieving my objective that day was really promising, and so I thought. Although the task of installation is a straightforward one, I did not expect the daunting task of removing bolts from tight and cramp spaces. I heeded advice of the technician and attempted to change the lines without removing any fairings except the front mudguard. Some of the bolts can be positioned at such odd and tight spaces, especially the ones between the fork and the chassis, that I wonder if a contortionist is a pre-requisite for installing this kit. Thank goodness for me, my technician and bro was around that day and had the pleasure of their assistance. Otherwise, I would be in a pretty big fix. After completing the entire installation after 6 hours of struggling. The next task was bleeding !! By then I was quite buffed and was demoted from chief installer to apprentice. But considering the importance of proper bleeding to attain perfect brake function, it was a choice I did not have ponder over much before I decide to leave it to the experts.
Many had the impression that the bike stops faster or better after changing the cables but I had read that actual stopping power does not actually significantly increase by just changing the brake cables. It does however gives you a better feel of the brakes in terms of feedback and firmness due to stiffer hose walls. Better stopping power is the brake pads department and that is another story for another day.
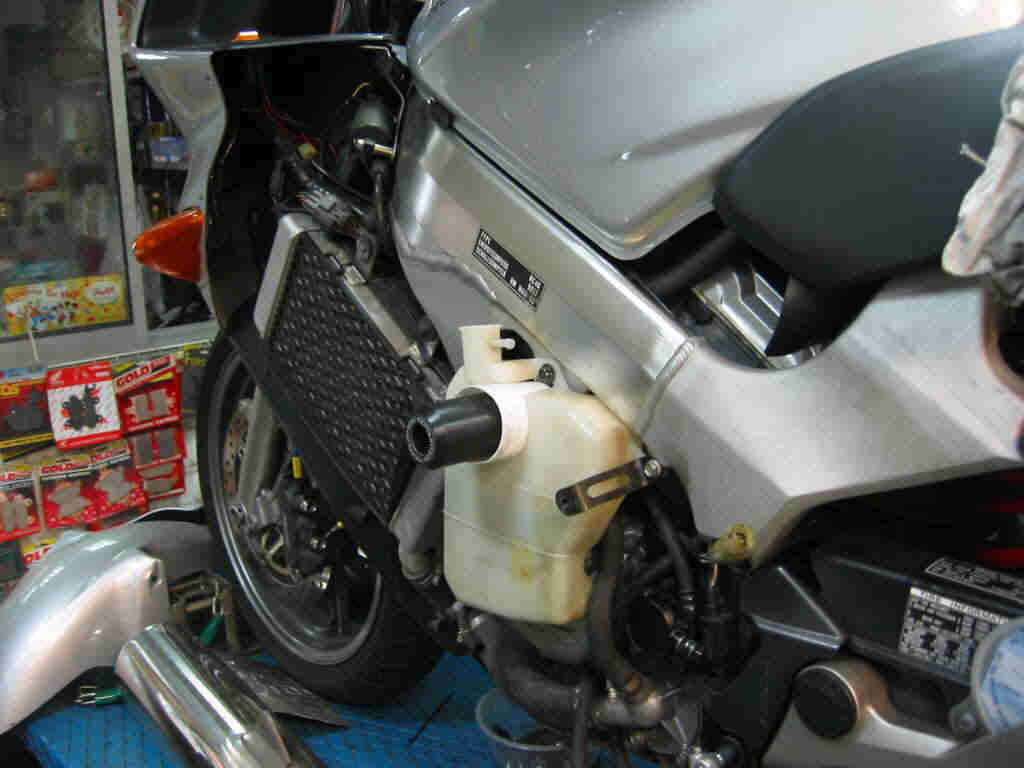
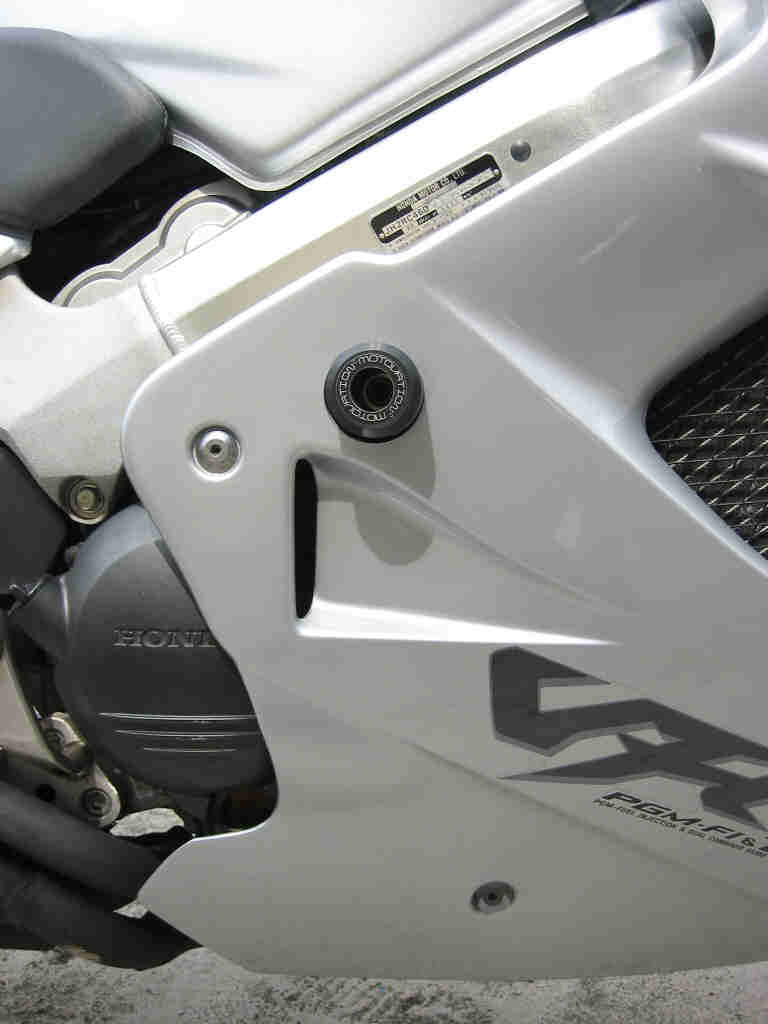
The crash slider has become a necessity ever since track days become part of my VFR's exercise routine. This kit is essential to control the exponential expansion of an already big cavity in my pocket in the event of a spill, big or small. So the dough spent in this kit can be considered an investment. Since my kit is made locally, thanks to some very enterprising chaps, it is very affordable.
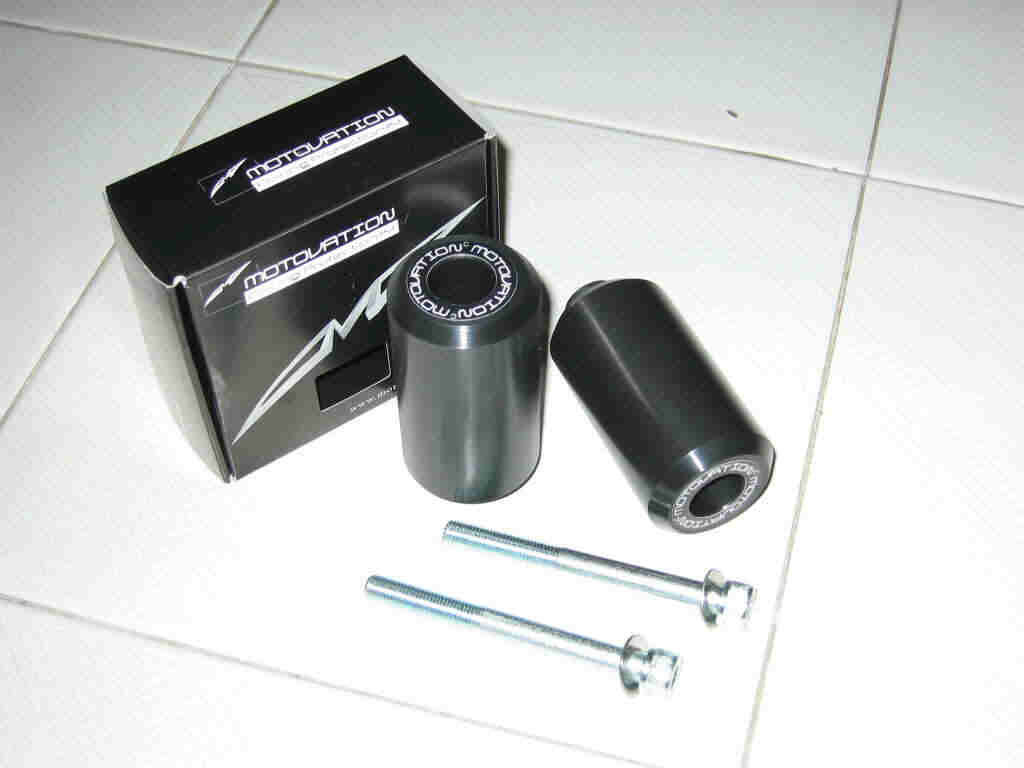
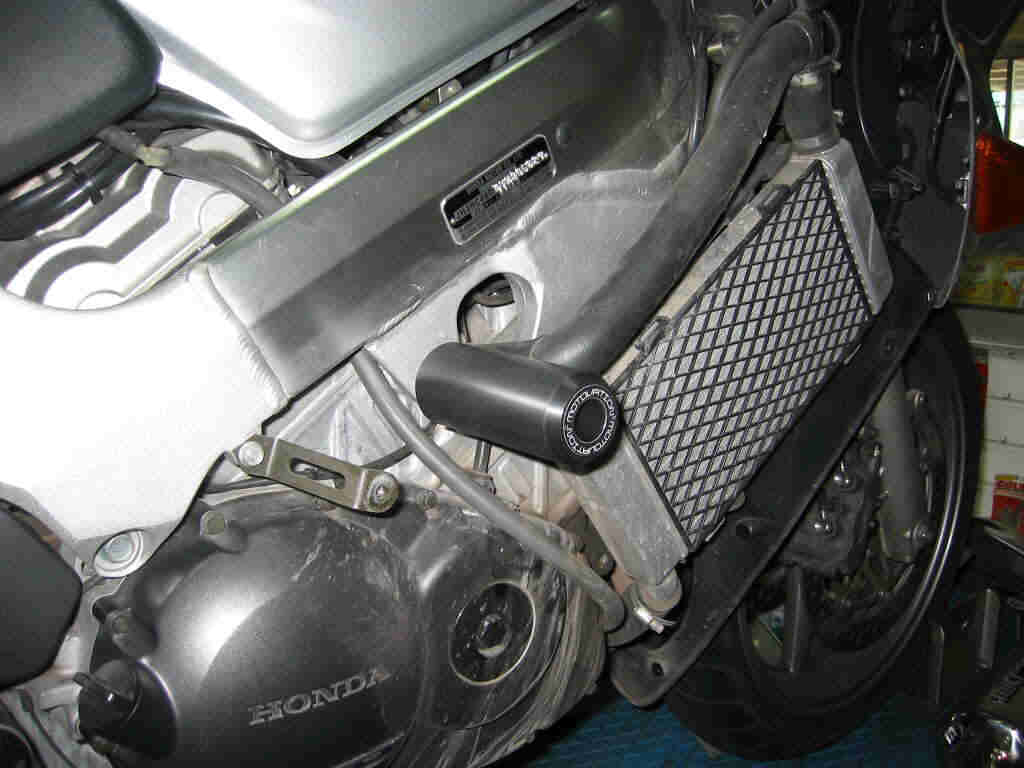
The sliders mounts directly onto two pairs of the four engine mounts and is sturdy as a rock. Since mine was the first VFR in Singapore for this locally made kit, I had the privilege of influencing the design of the sliders. Motovation designed a longer shank within the slider so that it will instill additional shearing strength on the exceptionally long nylon slider. The effect was a very firm and secure mount which provides added confidence in the kit, not that I was ever intending to put this set of confidence to test anytime soon.
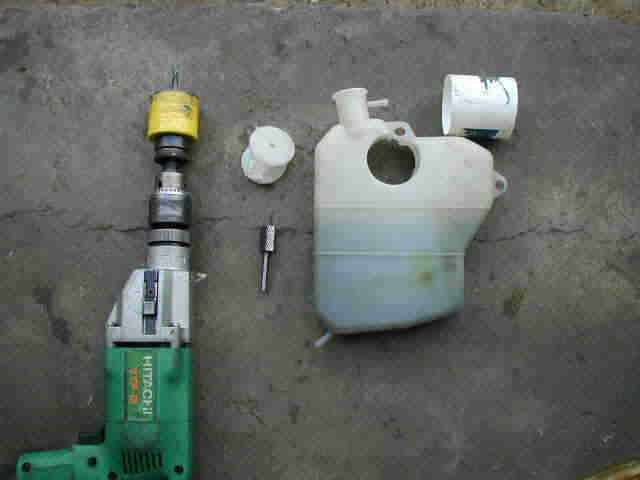
The fun was not over yet though. Due to the construction of the chassis frame, the slider mounting point on the left hand side happens to be behind the radiator coolant bottle. The solution was to bore a hole through the bottle at the position of the mounting point to allow the slider to penetrate right through it; yes right through the radiator bottle. I must admit that some guts was in order to be drilling into a crucial organ of the bike without much certainty how the end product is going to turn out, not to mention if a spare bottle was available anywhere.
Nevertheless, I had my factory store at my calling so tools was not a problem for me. I used an electric hand drill, with a diameter 51mm hole saw attachment and a grinder attachment. The diameter of the slider was 49mm. You will need some sand paper and epoxy as well. I only managed to find a 61mm pill bottle which I used as the internal wall of the bored hole. So after drilling the 51mm hole, was the task of grinding the hole enough to insert the 61mm bottle. After that was just a matter of applying the two part epoxy to ensure a good seal.
This is the link to another fellow Viffer, Mr Stuart Tyrell's web page which contains very clear instructions to boring the bottle and installation of a similar crash slider for the VFR.