Grims Ping v1.7.4
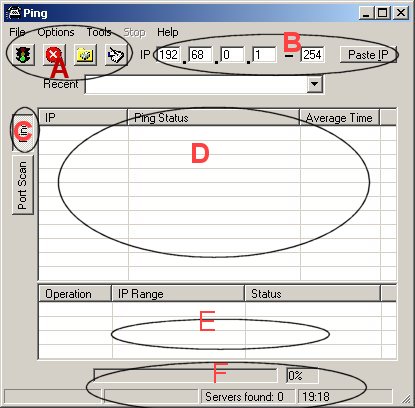
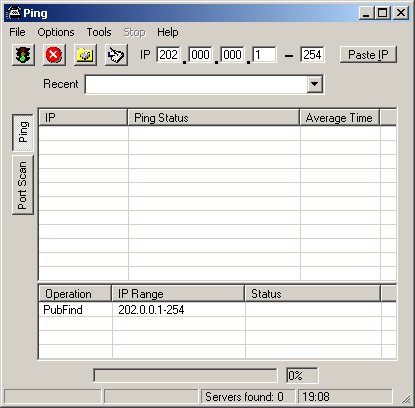
As you can see i have marked the important thinks here explained in the following.
A. This 4 bottons gives us the actions from left to right , 1st is starting sxanning , 2nd is stop the sxanning process, 3rd to print the screen and 4th to go directly to the preferences. We do this later.
B. Shows us the ip which is located by the first run of grims ping by himself and next to this the Button Paste IP.
C. There you can swith between Ping and Port Scan. That means in Ping you send ip packets to check for anonymous ftp's and for Port Scan you ping a IP and check for open ports.
D. Shows us the IP's which will be sxanned actually or have to be , the Status in the middle and the average time for that.
E. Is the qeue of the ranges you have add to it , in case you have decided to scan a full range every range will be listed in this field.
F. Shows us the status of every range that we are sxanning actually, a blue indicator moves between 0 - 100 % of the spezific range. How many servers are found allready and what time is it in general.
Check preferences
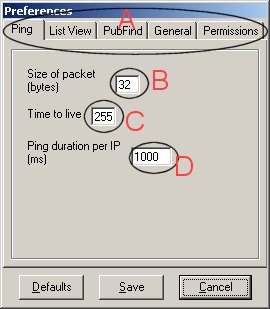
A. Shows us the windows that are available in this case.
B. Size of packets that will be sended to each host to gain access and information.
C. Time to live
D. Ping duration defines the time grims ping try to get access to the ip.
Here is the important thing if you wanted to ping a hole range in one process that means 255 threads.
One range means 1 - 254, in that case he pings all in one.
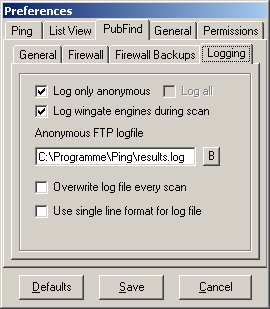
Make sure you marked to log only anonymous access. Anyway your list will be screwd up with all accessable pubs.
To log the wingates also (i prefer so) mark it also. As you also can choose the file to store the logs into.
Standard is here set.

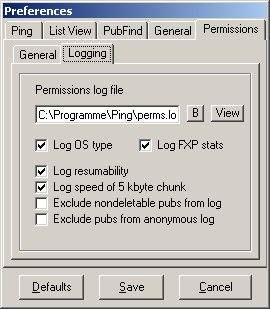
You can add or remove directory permissions that will be logged in the perms.txt.
Here you can mark what you wanted to see of each ping that successfully find a anonymous ftp.The OS is important for further steps of tagging and maze making. The FXP stats could be used if you wanna FXP.
Save your Setting by pushing the Save button.
I recommend you make sure which range you wanna to sxan.
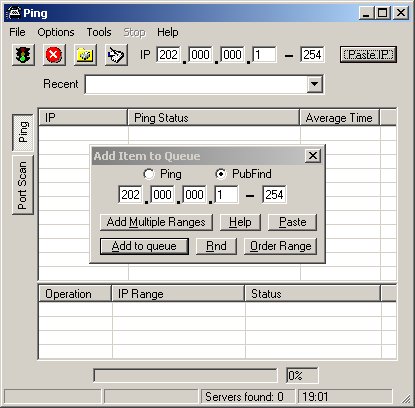
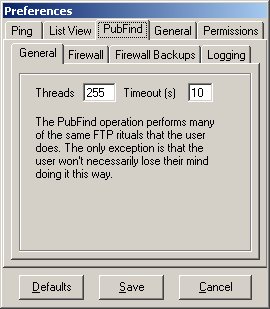
Here you can choose between Ping and Pub find. Make sure the Pub find is marked, anyway no permissions will be logged.
Add Multiple Ranges to get more than just the 1 - 254 , this defines a range. Take a calculator and its easier to figure out how
many Ranges it will be.
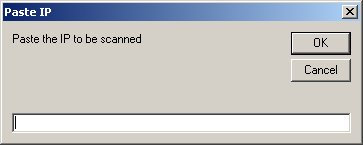
If you wanna to add another IP just click on Paste and you can enter it right away.
After you set up this window you can close it by pressing the x.
You will see the IP's you have choosen to sxan in the qeue.
I recommend you close all other applications before you start because grims ping uses 100 percent of the cpu.
Click on the traffic light and the sxan will begin.
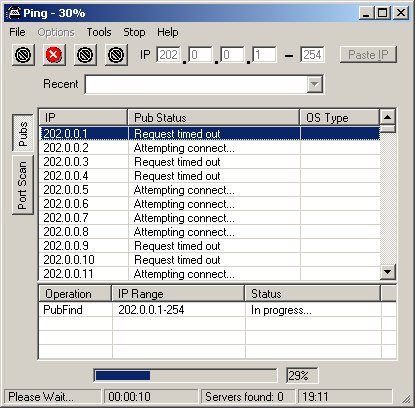
As we can see the IP's are listed on the left, the action in the middle and the OS type and following dir access on the right.
The blue indicator shows us the ping process of the hole range in that case 1 - 254.
check this Site for more