
Rapid Emplacement of Pitfall Traps
by Scott Carlton
Miles City, MT
One of the most common methods of capturing ground-dwelling insects, spiders, and other invertebrates is by using pit-fall traps. These traps are really nothing more than holes in the ground into which the intended organisms fall and from which they are (hopefully) unable to escape.
In the past several years there have been many attempts to improve the pit-fall trap's design ... some in order to increase the amount of time between required servicing, some in order to decrease the number of escapes, and some in an attempt to quantify the results obtained. While a few of these designs have, indeed, added to the presumption of legitimacy accorded such traps in the midst of formal "studies" there is really little to be improved-upon where the simple, open pit-fall trap is concerned. Nor, candidly, is there any reason for it's inclusion in any study to be suspect because of its simplicity. I shall not enter here into any discussions relating to the work which has been done -- and which continues to be done -- in an attempt to extrapolate numeric data from the employment of these traps. That's another discussion.
From my perspective, the simple pit-fall trap is an ideal adjunct to any study of a survey nature. Consequently, I recommend its use wherever possible and in such quantities as might reasonably be anticipated to supplement other collection and survey methods.
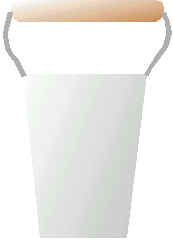
In order to accomplish this, it is important that the trap be inexpensive, easily transported, and rapidly emplaced. I find small plastic cups, particularly the 8 Oz yogurt cup, (fig. 2) to be ideal as pit-falls. They stack together readily, are lightweight, and readily available. The traditional method of emplacement of the traps has been to carry along a small shovel or a trowel and then dig an over-size hole into which the trap cup is placed and then backfill the soil around it. I have also found that the use of a garden "bulb planter" (fig. 1) makes the task very much easier and quicker. The planter is simply placed at the intended trap location, twisted back and forth and pressed into the soil to the appropriate depth. The resultant hole created when the planter is removed (carrying the plug of soil with it) has wonderfully smooth tapered sides into which the yogurt cup slips effortlessly.


(Fig.1 ) Bulb planter (L.) and, (Fig. 2.) standard 8 Oz. Yogurt container (R.)
The method of employment is highly variable: wet, dry, single, double... but the simplicity and neatness this method of placement accords is a great way to start!
Text and Drawings © Scott Carlton, 2001
all rights reserved.