
FrontPage
Microsoft Frontpage : Tutorial
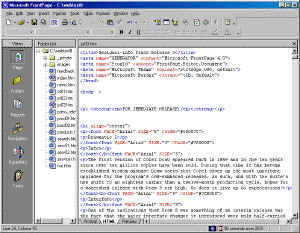
Main FrontPage Screen
There are several different ways you may view your web pages and their relationship to one another. These views include: Page, Folders, Reports, Navigation, Hyperlinks, and Tasks. Most of these views are useful only if you create a FrontPage web A web page is normally created in Page View
Front Page Tool Bars
Some of the commonly used short-cut buttons are shown below. If you place your arrow over a button, it will state its function name.Front Page XP Training To get started we are going to create a new blank page and start from scratch. There are themes and other bells and whistles, but lets have you to learn the basic operation, which is most crucial.
1. Go to the file menu, select New and then select Web.
2. Select One Page Web from the list of web Wizards
3. Enter your destination: a:\frontpage (this will change depending on where you are working)
4. Click on OK
5. After you click on OK you will see this type of screen screen.
6. Now letÆs look at a few things before we begin to add anything to the web page.
Creating folders
1. Right click in the area that shows your FOLDER list. A menu will pop up,
2. click on new folder and then name the folder whatever you wish. You also see an Images FOLDER. This is where you should keep all the images you are using for this Front Page web. Text Fonts and Colors Recommendation(Font type, size, color, decoration)
Font Style
Arial,
Verdana, and Times New Roman are good choices for the web and are used
extensively. Examples of each:Arial, Arial (size 10) font example, Verdana
Font size
Don't go much smaller than size 8, or much larger than size 14. Most content should be size 10 or 12.
Font decoration
Do not underline words, unless they're a hyperlink. Use italics sparingly, it's difficult to read. Bold is typically used for headings.
Cautions
If you choose an oddball font and the PC used to view the page doesn't have that font, a "default" font will be used in its place, usually giving undesirable results. Don't mix too many font types on a single web page - this is confusing to the eye. Instead, use different sizes and/or decorations of the same font to set off headings and sections of content.
Editing Page Elements Spell Check
FrontPage automatically spell checks your document. A wavy red line underneath a word indicates that word is misspelled. Check Spelling Icon
Method to correct errors:
Right-click on the misspelled word or click the icon pointed out above. A window pops up with a list of possible corrections. Click on the word that has the correct spelling.
OR
If the pop up window doesnÆt contain the word with the correct spelling, you will need to manually correct the misspelled word.
Create a Link
A link can be created to a web page within your site, a specific section within a web page, a web page at an external web site, a personÆs email address, and to another resource (such as a document, image, sound clip, video clip, etc.). A link that is created to a personÆs email address is discussed in a later section. Method to create a link to a web page within your site:
1. Select the text for which you want to create a link.
2.Select Insert/Hyperlink from the menu.
3.Click the Make a Hyperlink to a File on Your Computer button.
4.Click on the drop-down arrow next to the Look In box. Navigate to and select the proper drive and directory that contains the file.
5.Double-click on the file name that you wish to link. Web address goes here. Use Your Web Browser to Select a Page or File Button Link Button to make a Hyperlink to a File on YourComputer Method to create a link to a web page at an external site:
6.Select the text for which you want to create a link.
7.Select Insert/Hyperlink from the menu.
8.In the URL box, type the web address of the external site after the http://
and then press the OK button.
OR
Click the Use Your Web Browser to Select a Page or File button. This opens your default web browser. Using the browser, navigate to the web page that you want to link too. Return back to FrontPage. The web address for that page is automatically inserted into the URL box. Press the OK button. Refer to the diagram on the previous page for the location of the button.
Method to create a link to a resource (such as an image):
1. Select the text or resource for which you want to create a link.
2. Select Insert/Hyperlink from the menu.
3. Click the Make a Hyperlink to a File on Your Computer button. Refer to the diagram on the earlier page for the location of the button.
4. Click on the drop-down arrow next to the Look In box. Navigate to and select the proper drive and directory that contains the resource.
5. Double-click on the file name that you wish to link. Method to create a link to a new web page:
6. Select the text for which you want to create a link.
7. Select Insert/Hyperlink from the menu.
8. Click the Create a Page and Link to the New Page button. Refer to the diagram below for the location of the button.
9. At the New dialog box, click on the General tab and then click on the icon for Normal Page. Click the OK button.
10. Enter the information for this new web page and then save the file.
11. To return to the previous web pageģ Select Window from the menu and then click on the name of the previous page.
Create an Email Link
A link can be created for an email address. This allows a visitor to send email to the specified person.
Method:
1. Select the text for which you want to create an email link.
2. Select Insert/Hyperlink from the menu.
3. Click the Make a Hyperlink that Sends Email button.
4. Type the complete email address for the person in the dialog box. Click the OK button. The URL box now contains the prefix, mailto:, immediately followed by the email address. Click the OK button.
Setting Page Color (Background)
The background color of a page may be changed.
Method:
1. Select File/Properties from the menu. (OR right click on the page, and select page properties)
2. Click the Background tab.
3. In the
Colors section of the dialog box, click the drop-down arrow next
to the Background box.
4. Click on one of the 16 basic color selections. Click the OK button.
OR
Click on More Colors. Click on one of the colors from the color chart.
Click the OK button. Click the OK button again.
If you choose "default" as the background color for a web page in "Page Properties" in FrontPage, the background color will be white on a Windows platform and gray on a Macintosh. For this reason, always set your page background color to white to insure the page renders the same on both platforms.
Set Default Text Color
The default color of text on a web page may be changed.
Method:
1. Select File/Properties from the menu.
2. Click the Background tab.
3.In the
Colors section of the dialog box, click the drop-down arrow next to
the Text box. The dialog box looks the same as the one pictured above (for
setting the page color).
4. Click on one of the 16 basic color selections. Click the OK button.
OR
Click on More Colors. Click on one of the colors from the color chart. Click the OK button. Click the OK button again.
Set Link Colors
The text color for a hyperlink, a visited hyperlink, and an active hyperlink may be changed.
Method:
1. Select File/Properties from the menu.
2. Click the Background tab.
3. To change the hyperlink colorģ In the Colors section of the dialog box, click the drop-down arrow next to the Hyperlink box. OR to change the visited hyperlink colorģ In the Colors section of the dialog box, click the drop-down arrow next to the Visited Hyperlink box.
OR
To change the active hyperlink colorģ In the Colors section of the dialog box, click the drop-down arrow next to the Active Hyperlink box.
4. Click on one of the 16 basic color selections. Click the OK button.
OR
Click on More Colors. Click on one of the colors from the color chart. Click
the OK button. Click the OK button again. Apply Bold and Italic to Text Bold and italic formatting may be applied to text. (Avoid underlining text. It could be confused with a hyperlink.)
Method:
1. Select the text you want to make bold or italic.
2. Click the Bold or Italic button.
Change Font and Font Size for Selected Text
Text may be formatted with a different font and font size.
Method:
1. Select the text that you want to change the font or font size for.
2. Click the
drop-down arrow next to the Font box and click on the desired
font.
3. Click the drop-down arrow next to the Font Size box and click on the
desired font size.
Change Text Color for Selected Text. The color of text may be changed.
Method:
1. Select the text that you want to change the text color for.
2. Click the drop-down arrow next to the Font Color button.
3. Click the desired color.
Change Paragraph Alignment
Right, left, and center justification may be applied to paragraphs.
Method:
1. Click in the paragraph that you wish to align.
2. Click the Left, Right, or Center button.
Create Bulleted Paragraphs Paragraphs may be formatted with regularor numeric bullets.
Method:
1. Click in the paragraph (or select a group of paragraphs) that you wish to
format with bullets.
2. Click either the Numbering or the Bullets button.
Bullets may also be removed from paragraphs.
Method:
1. Click in the paragraph (or select a group of paragraphs) that you wish to
remove the bullets.
2. Click either the Numbering or the Bullets button (depending upon which one was used to format the paragraphs) to remove the bullets.
Recommendations: Graphics
JPEG's:
This file format is typically used for photos of living things that contain lots of shades of color. The format supports literally millions of color combinations. The pitfall of this file format is that the large file size makes the graphics download slower. For this reason, if you're going to use a jpeg format, keep the physical image dimensions small (like 2 x 3 inches).
GIF's:
This file format only supports 256 colors and is therefore, not good for photos of people or living things. GIF file sizes are small though and download fast! Therefore, when there are only a few simple (plain, common) colors in your image, use this format to decrease the overall download speed. Typical applications include: table and cell backgrounds, horizontal rules, text images, bullets, etc.
Image Editors:
Editors available to create and edit your images on campus include: Microsoft Image Composer (included with FrontPage), Microsoft Photo Editor and Microsoft Paint (a bitmap paint program). Adobe Photoshop and Adobe Image Ready along with Macromedia's Fireworks are probably the best graphics editors on the market and are available in some departments.
Caution:
Some image editors (Adobe comes to mind) allow you to custom tailor the quality of the image, which increases/decreases the image file size. Choose the smallest quality setting possible (while not degrading your image) to minimize file size and download time.
Insert Images
Images may be inserted within a page or table.
1. Click in the paragraph or table cell where you want to insert the image.
2. Select Insert/Picture/Clip Art from the menu.
3. Click on the Pictures tab.
4. Click on the desired category of images.
5. To preview an imageģ Click on an image. From the pop-up menu, click
the Preview
Clip button. When done, click the Close button for the
preview window.
6. To insert an imageģ Click on an image. From the pop-up menu, click on
the Insert Clip button. Other attributes may be set for the image. To do so, right-click on the image and select Picture Properties from the short-cut menu. (The section for adding alternative text is found under the General tab. The section for changing the alignment, adding a border, or altering the spacing around an image is found under the Appearance tab.) Make the desired changes and click the OK button.
Method to insert images from another source:
1. Click in the paragraph or table cell where you want to insert the image.
2. Select Insert/Picture/From File from the menu.
3. Click on the drop-down arrow next to the Look In box. Navigate to and select the proper drive and directory that contains the image.
4. Double-click on the file name for the image you wish to insert. To do so, right-click on the image and select Picture Propertiesfrom the short-cut menu. (The section for adding alternative text is found under the General tab. The section for changing the alignment, adding a border, or altering the spacing around an image is found under the Appearance tab.) Make the desired changes and click the OK button.
Insert Horizontal Rule
A line may be inserted within a web page.
Method:
1. Click where you want the line to appear.
2. Select Insert/Horizontal Line from the menu. Other attributes may be set for the line width, height, color, etc. To do so, right-click on the horizontal line and select Horizontal Line Properties from the short-cut menu. Make the desired changes and click the OK button.
Creating Tables with FrontPage
Tables are most commonly used to arrange text and graphics on your screen. HTML does not allow having columns. But by inserting the text into a 2 column table it will appear as if you have columns.
Insert Table: Acts like the insert table tool button
Insert Rows/Columns: Allows you to insert Rows and Columns to your table
Insert Cell: Allows you to insert a cell
Merge Cells: Will bring two selected cells together
Split Cells: Will split a selected cell into either rows or columns
To insert an image:
Creating Links in FrontPage
Creating a Link to another file that you have created:
1. Open the file to wish you want to link.
2. Highlight the text or image that you want to make 'hot.' (ie: what do you want to click on to go somewhere else)
3. Click on the Insert link icon in the toolbar
4. Click on 'Open Pages,' this will display all the pages you have open.
5. Choose the file to which you want to link
6. Click 'Okay'
7. Your words should turn blue!
Creating Links to other pages on the web:
1. Highlight the text or image that you want to make 'hot.' (ie: what do you want to click on to go somewhere else)
2. Click on the Insert link icon in the toolbar
3. Click on 'World Wide Web
4. Click 'Browse'
5. This will launch your browser, navigate to the web page that you want to link. OR type in the web address (URL)
6. Your words should turn blue!
Creating box
Creating a text box
then click on the right and choose ōtext box propertiesö to put in the name and topic.
Creating list
you can add choice by clicking on the right then choose ōform field propertieisö you will see ōdrop down box propertiesö then click ōaddö --> ōchoiceö ¢> ōspecify valueö.
Creating a button
click on the right and choose ōform field propertiesö you will see name and initial. Put the name in the name box and in the initial state ¢ itÆs tell you whether you want to let itÆs checked before or not.
ōOption buttonö lets people to choose only one
Creating a ōSubmitö and ōResetö box
double click on push button choose ōpush button propertiesö then type in the name (submit) then click ōokö.
Checked spelling
Rename file
Delete file
Task list ¢ shows complete and incomplete task
Upload (in the frontpage)
you can change the directory by clicking on ōchangeö
Upload web into website
(you have to register the website first)
Background
you can insert picture to be you background by clicking on the right side then choose ōpage propertiesö then click ōback ground pictureö at the format then click browse to choose picture then ōokÆ.
Sound
Making text move around
you can remove effects by clicking ōremove effectö button.
Creat a comment
Roll over
Transition
Hover button
Count the visitors
search
Webboard
Comment_cfm is to post
Comment_post is to post in questions
Comment_srch is to search
Commnet_toc is to put in comments.