Kite Aerial Photography Equipment


Kite aerial photography, or KAP, is the art of taking photographs from a kite or kite line. Since there are many KAP web sites out there, in building this page, I have tried to focus mainly on the parts of my system that are unique. If you want to learn more about this subject, there are some links at the bottom of this page.

Old Rig

I first became interested in photography from kites after reading an article in Scientific American. It discussed lifting instruments and cameras with kites. This was my first rig. It was made mostly from a satsuma crate. I used a 75MHz radio system that someone had given me. The radio only had two channels: one for the shutter release, and one to move the fin for aiming. Pretty ugly, isn't it?

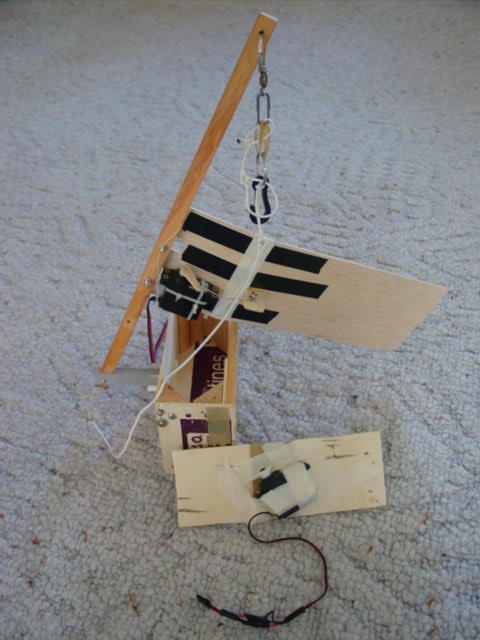
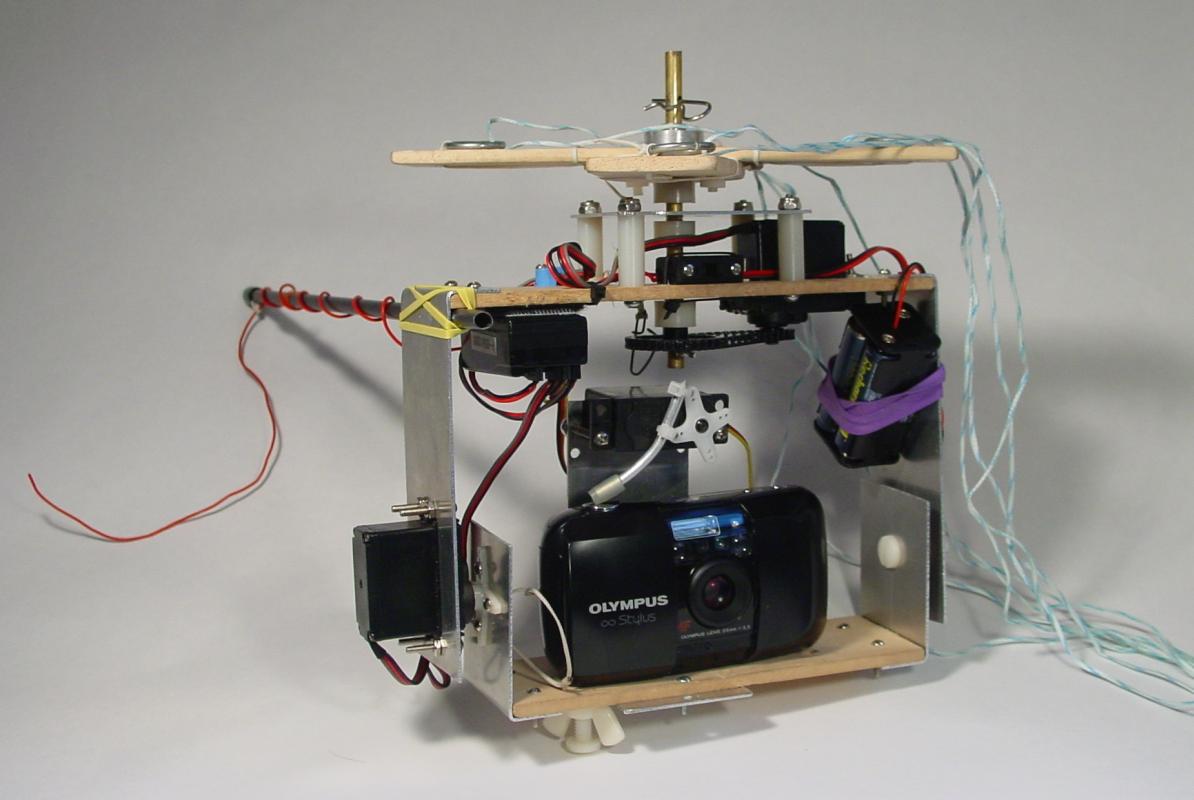
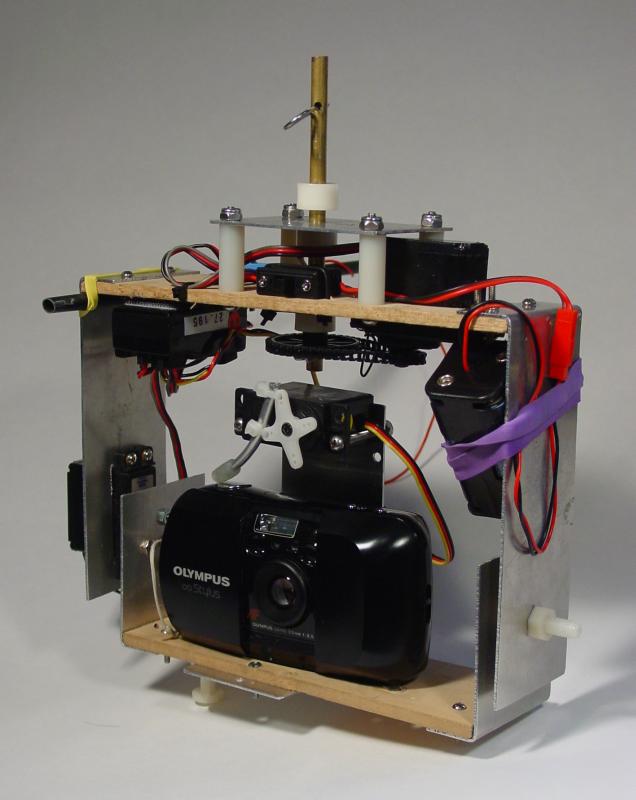
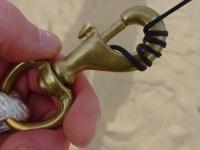
New Rig

I completed my second rig during the summer of 2001. There isn't much that's too unusual about it. I did some research on the internet, and modeled it loosely after some of the others that I had seen. It is made from basswood and aluminum, with steel and nylon hardware.

I have used many different cameras in it. Currently I am using an Olympus Stylus that I found on Ebay for about twelve dollars. Sometimes, when the wind is steady and strong enough, I send up my Sony Cyber-shot DSC-S75 digital. It is rather heavy, but that's what I have. The camera usually secured with a nylon bolt, and a rubber band (not on for the picture). In addition to that, I run a line from the camera to the frame as a backup.

The pan servo is hacked for 360 degree rotation. It is geared down 4:1 (I think) using a chain and sprockets purchased from ServoCity. The large sprocket and cross are mounted on a 1/4 inch brass tube. There are pins in the top and bottom to keep anything from sliding off.

The picavet cross is made from basswood. It is secured to the bras tube with an aluminum hub and set screw (also from ServoCity). The line is 300lb spectra. It runs through four steel rings tied to the cross, and two D-rings that are attached to the kite line. It isn't exactly low friction, but it works ok. When I built it, the cross was a lot bigger. I have since realized that a smaller cross provides more leverage so the camera rig levels itself easier. I think I started at about 12 inches, but I have since cut it down to 8 inches.

As is it now, the whole thing (including the camera and cross) weighs about 1lb., 11oz. Without the camera, it is about 1lb., 4oz.

Radio

I use a 3 channel radio on the 27MHz band. I do this to avoid the legal issues related to the use of 72MHz equipment which, by FCC regulation, may only be used for aircraft.


Changes and Improvements

Since I first built it, this rig has been constantly changing. Some future changes I have planed for it are to replace the shutter servo with a micro servo, and switch from AA batteries to AAAs in order to save weight. I would really like to lighten it up some. Maybe I will start replacing the steel hardware with nylon and aluminum. Another thing am realizing, is that it is relatively easy to see which way the rig is pointed, but difficult to see how the camera is tilted. I think I will add a second pointing stick to the lower part of the rig. I am also thinking about adding an xcam based video downlink.


Kites

I started out using a 6 foot tall rokkaku that I made. Now, I usually use a flowform 16 or dopero.

I use either 220# or 250# line. This is probably more than adequate for the the kites that I fly, but line breakage is one thing I worry about a lot. The failure of this one part could mean disaster. Below is my method of securing the kite line. I take a brass clip and wrap the line around it about five to ten times.


You can see some of my better photos here.


Links

Here are a few good web sites with links to many other KAP sites:

Charles Benton's web site

Digital Encyclopedia of Kite Aerial Photography

Kite Aerial Photography E-Resources


Hosted by www.Geocities.ws

1