| In the Rendering Control is a Detail slide bar. Adjusting this bar |
| In the Renderin |
| In the Renderin |
| In the Renderin |
| In the Renderin |
 |
 |
 |
 |
 |
 |
 |
 |
 |
| In the Rendering Control is a Detail slide bar. Adjusting this bar |
 |
 |
| This page lists images I created with Terragen . A short tutorial is also provided to give a bare minimum of what this free software can accomplish. That's right, Terragen is a free 1.5 mb program. Terragen not only produces photorealistic imagery but you can also create animations. Enjoy Terragen. |
 |
 |
 |
| In the Rendering Control is a Detail slide bar. Adjusting this bar |
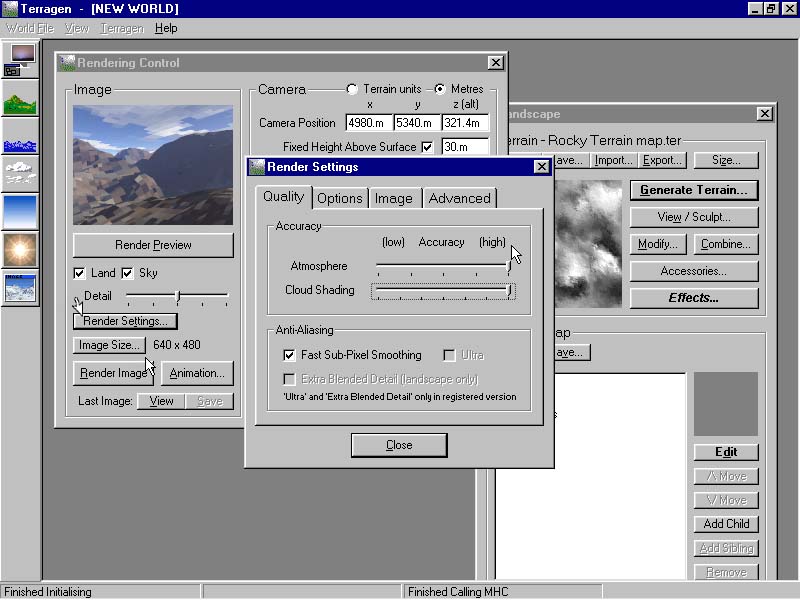
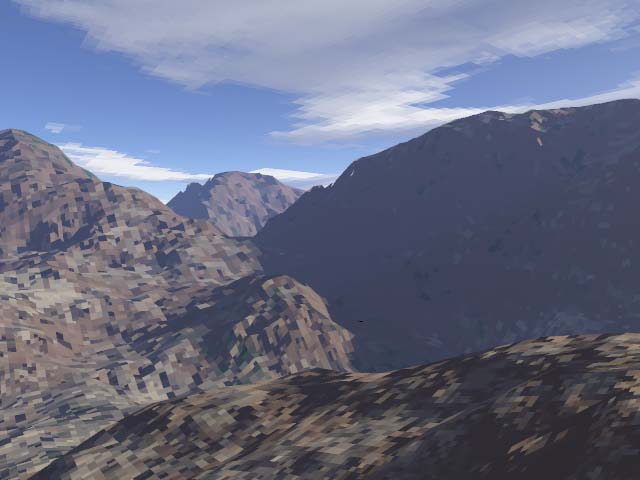
| Now for the short tutorial. First I want to deal with resolution. |
| In the Rendering Control is a Detail slide bar. Adjusting this bar increases the detail of your Render Preview box as well as the final rendered image regardless of the Image Size. |
| In the Rendering Control menu is a Detail slide bar. Adjusting this bar increases the detail of your Render Preview box as well as the final rendered image regardless of the Image Size. This is important to remember because if you keep the Detail bar at the normal default level or lower simply because you don't need or want a high - res preview, then when you do a final render your image will be bad as well. |
| In the Rendering Control is a Detail slide bar. Adjusting this bar |
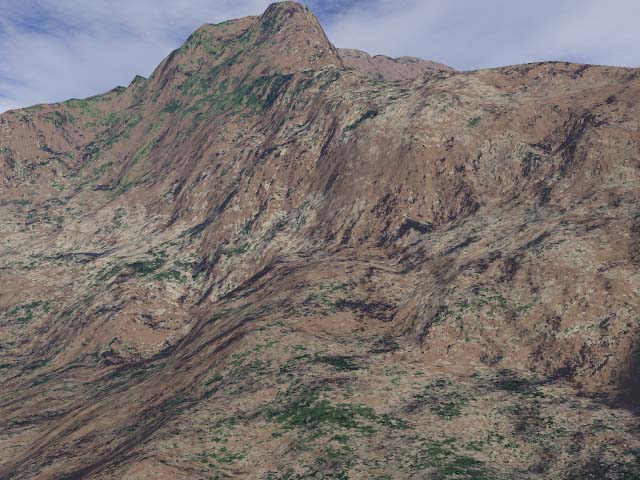
| Thus, a 640 x 480 image rendered with default Detail slider levels will like this. . . . |
| In the Rendering Control is a Detail slide bar. Adjusting this bar |
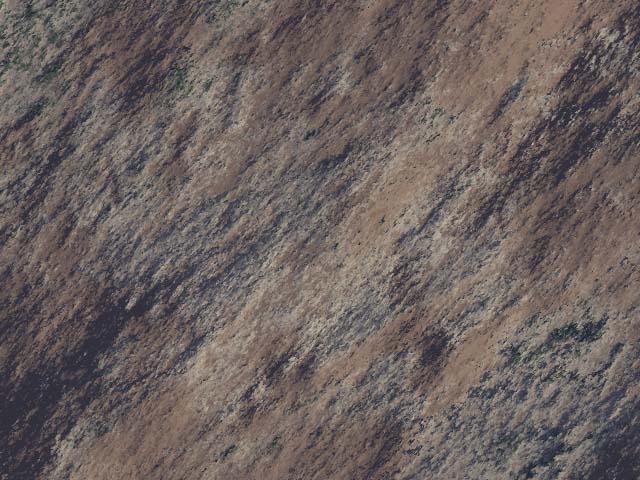
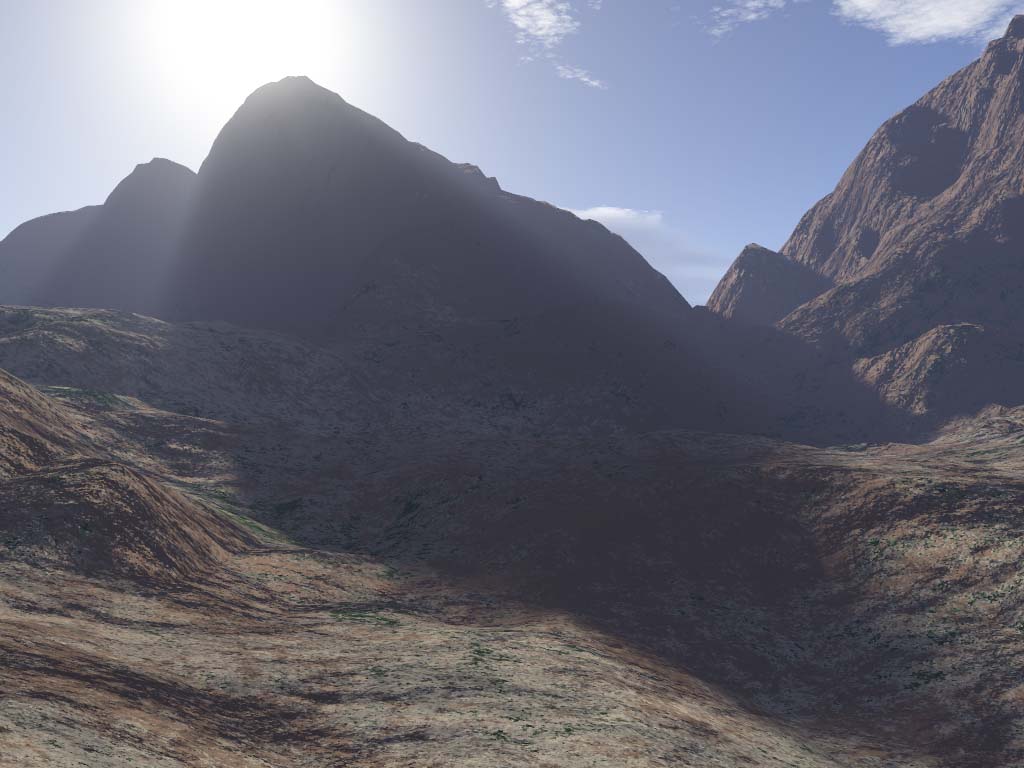
| While the same 640x480 image rendered at higher Detail slider bar levels looks like this. |
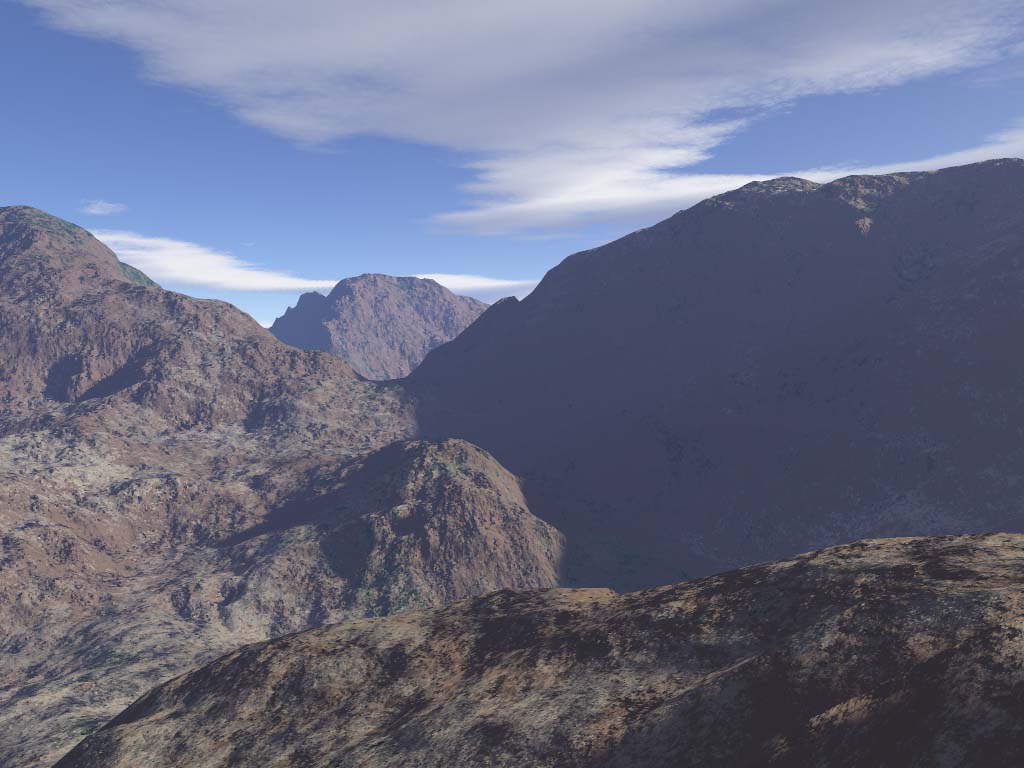
| Now let's increase the detail a bit more with Render Settings.. |
| In the Rendering Control is a Detail slide bar. Adjusting this bar increases the detail of your Render Preview box as well as the final rendered image regardless of the Image Size. |
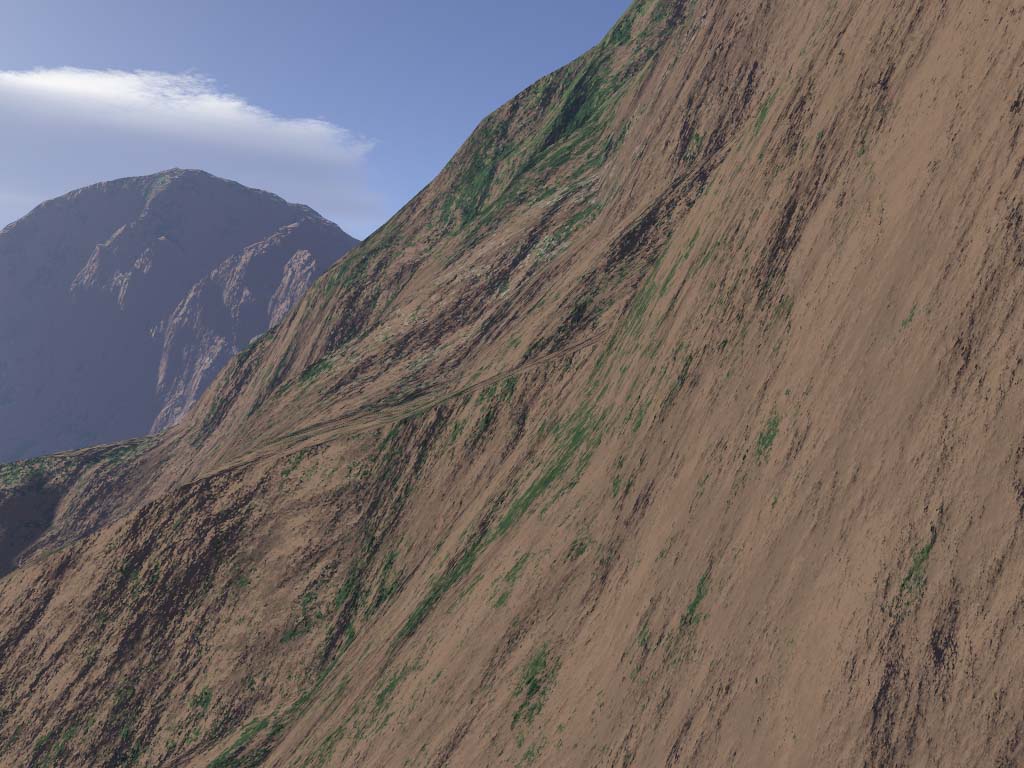
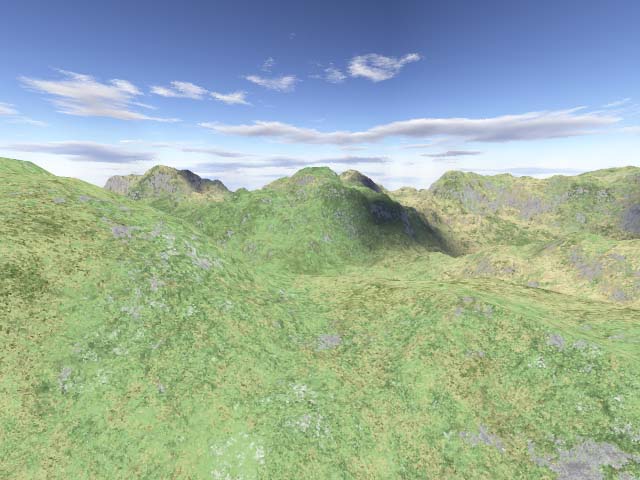
| Below the Detail slide bar are the Render Settings and Image Size. Clicking either button will open the same sub menu. In the Quality tab are the Atmosphere and Cloud Shading, set these two bars on High. Then select the Image tab and reset your image size to a 1024x768 setting instead of the 640x480. Not forgetting the Detail slider bar, remember to keep it at the highest position so that your final render will not be muddy.. Render a preview if you want and then render a final image which will look like this. |
| In the Rendering Control is a Detail slide bar. Adjusting this bar |
 |
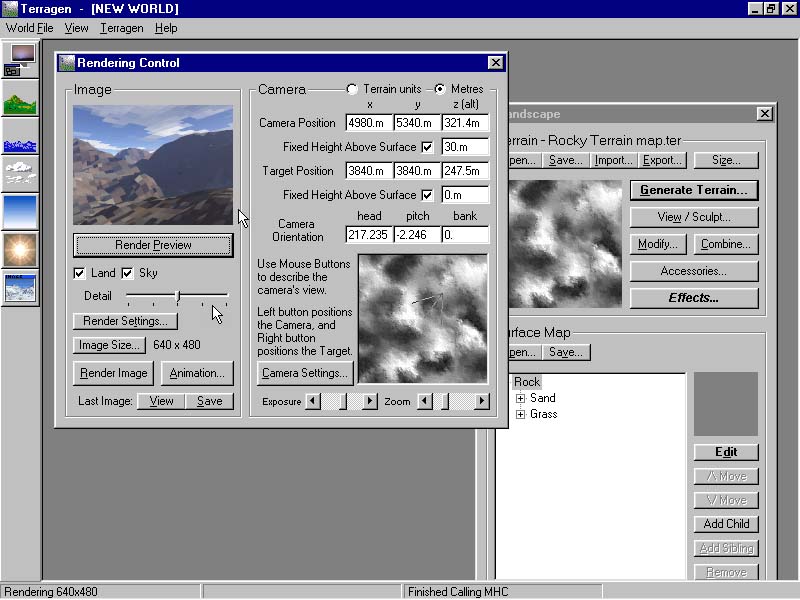
| Let's review the Zoom controls. In the Rendering Control menu is a grey scale window with the zoom controls located underneath. Adjusting the zoom all the way left will give this view. . . . |
| In the Rendering Control is a Detail slide bar. Adjusting this bar |
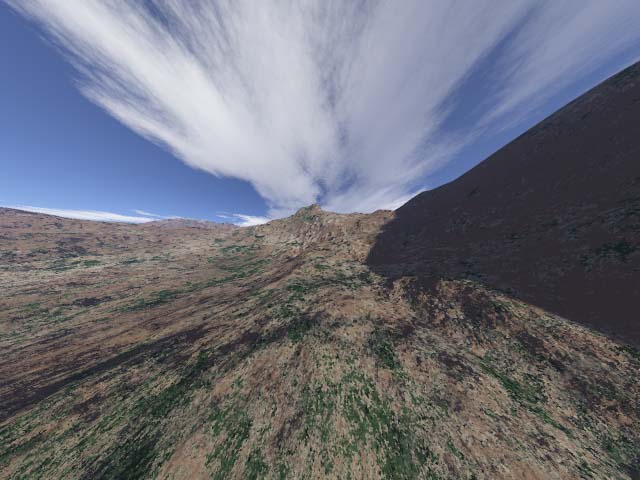
| while adjusting the zoom all the way right will give this extreme close up view. . . . |
| In the Rendering Control is a Detail slide bar. Adjusting this bar |
| Of course at the default level or either somewhere in the middle, the zoom control will give a normal full view. |
| In the Rendering Control is a Detail slide bar. Adjusting this bar |
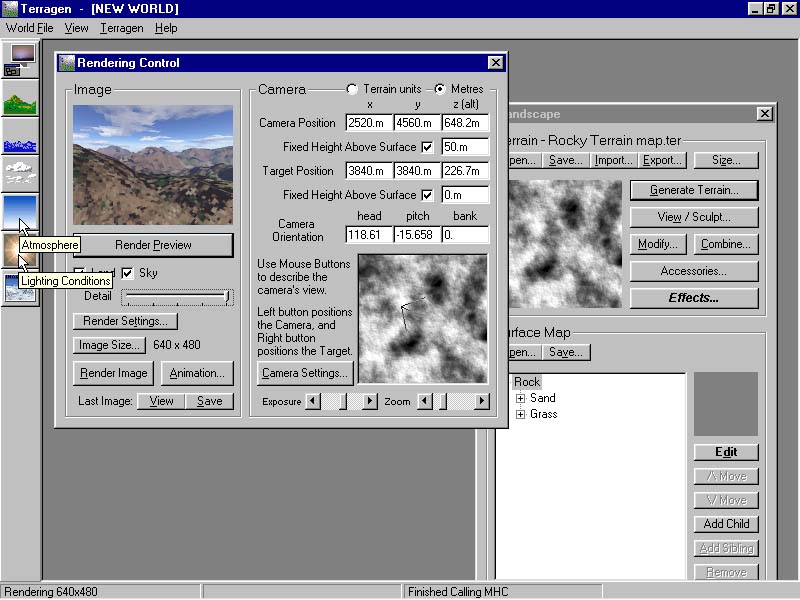
| Let's look at a couple more items. To the left of the Terragon window are a number of items, two of which are Lighting and Atmosphere. Click on Atmosphere. |
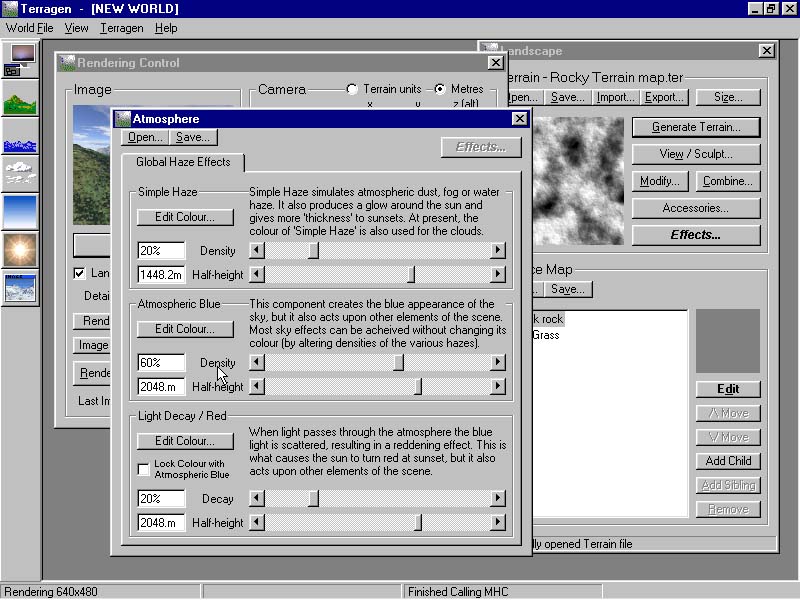 |
| In the Rendering Control is a Detail slide bar. Adjusting this bar |
| In the Atmospheric Blue section, adjust the Density bar from the default 20 % to a 60 % reading. Go back to the Render Control menu and render the image.. |
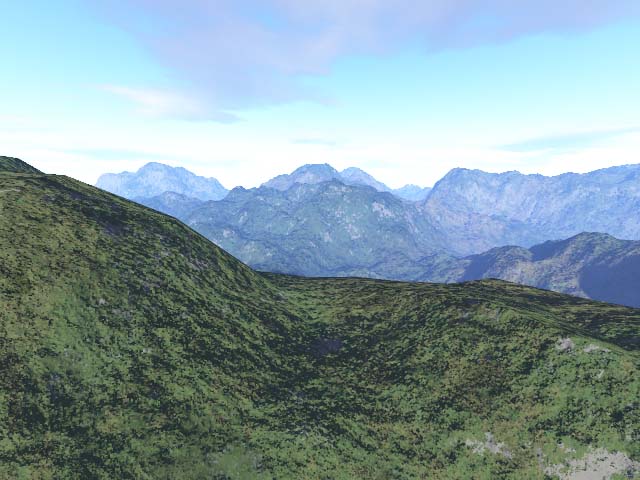 |
| In the Rendering Control is a Detail slide bar. Adjusting this bar |
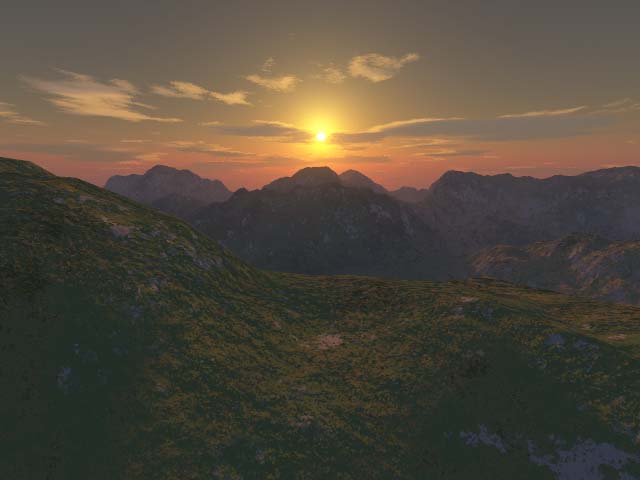
| Now let's make the image a sunset. Go back to the Atmosphere menu. At the bottom of the menu is the Light Decay / Red section. Adjust the Density from 20 to a 60 % reading. Keep the Density level on the Atmospheric Blue section at 60 %. Also, take note of a little box located in the Light Decay / Red section called, Lock Color with Atmospheric Blue. Make sure that box is checked. |
| In the Rendering Control is a Detail slide bar. Adjusting this bar |
| Go back to the Rendering Control and render your sunset. |
 |
| In the Rendering Control is a Detail slide bar. Adjusting this bar |
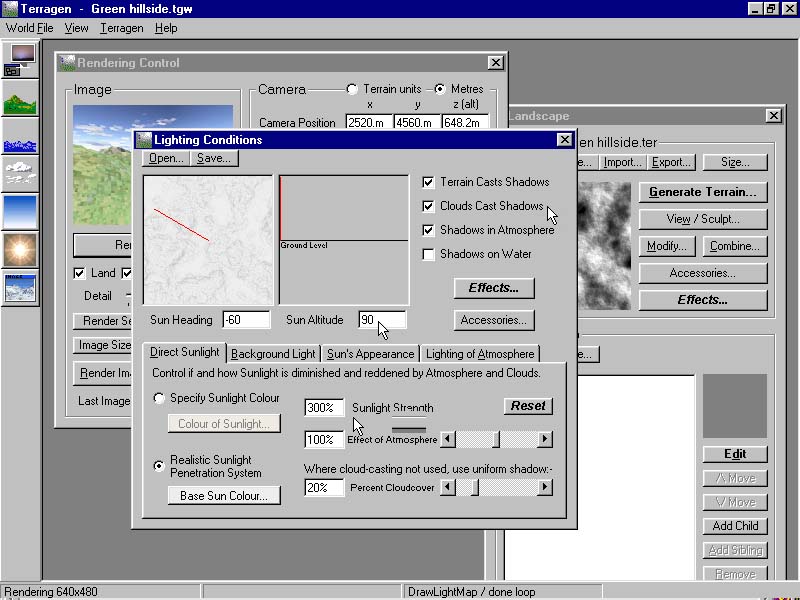
| It's not quite a true sunset considering the sun is setting behind the mountain range. But with Terragen, it is an easy fix by adjusting the controls in the Lighting Conditions menu. Click the Lighting Conditions button on the left side of the Terragen window. |
| In the Rendering Control is a Detail slide bar. Adjusting this bar |
| We need to adjust two of the default levels in the Lighting Conditions menu. First, in the left box is a grey scale of our mountain range. The red line shows the direction of the sunrays. Use your cursor to move the red line in an opposite direction, where the two arrows are. Now, change the Sun Altitude reading from 25 to 6. Leave the Clouds Cast Shadows box on the right unchecked. |
| In the Rendering Control is a Detail slide bar. Adjusting this bar |
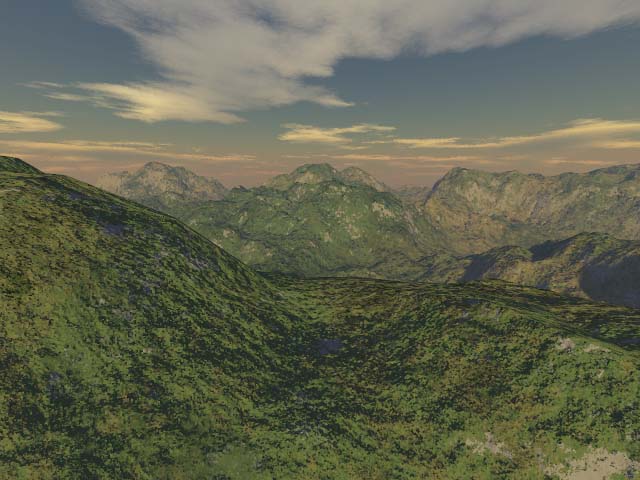
| Go back to the Rendering Control and render your sunset. Now that is a more realistic sunset. |
| In the Rendering Control is a Detail slide bar. Adjusting this bar |
| Let's do one more picture, a high noon image of our same mountain range. |
| In the Rendering Control is a Detail slide bar. Adjusting this bar |
| Adjust the Sun Altitude setting to read 90. Notice the red line in the box above is vertical. Now our sun will be directly overhead. Take note that the Sun Heading box on the left has now turned almost completely white. Next, adjust the Sunligh Strength from 150 to 300 %, then check the little box called Clouds Cast Shadows. Render your high noon mountain range. |
 |
| Each project is called a World and is saved as a .tgw file. The Landscape menu, where you generate your terrain, needs to be saved separately and is a .ter file. |
| In the Rendering Control is a Detail slide bar. Adjusting this bar |
| At this point let me say that there are other landscape and terrain softwares out there which do phenomenal work. Get them if you can. However, if not, the eye-catching photorealism of Terragen plus the fact that it does animations as well as still pictures is certainly worth a look, considering it is free and a small download to boot. All of the various menus, scales and slider bars may look a bit difficult at first, but in reality, the menus are quite straight forward. Terragen has a list of resource links of different plugins for the purpose of helping further your creativity using the Terragen program. Have fun creating your own worlds with Terragen. |
| Roger - [email protected] |

|
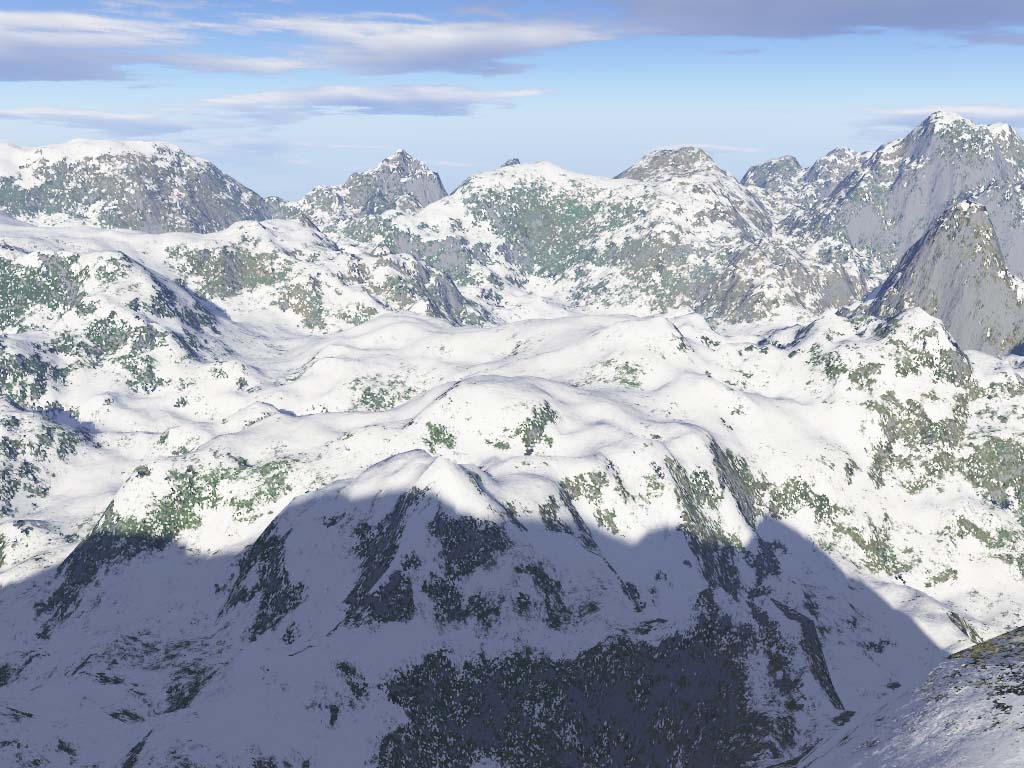
| Below are three images I created and rendered within an hour of downloading the Terragen program. My computer is not powerful, Pentium III 450 Mhz processor, 250 Mb RAM. The render times for these three images ranged from 14 to 18 minutes and were rendered at 1024 x 768. |