An old computer power supply will usually have a bunch of wires sticking out of the box. Cut the connectors off the end of the wires. Open the box and follow the wires to the PC board. The same color wires should all lead to one point on the board. If you're lucky, the board will be marked with what voltage the wires provide. If not, then you will need to use a voltmeter to determine the voltage of the different wires. Generally you should have wires with the following voltages: +12V, +5V, -12V, -5V, and ground wires. Sometimes the -5V or -12V wires will be absent. This is OK since we won't use them anyway.
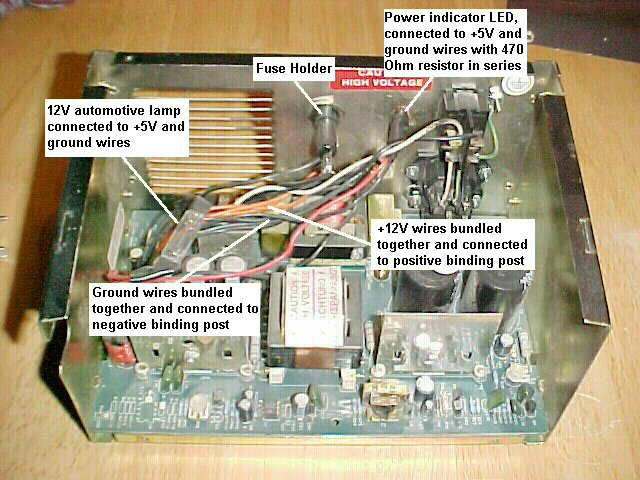
Once you have determined which wires are which, snip or desolder & remove the -12V and -5V wires from the PC board. Remove all but one of the +5V wires. Install a black and a red binding posts in the case of the power supply. Connect the +12V wires to the red post, and all but one ground wire to the black post.
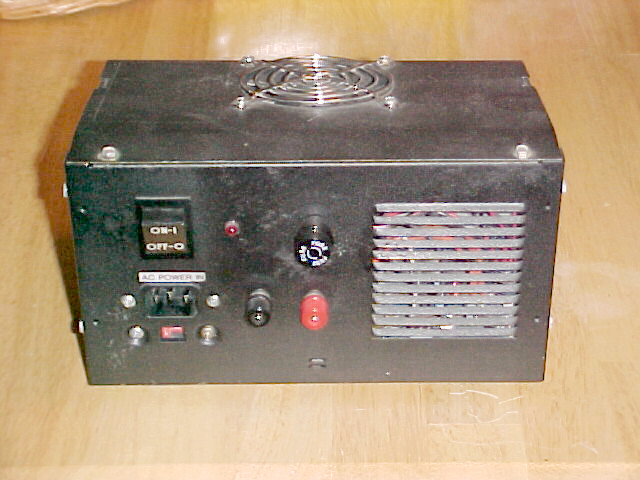
If you are using an older power supply, like that from an old IBM computer or clone, chances are it will already have the power switch installed in the case. Newer power supplies will have the power switch remoted on a cord sticking out from the case. It should be either a rocker switch or push on/push off type. It is a simple matter to cut the old switch off the cord, shorten it, and mount a new power switch in the case, running the original wires to the new switch.
The last important step is to install a load across the +5V part of the supply. If this load is not present, the supply will not work. The easiest way to supply a load to the +5V is to wire a 12V automotive lamp across the 5V and ground. The lamp will light when the power supply is turned on, but will not burn out since the 12V lamp is only getting 5V.
As an extra touch, I decided to get fancy and install a red power LED. I connected it to the +5V and ground, with a current-limiting 470-Ohm resistor in series. I also installed a fuse holder in the front panel. This is not really necessary since the power supply has a fuse holder inside, but will make it handy to change the fuse if it blows. I wired the fuse holder to the fuse holder on the PC board. If there's room inside the case, a cigarette lighter jack could be installed if desired. It could be used instead of the binding posts or wired in parallel with them so either the jack or posts could be used.
A 4 amp power supply isn't big enough to run a 100W ham rig from, but will provide enough current to operate a ham HT, shortwave receiver, QRP rig, CB, or anything else that doesn't require a large amount of current.
One thing to note is that most computer power supplies are not RF shielded so they may put out noise on different radio frequencies. However, I have had no RFI problems with this power supply.
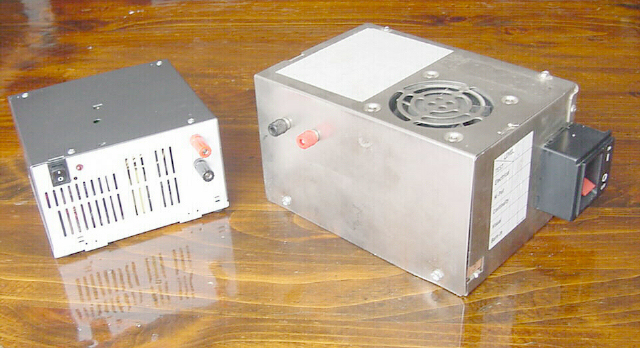
I have also built two more power supplies as shown in the following photo. The one on the right is from an old IBM PC and is the one that is currently powering my beacon transmitter. It supplies 2A of current. The one on the left is a newer, more compact supply, and puts out 4.2A of current at 12 Volts.