Please move this over-->
GO BACK to main page
Welcome to the tutorial page!! This is going to show you how you can change the graphix in the game. It will work for pretty much any of the images used, be that the Pose.svg ( as you guys call it "the Mascot " ) the neck image or the flames, they are all basically the same. There are 3 things you will need to do this right. 1: Inkscape ( its a Vector graphix program, and its free) Get it Here 2: Some Paint/ drawing program ( i use photoshop ) 3: Frets on Fire ( obviously ) ----------------------------------------------------------------------------------------------------------------------------------------------------------------------------------------------------------------------------------- Right Lets get started then! First of all load the image you want to put in the game, into your paint program of choice. This is purly so you can tidy up the image & cut out the background. All you want to keep is the part of the image you want to use. Once your happy with your image save it, i dont think it makes much difference what format you save it as, but as FoF seems to like PNG files for the cassette and folder labels i usually save in that format. Plus it seems a fairly lossless image format. Heres an Example of what i mean. This is a badly drawn image to use for the "POSE.svg" .. And after i cut out the background.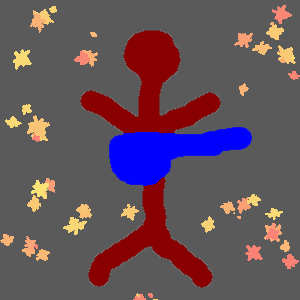
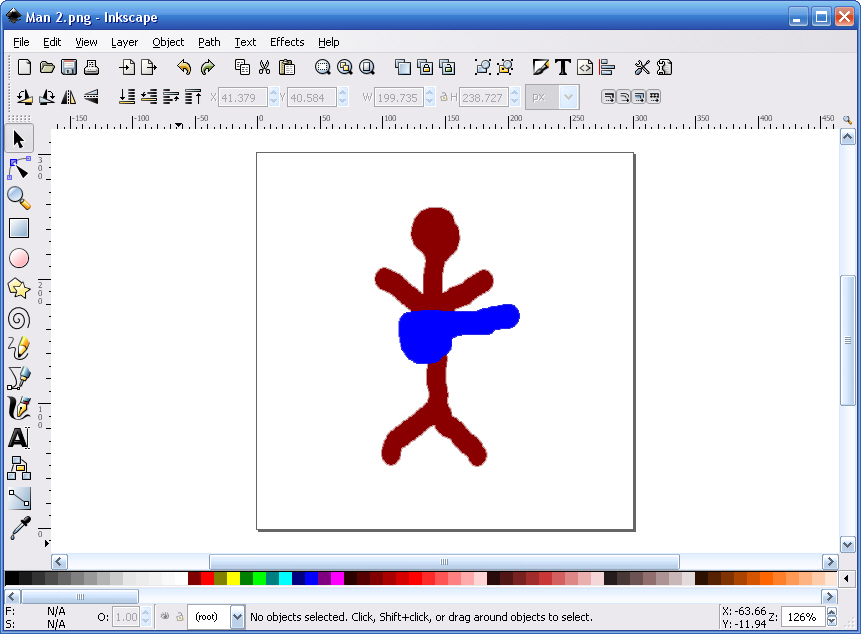
Ok now load up Inkscape. Load in the image you just saved, it should now appere in your main inkscape screen looking Some thing like this.
Click image to see bigger. Before we go any further, the 3 things you will use the most are 1:
Select, located in the toolbar on the left of the screen, its the top most icon. 2:
Edit nodes and anchor points, located just below Select in the toolbar 3:
The colour settings, Located in the bottom left of the screen. The F: means Fill Colour ( Main colour ) the S: means Stroke ( outline colour ). Ok the image is now loaded in inscape, your ready to turn it into a vector graphic. Click SELECT, then click on the image, a dotted line box should now surround your image ( that means its selected ). Now in the menu bar at the top click on PATH, then on TRACE BITMAP. Or you can use the shortcut which is SHIFT + ALT + B.
A new window should now pop up looking like this.
While you image is still selected click on PREVIEW. You should see the image in the preview window. it will probably look just BLACK. thats ok for the moment i will explain why it is like that. If you dont see the image in the preview window then it has become Unselected, just releselect and click preview. ----------------------------------------------------------------------------------------------------------------------------------------------------------------------------------------------------------------------------------- The options available to you are. SIOX forground selection ( ive tried using this and didnt see any difference, so leave it off for now). Image Brightness/Brightness. This is if your only using 1 colour ( this is why your image looked black) Edge Detection/ Optimal edge detection. ( use this if you just want to have just an outline of your image ) Quantization/ colour quantization. ( im not too sure about this one, as far as i can tell , however many colours you set in the box, is how many layers it will spit out when you click ok. Multiple Scanning/ Brightness-Colour-Monochrome: This is the section you really want to use. I'll try and explain this section as best i can. On the right of this section you will see a box marked SCANS. This means how many layers you have in your vector image, so if you had ( as an example my crap pose man used here) that uses 2 colours, so you would want at least 2 layers , one for the red and one for the blue. If when you vectorize it, it looks like some of the colour has been removed or the image looks really bad quality, but your original image was good, chances are you havnt used enough scans ( medium orange and dark orange now merge into one colour, or something similar ). SMOOTH and STACK: Smooth is kinda obviouse ( it will smooth out some of the rough edges ). Stack is kinda strange to explain. so i will include images for this.
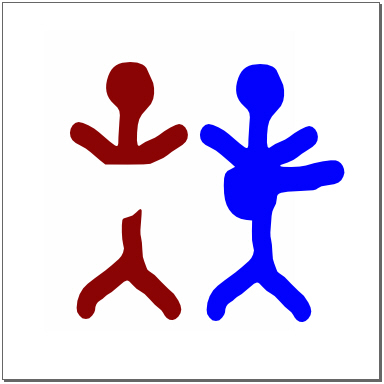
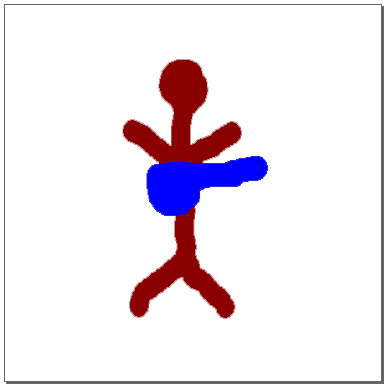
The first image is with Stack turned on and the second is with Stack off. With stack on It seems to make some layers the entires shape but of one colour and then the other layers sit on top. With stack off it just makes each layer as its indevidual shape ( which is better) so i say turn Stack OFF. OK now what do Brightness-Colour-Monochrome do? COLOUR will make you vector in colour Duuh. Make sure you use enough scans for the amount of colours your using. Brightness & Monochrome will make each shape/layer a shade of grey ( thats ok tho you can change them using the colour settings). The only differences i can see between them are, Brightness, will appear in the preview as just all black, but will vectorize as different shades of grey, and Will Not have a white background layer. Monochrome will appear in preview, as different shades of grey, and when vectorised Will have a white background layer, which you will have to delete after. ----------------------------------------------------------------------------------------------------------------------------------------------------------------------------------------------------------------------------------- Once you have your preview kinda how you want it, click ok. Voila you just vectorized an image.... It should have gone from this.. To this. The second image has much cleaner lines.
Click either image to see bigger Now what was i talking about background layers for??? Unless you used BRIGHTNESS, when you vectorized your image, it also vectorized the White background surrounding it. i have changed the background colour so you can see it better.
Also your original image is still in a background layer, that will have to be delete too. This is how you remove both of those layers. ----------------------------------------------------------------------------------------------------------------------------------------------------------------------------------------------------------------------------------- Choose SELECT
Now select your original image and delete it
So now you have deleted your original, its time to remove the background. choose Edit nodes
Now without clicking anything else, choose SELECT
Now delete it. You dont have to move it, but it does allow you to make sure you only selected the background. You should now have something like this.
If you have SAVE IT NOW!!!!!! ----------------------------------------------------------------------------------------------------------------------------------------------------------------------------------------------------------------------------------- You have now got a basic vector image. If you wish you can celebrate, by cheering, shouting, or running down the street naked its up to you, i dont mind, as long as i dont see the pictures of you doing it ( unless your a hot female then ill look) Lol. ----------------------------------------------------------------------------------------------------------------------------------------------------------------------------------------------------------------------------------- Lets recap what you have done so far..... You loaded an image into inkscape, You applied Trace Bitmap on it and removed the original image and the background. It sounds simple when you say it like that !!!!
----------------------------------------------------------------------------------------------------------------------------------------------------------------------------------------------------------------------------------- DONT try loading this into the game YET! it wont work, simple as that. ill show you what you have to do in a little while, i just have something else to show you first. ----------------------------------------------------------------------------------------------------------------------------------------------------------------------------------------------------------------------------------- Lets make our new image look better. Remeber i told you about the colour controls before
Notice how in the colour settings it now shows what colour is used.
If you click on the Fill colour it will pop up with a colour selector, you can change it to whatever colour you wish( you can even make it slightly transparent, or have a gradient fill. ( just have a mess about with it, as long as you saved your image you can always reload it). Now if you click on the STROKE colour ( that says unset) you can say if you want an outline and what colour you want it to be. All the colour setting from the Fill colour are available on Stroke colour too. here is an example ....
What i did was.. In the Fill colour i applied a gradient fill from Blue to Red, and in the Stroke colour i applied a gradient fill from Green to Yellow. If its how you want it to be SAVE IT AGAIN. ----------------------------------------------------------------------------------------------------------------------------------------------------------------------------------------------------------------------------------- Now you have a finished vector image , with fancy colours and outlines. You will want to get that in the game and test it! Go to your FretsonFire/data/mods folder. Create a new folder, call it whatever you want your mod to be called. Copy your new SVG image into this folder, rename it to POSE.SVG and run the game.. In the game go to your settings/ Game settings/ Mod settings. You should see the name of your mod folder, turn it on. it will restart the game and it should look something like this.......
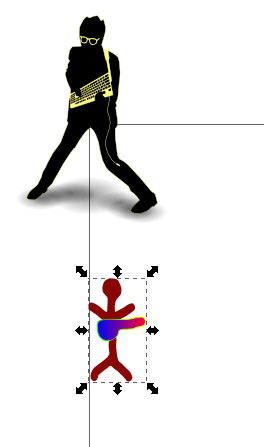
Oh Shit its not in the right place or the right size.... Actually i knew this would happen but i wanted you to see it for yourself. The reson for this is.. the game images are not placed in the center of the screen, this is what i mean
Your image is in the center of the document page..
Where as the original is in the top right of the document page. you have to move yours so its in the same place, also change the size to be about the same, the easiest way of doing this is to

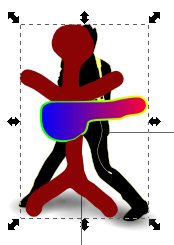
1: copy and past your image into the original. 2: move it into place. 3: size it to about the same 4:delete the old image. Then save it again. REMEMBER to save it into YOUR mod folder, DO NOT overwrite the original images that came with the game. Now reload the game and it should look correct ( Hopefully )
YAY!!! it worked, Pat yourself on the back, or do that running in the street thing. ----------------------------------------------------------------------------------------------------------------------------------------------------------------------------------------------------------------------------------- Ok Lets recap again, how to make a SVG file in 5 steps or less!!!!! 1: loaded an image into inkscape 2: Traced bitmap 3: deleted unwanted layers 4: Made it look nice with colours and outlines 5: set the position and scale to match that of the game! TESTED & FINISHED. Now thats the general idea behind making an SVG file for Frets on fire, you do exactly the same for any of the other images. if you wanted to change the Frets on fire logo ( as seen in the image above ) just draw or paint a new one in your program of choice , load it into inkscape and vectorise it . The 2 big reasons images dont show up in the game.. 1: you didnt name it right ( look at the names for the original images, it has to be the same, and it IS CASE sensitive, ) 2: its not the right size or placement on screen. One final note.. try not to have too many layers in your images, the more layers, the more complex it is. The more complex it is, the more your computer will lagg and stutter. ----------------------------------------------------------------------------------------------------------------------------------------------------------------------------------------------------------------------------------- Now you have an understanding into making SVG`s GO make your own mod, and stop asking every body else to do it for you. PEACE, OUT. NOBBY76 GO BACK to main page