

Giving TV Scanlines to an image - An
Image Manupulation
In this tutorial, we are learning how to do simple manupulation on an
image. See the difference between two images
(fig-1 and fig-2) shown below. This tutorial includes two concepts, a)
Defining a Pattern and b) Simple manupulation on an image. Let's first
define a pattern.
Image before manupulcation Image
after manupulation

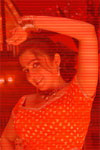
fig-1 fig-2
1. Open a New Document in the Photoshop application of dimensions (Width=5,
Height=4 and Contents=Transparent SELECTED) as shown in given below figure.
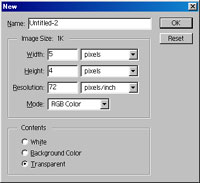
fig-3
2. Now select Zoom  tool from Tool Pallette and make the document size to maximum, so that
it will be clearly visible to you. Select Rectangle Marquee tool form
"Tool Pallette" and draw as shown below figure.
tool from Tool Pallette and make the document size to maximum, so that
it will be clearly visible to you. Select Rectangle Marquee tool form
"Tool Pallette" and draw as shown below figure.
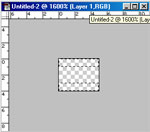
fig-4
3. It's time to fill with color. Select any color as you like (i selected
red). To do, go to Edit >> Fill and click on Ok. Image shown below.
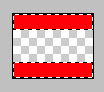
fig-5
4. Deselect it. Press Ctrl+A to select entire. Now goto Edit >>
Define Pattern to define the pattern. That's it. Defining a pattern is
completed. Now, it's time to make TV Scan Lines to an image.
5. Open any image file. Create a new layer by selecting Layer >>
New >> Layer and click Ok button. New layer was created. Select
the new layer (if not selected, click on that layer to select as shown
in figure).
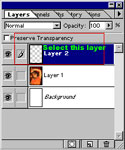
fig-6
6. It's time to apply the pattern. To do so, Select Edit >> Fill.
Fill dialog box appears. Select "Pattern" under Contents title.
Click on Ok button.
7. Select Layer pallette. Choose Opacity (select Opacity slider).
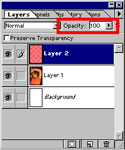
fig-7
8. Change the Opacity to 30 (you can choose your own value) as shown below.
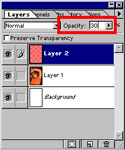
fig-8
9. That's it! Desired TV-Scan Lines!!!
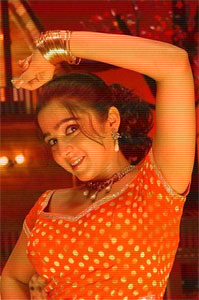
fig-9
That's all my dear friends.
"Fundamentals are the Route
to the Destination" - BHMK
Go Home