

Making bright (white) teeth to dirty
teeth - An Image Manupulation
In this tutorial, we are learning how to do simple manupulation on an
image. See the difference between two images
(fig-1 and fig-2) shown below.
Before Image Manupulation After
Image Manupulation
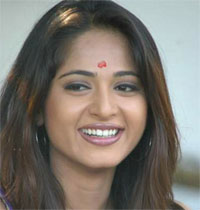
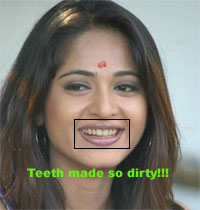
fig-1 fig-2
To make such effect, do the following,
1. Open any image document/file (ie., JPEG or GIF) in the photoshop application.
2. Make image to Zoom by using Navigator as shown in the given below figure.
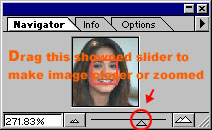
fig-3
3. Now, select the Pen tool  from Tool Pallette and begin to draw the path as shown below figure.
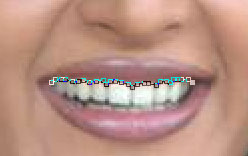
fig-4
4. Complete the total path by using Pen tool as shown in the figure (below).
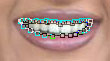
fig-5
5. After completing the path, now it's time to make selection. Right-Click
on the selected path and choose "Make Selection". Enter the
values (Feather Radius=1 px, Anti-aliased=Checked and Operation=SELECTED)
as shown below figure.
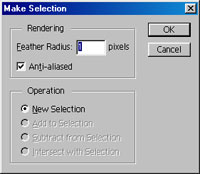
fig-6
6. Again, Right-Click on the selected path and choose "Turn Off Path".
7. Now, it's time for changing the color. So, select Image >> Adjust
>> Hue and Saturation (or press Ctrl + U) and enter the values (Colorize=CHECKED, Hue=31,
Saturation=22 and Lightness=-10) as shown below figure.
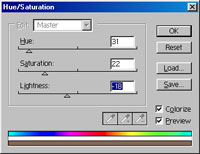
fig-7
8. That's it. You will see the final result as shown in fig-2.
That's all my dear friends.
"Fundamentals are the Route
to the Destination" - BHMK
Go Home