

Creating a brush & saving a brush
Creating a brush is as simple as ever. But it involves little patients.
Lets create a brush and save it. Follow the given below example.
1. Open Photoshop Application (whatever version you have, but, i used
Photoshop 5.5). Open New document by pressing Ctrl+N. Open dialog box
appears. Enter dimensions (Dimensions: Width=100, height=100 and Mode=RGB)
as entered that was shown in the given below fig-1.
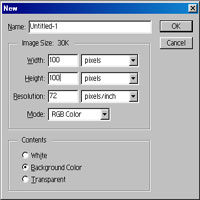
fig-1
2. Create a new layer by pressing Shift+Ctrl+N.
3. Now choose the brush tool and choose the color(you can choose any color
as you like) and choose the brush type as shown below ie., fig-2. And
just click on the document (so that it appears as a dot).
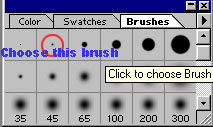
fig-2
4. Now, right click on the Layer Pallette and choose "Select Layer
Transparency" as shown below.
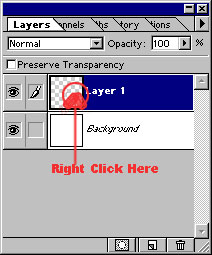
fig-3
5. It's time to define it. So, click on the brush pallette as shown below.
Select "Define Brush" to define it.
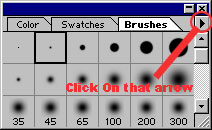
fig-4
6. That's it. Brush was defined as showned in the fig-5.
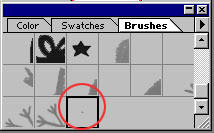
fig-5
7. This is how one can define their own brushes. After defining, it's
time to save a brush or to save all the defined brushes.
8. To save a brush or set of brushes, first of all you have to do is just
delete unwanted brush/brushes. To delete the brush or brushes, place the
mouse pointer on the brush pallette and press Ctrl+Mouse Click (left button).
Mouse pointer Changes to sessors. Delete unwanted brush/brushes by keeping
wanted brush/brushes for saving. Now, after keeping all wanted brush(s),
click on the brush pallette's position shown in the figure. Now, select
"Save Brush". Give it a name and click Ok to save.
9. Tha's it! Now Happy!!!
"Fundamentals are the Route
to the Destination" - BHMK
Go Home