 |
| Liran's modller site |
| Right me at: [email protected] |
| Hello you Voyager and modeling fans. This page goes to show you my expiriance with building Star Trek Voyager Model by Revell and possibly my other models. I bought this model and the other three "Voyager series" Revell models for a very low price. They only cost me about 7$ each, and they are hard to find as well. I will probably buy more of them to stock for the future. For building the Voyager I used : 1. Brushes � 2 of them a very small one for details and a thicker on for surface. 2. Humbrol Super Enamel paint (which I hate because it create a thick coating). 3. Staedtler Lumocolo permanent color pens (the user you use to write on a CD). 4. Handheld soldering iron. 5. Hanheld ellectric glue gun (this is really great). 6. Small LEDs (originally ment for printers) which I found were I work). 7. 0.5mm and 1mm drills. 8. Fiber Optic UFO (10$) which I broke to scavange the fiber optic cables, lamp, transformator and electric socket. 9. Polystyrene cement (Plastic model glue).I I guess the total cost of making it (not including the glue gun and solder which I own) Totals to about 35$ and allot of working hours. |
| New !!! Voyager model |
|

|
| You are visitor number |
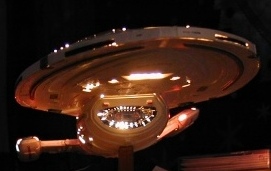
| Actual model in the dark |
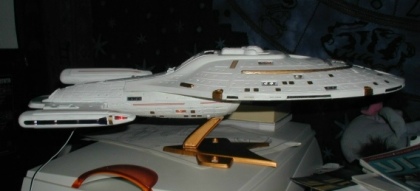 |
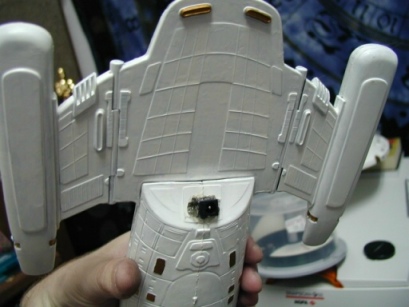
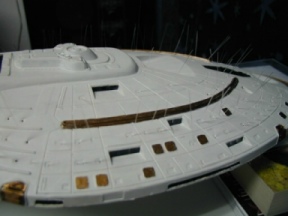
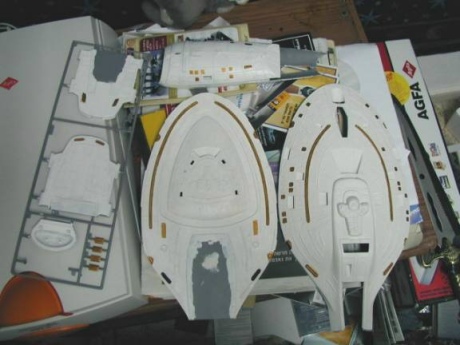
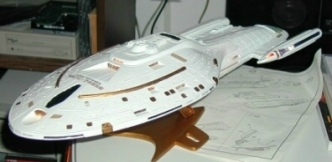
| OK, so how did I build it�. Well, I started with painting the model white, then colored the rest of the stuff. I did not glue anything together yet. After painting I started working on the warp engin nacelles. I put 4 LEDs along each And 2 LEDS where the red neccelles tips are. I used the soldering iron to put holes in the plastic so I can put the cabels to bring them to the body of the ship. I used a friend�s 0.5mm drill which came with the Fiber Optic Enterprise model to drill a few holes untill the drill broke (actually the plastic holding the drill did not hold it anymore) so I bought the 1mm drill which fitted an electric drill and I put the holes for the ship�s windows. For the deflector light I used a heated thin knife to put holes in. I used 2 more LEDs to light the bridge section and 2 more near each side window on the hule on the ship. Then I put the fiber optic strings into the windows. I used the glue gun and regular glue to make the the fibers stick to the windows when I turn the model upside down. I put in the main lamp to shine on the fiber optics and put more fiber optic around the ship. I took the transformator connector from the UFO and made a hole in the back of Voyager With the soldering iron to fit it in. I covered the rest of the holes space with the glue gun. Finished it off by glueing everything together. Look at the pictures to see the work in progress nad the final product. Good luck. |
| Down to business |
 |
 |
 |
 |
| Also take a look at |