
How to Make Foam Baby Blocks
Materials you will need for a set of 6 blocks:
enough fabric to make 36 squares (each block uses 6 squares) of whatever size you would like your blocks to be, plus seam allowance. My blocks were 4" square and I used a `1/2" seam allowance, so I cut 5" squares.
cubes of foam in your desired block size.
electric knife
thread
How to cut the foam:
Decide on the finished size block you'd like, and mark cutting lines on the foam with a sharpie. I used 4" blocks, so I made lines every 4" along the foam.
Using an electric knife, cut the foam along the lines you've marked. An electric knife will give you a very clean cut edge on the foam and makes it extremely easy to cut.
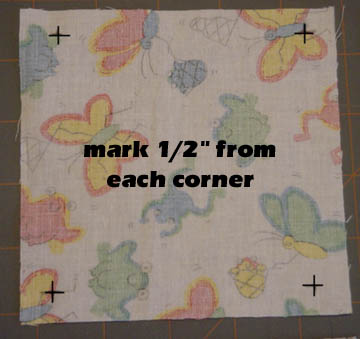
| Step 1: Cut out your 36 squares of fabric. On the wrong side of each block, make a mark 1/2" (or whatever seam allowance you choose) away from the corner on all four sides. This will make the sewing part a lot easier. |
|
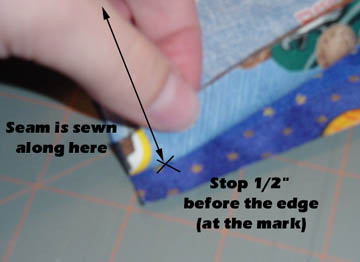
| Step 2: Sew four of the six fabric squares together end to end, starting and ending your seams at the marks you made. DO NOT sew all the way to the edges of the fabric. I found it works best if you backstitch a couple stitches at the beginning and at the end of each seam. It makes the corners of the blocks stronger when they're all sewn together. |
|
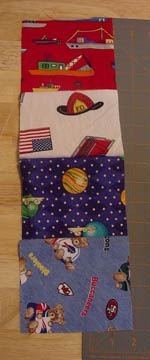
| Here is a picture of how the seams should look when you sew the squares together. |
|
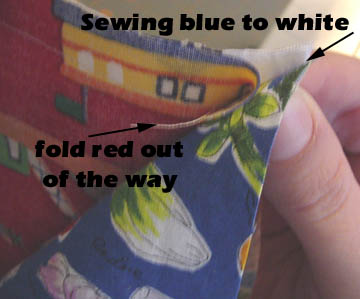
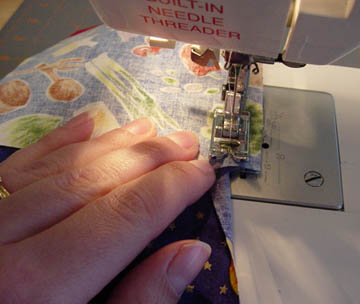
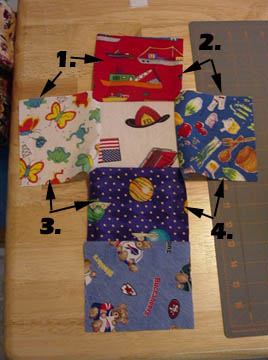
| Step 3: This is where it starts to get a little tricky. The two remaining squares will be sewn onto the first four to form a cross, or lowercase "t" shape. Going by the above picture, you'd be attaching one square to either side of the white square with the fire hat on it. When you attach the squares, you will need to fold back the seam allowance of the squares above and below the one you're sewing on. In this picture, you can see I'm folding away the SA of the red boat print (at the top of the strip of 4 squares) and lining up the corners of the white fire hat print with the new blue print. Sew the seam joining the white and blue starting and ending at the marks you made. Do this for both remaining squares, so that all 6 are sewn into a "t". |
|
| Sewing the seam, with the seam allowance of the other square folded out of the way. |
|
| Here's how the squares will look when they're all sewn together into a "t". |
|
| Step 4. Now you will sew the "t" into a box with an open lid. Using the same technique of folding the SA out of the way, and starting and stopping the seams at the marks, sew the four side seams together in the order shown in the picture. |
|
| After you've sewn those four seams you should end up with a block that looks like this: |
|
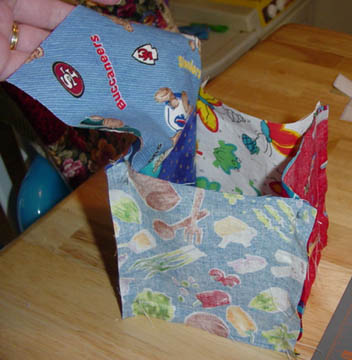
| Step 5: Sew two of the remaining three sides down, so you have a cube with one side open for inserting the foam. (You can see in this picture how none of the seams go all the way to the edge of the fabric) |
|
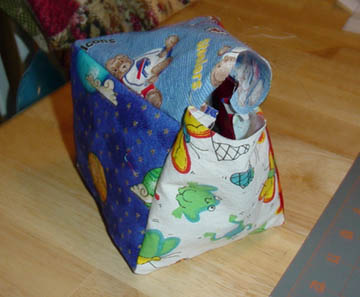
| Step 6: Turn the block right side out, being sure to push out the corners to nice points. |
|
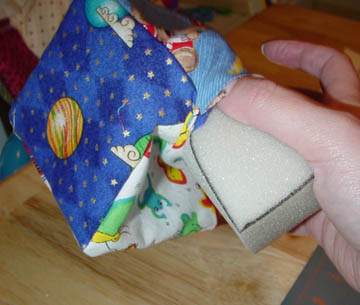
| Step 7: Stuff foam into the block through the opening, and then stitch opening closed by hand. |
|
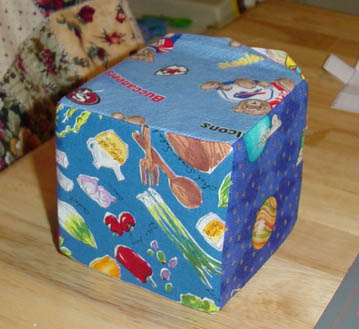
| A finished block! |
|