 |
|
|
|
|
|
|
|
|
|
|
|
|
|
|
|
|
|
|
|
|
|
|
|
|
|
|
|
|
|
|
|
|
|
|
|
|
|
|
|
|
Fuselage Front Deck |
|
|
|
It's the end of October and the remainder is due on the purchase of my Blue Mountain Avionics system for my panel. When it gets here I am going to send it to Dave at Penn Avionivs to install in the panel along with the radios. That being the case I figured I should get that part of the plane done now, so Dave can be working on the panel while I am doing other things on the plane. |
|
|
|
 |
|
|
|
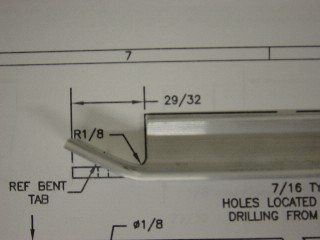
This is an angle brace for the center section support rib of the front deck. Gotta love those full scale drawings to get the angles right. |
|
|
|
|
|
 |
|
|
|
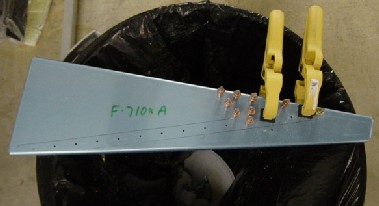
Here I am match drilling the brace plate (underneath). I did the drilling right over the trash can to help with clean up. You can also see the lines to center the angle brace that I will have to match drill from the other side. |
|
|
|
|
|
 |
|
|
|
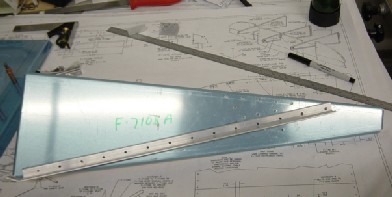
I match drilled the angle brace. Here it is clecoed for the time being. |
|
|
|
|
|
 |
|
|
|
I drilled and clecoed the engine control support bracket to the center sub panel. This bracket will support the cables from the engine controls |
|
|
|
|
|
 |
|
|
|
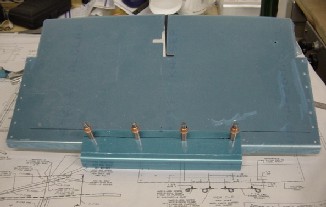
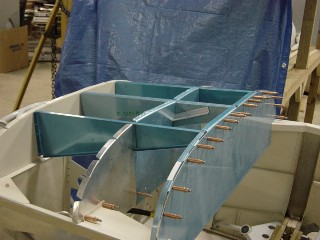
The front deck clecoed in place. I want to get everything built and sized up so I can sent the panel and front deck pieces to Penn Avionics. This way they will know what to work around. Then after I get the system back I will rivet it in and I will be ready for my wiring. |
|
|
|
|
|
 |
|
|
|
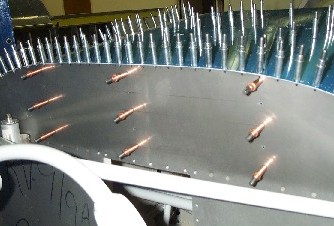
I've attached the top skin over the deck with clecos. I drilled from the top skin through the top flange of the firewall. The center rib was not drilled for the firewall, nor was the firewall it self. The instructions were written as though they were pre-drilled. So After I clecoed everythinh in place, I marked the centerlines for where the holes should be, then drilled and clecoed them. |
|
|
|
|
|
 |
|
|
|
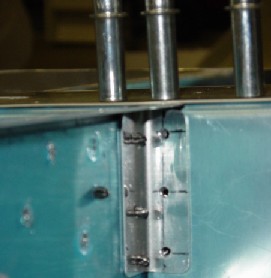
The center rib required an angle bracket fabricated and drilled in place. The sub panel had the angles formed in it for the left and right ribs, however the center rib has a long angle that has to be riveted in advance, the has to be "fit" into a slot in the sub panel. If the agle was formed into the sub panel for the center rib, it would not allow the center rib to be inserted. Hence, on had to be fabricated, to be installed "after" the center rib is "fit" into the sub panel |
|
|
|
|
|
 |
|
|
|
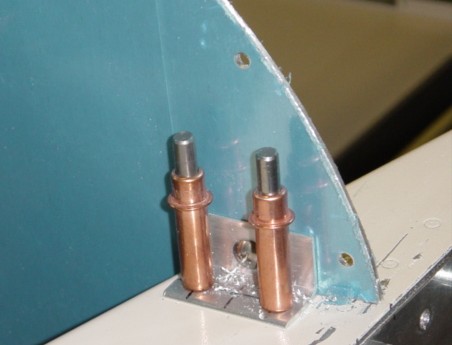
The first angle bracket that supports the main Panel. The panel has about a 6 degree tilt from level, but the angle bracket only had to be formed about 1 1/2 degrees back as the longeron it attaches to is at an angle. |
|
|
|
|
|
 |
|
|
|
Now the bottom agle for the bracket for the panel support. Would be nice to have some shorter clecos, look at the angle on it. This is the right side. |
|
|
|
|
|
 |
|
|
|
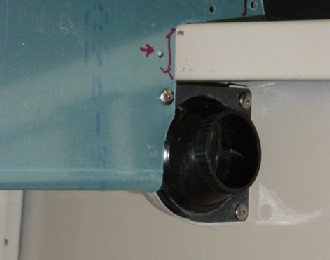
Here is the right side air vent. This is the plastic one. I don't really like it very much. I see why a lot of people have switched to the metal ones. I may do the same before I am done. |
|
|
|